


-28-
G8976 3 Wheel 12" Bandsaw
NOTICE
Refer to Figure 36 on page 29 to determine
the best blade for cutting various curves.
When cutting curves, simultaneously feed and
turn the stock carefully so that the blade follows
the layout line without being twisted. If a curve is
so abrupt that it is necessary to repeatedly back
up and cut a new kerf, use either a narrower
blade or a blade with more teeth-per-inch (TPI). A
blade with more TPI can cut relatively tighter
curves, though the cut is usually rougher than
cuts produced by a blade with a medium amount
of TPI.
Always make short cuts first, then proceed to the
longer cuts. Relief cuts will also reduce the
chance that the blade will be pinched or twisted.
Relief cuts are cuts made through the waste por-
tion of the workpiece and are stopped at the cut
line. Make relief cuts from the workpiece edge to
points along the cut line where there are sharp
changes in direction. As you cut along the layout
line, waste wood is released from the workpiece,
alleviating any pressure on the back of the blade.
NOTICE
Relief cuts require you to back the blade
out of the cut. Make relief cuts as short and
straight as possible so the blade only has
a short distance to back out.
Before making stacked cuts, make sure both the
table and the blade are square to one another. If
the table and blade are not square to one anoth-
er, the cut-out workpieces will not be the same
size.
To perform a stacked cut:
1. Draw the project cut lines on one of the work-
pieces. There should be at least an inch of
scrap area around the outside of the project
cut lines.
2. Stack matching sized workpieces on top of
one another.
3. Secure the workpieces to one another with
hot glue on the sides of the workpiece or
brads in the scrap area on the outside of the
project cut lines.
4. Draw relief lines where the blade or work-
piece may become strained when cutting.
Refer to the previous sub-section, "Cutting
Curves," for more information on relief cuts.
5. Make all of the cuts on the relief cut lines.
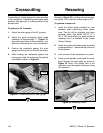
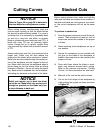
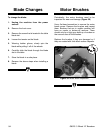
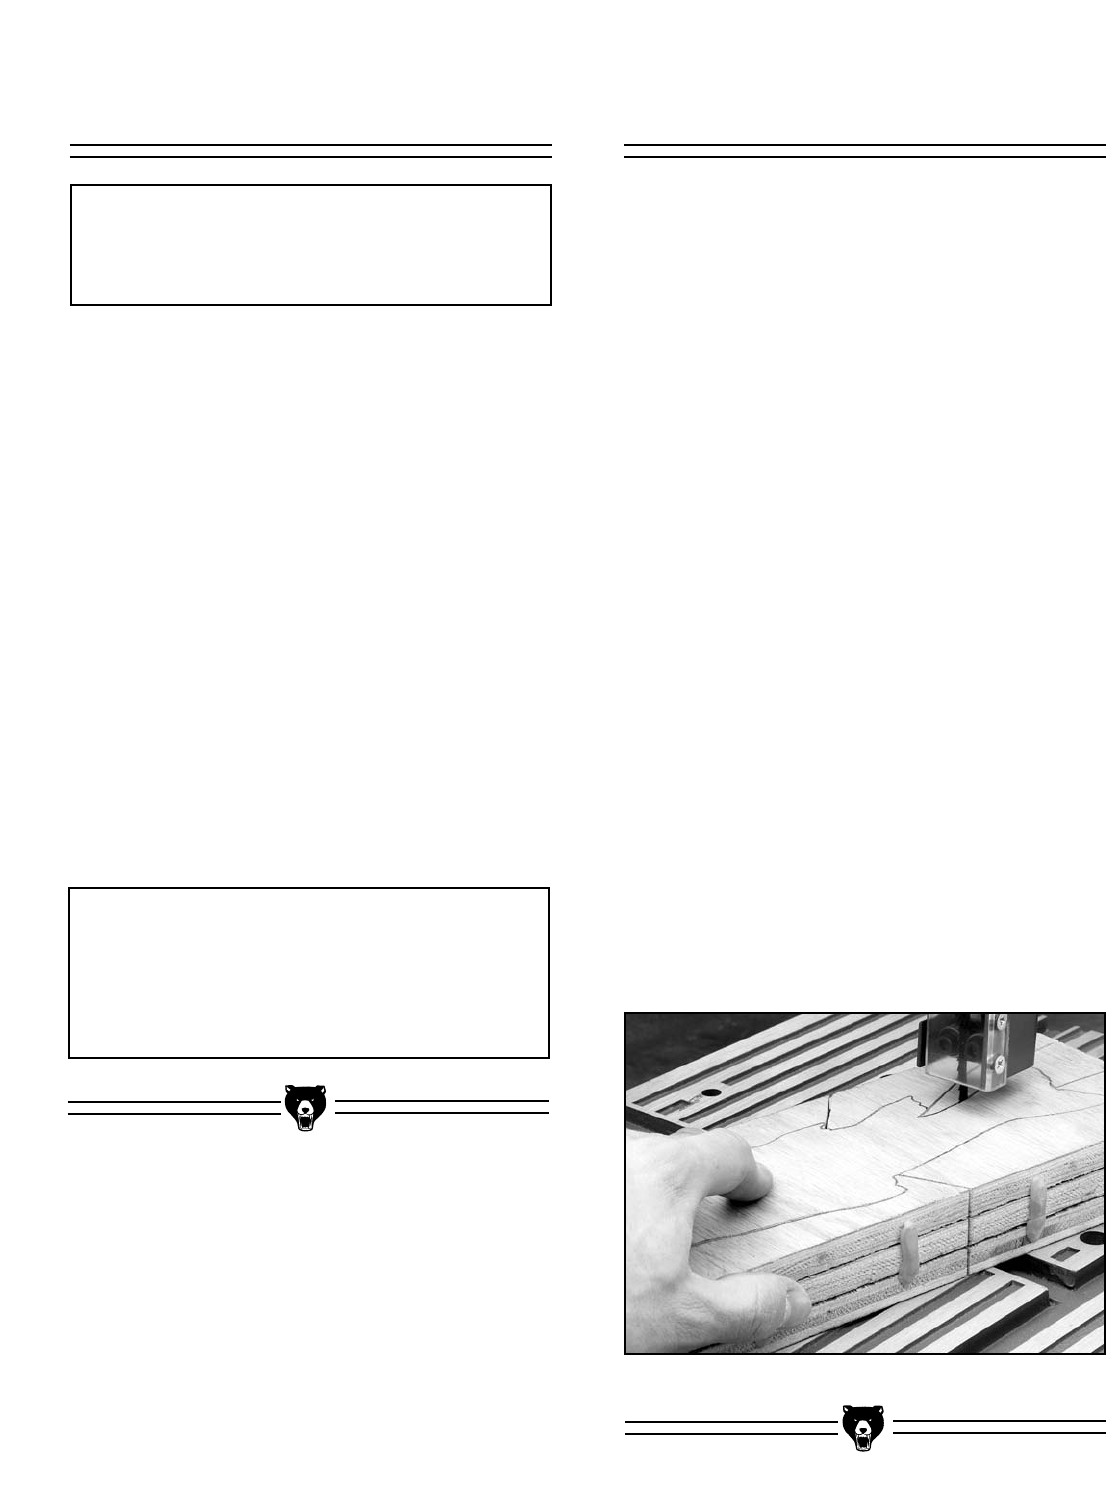
6. Cut out the final shape of the workpiece by
cutting along the project cut lines as shown
in Figure 34.
Figure 34. Cutting multiple pieces at once.
Cutting Curves Stacked Cuts