


H0603 18V Cordless Drill and Saw
-5-
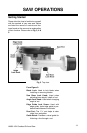
Getting Started
DRILL OPERATIONS
First review the contents of your cordless
tool kit and familiarize yourself with the key
components. The contents of the kit
include:
Heavy-Duty Case
Cordless Drill
Cordless Saw
Saw Edge Guide
Double End Phillips
®
/Straight
1 Hour Charger
Allen
®
Wrench
The battery in your new cordless power
tool will not be fully charged when you
receive it. To maximize the storage capac-
ity of the battery it should be completely
discharged, then fully recharged 3-5 times.
For optimal life span, completely discharge
the battery before recharging.
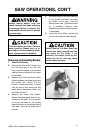
Battery charging with the 1 hour
“Smart” charger (1 piece charger):
1. Plug the charger into an appropriate
110/120V outlet.
2. Insert the battery into the charger.
The battery fits into the oval recess in
only one way. Do not force the bat-
tery. Insert until it locks into place.
3. The green light over the word “OFF”
on the control panel should come on.
If it doesn’t, make certain the wall out-
let you are plugged into is working. If
the outlet power is okay, the fuse
inside the charger may have blown.
Fuses should be replaced by a quali-
fied electrical technician.
4. To begin charging, press the “SET”
button. A steady red light over the
word “ON” should come on indicating
the battery is being charged.
5. When the battery is fully charged, the
Never leave a battery unattend-
ed while charging. While charg-
ing will make the battery and
charging unit warm, if it
becomes hot to the touch, dis-
connect the charger immediate-
ly. There is a possibility of fire
hazard. Have the battery and
charging unit checked by a qual-
ified electrical service techni-
cian.
red light will go off and the unit will
stop charging. Remove the battery
from the charger upon completion of
the charge cycle.
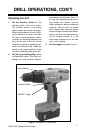
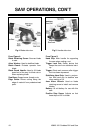
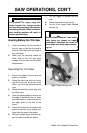
Inserting Battery Into Drill
1. Insert the battery into the handle of
the drill so that the long end is for-
ward. The battery will only install in
one orientation.
2. Make sure the securing clasps on
either side of the drill base engage
with the clips on the battery compart-
ment.
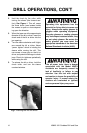
Inserting and Removing Bits
and Drivers:
1. Set the direction switch, located just
above the trigger, so that it is in the
center position.