


SKU 42528 Page 6For technical questions, please call 1-800-444-3353.
6. Test the tool by depressing the Nose
Piece (3-11) against the workpiece
without pulling the Trigger (A-26). The
tool must not cycle (fire). If it cycles
(fires), stop immediately and have the tool
repaired by a qualified service technician.
7. Hold the tool away or off of the workpiece.
The Nose Piece (3-11) of the tool should
return to its original position. Squeeze the
Trigger (A-26). The tool must not cycle
(fire). If it cycles (fires), stop immediately
and have the tool repaired by a qualified
service technician.
8. Depress the Nose Piece (3-11) against
the workpiece and squeeze the Trigger (A-
26). The tool must cycle (fire) once only.
Release the trigger and squeeze it again.
The tool must cycle (fire) again once.
With the Trigger held, carefully lift the
nailer and press it against the workpiece again. The tool must cycle (fire) again once.
If it fails to cycle (fire) or fires repeatedly, have it repaired by a qualified service technician.
Loading Brad Nails
ALWAYS WEAR ANSI APPROVED IMPACT SAFETY GOGGLES WHEN
RELOADING OR DOING ANY OTHER MAINTENANCE ON THIS TOOL. Other
people in the work area must also wear ANSI approved impact safety goggles.
Warning! Make sure the Nailer is not attached to the air hose whenever loading the tool.
1. Press the Magazine Latch (3-8) up and slide the Magazine Side Cover (3-1) back.
2. Holding the nailer with the nose pointing slightly down, insert the brad nails into the
Magazine Side Cover (3-1), letting the pointed end ride on the rail of the Magazine Side
Cover (3-1).
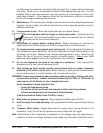
3. After the Nails reach the nose of the tool, close the Magazine Side Cover (3-1) making
sure the Magazine Latch (3-8) clicks shut. See
Figure 1
.
Operating the Nailer
1. Attach the Nailer to the air supply at the Air Plug (A-04). Start your compressor and
check the pressure making sure it is set at the recommended 55-95 PSI and not to go
over the maximum 95 PSI.
2. To fire, place the nose of the Nailer on the workpiece. The Nailer should not fire if the
nose is not depressed. Once depressed, gently and briefly squeeze the Trigger (A-26)
once. Do not fire repeatedly. Nails could bounce off of one another, damaging the work
piece or causing PERSONAL INJURY.
3. If the brads are being driven too far or not far enough, adjust your air pressure regulator.
Continue to adjust the air pressure until the brads are driven properly.
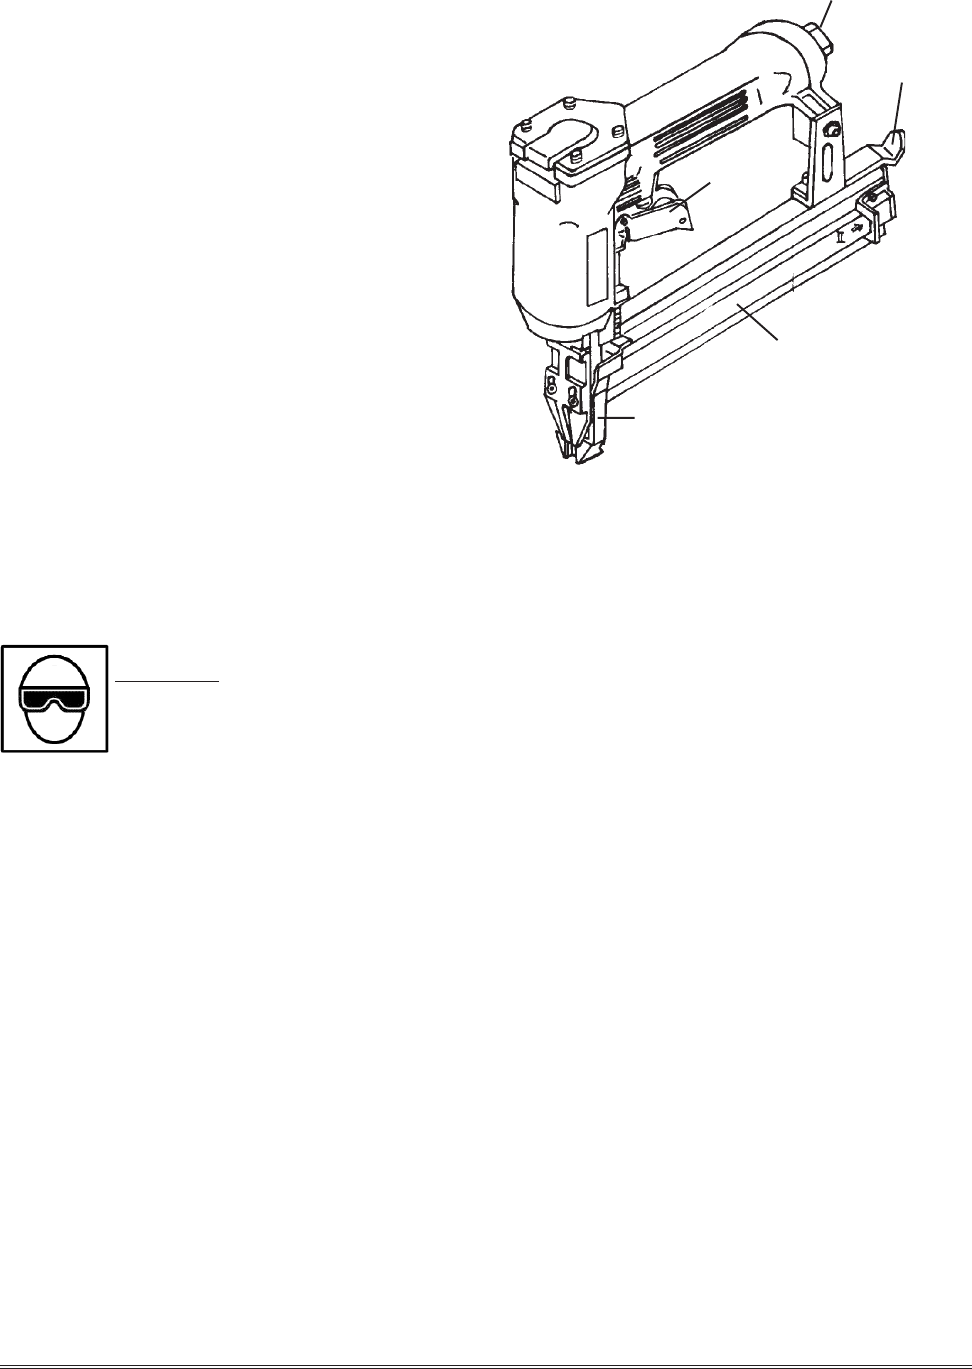
Magazine Side
Cover (3-1)
Nose Piece* (3-11)
*Also referred to as the
“S” Connecting Plate.
Magazine
Latch (3-8)
Air Plug (A-04)
Trigger
(A-26)
Figure 1 - Air Nailer Components