Page 18SKU 45861 For technical questions, please call 1-800-444-3353.
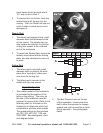
advancing the drill twice its diameter,
back the drill out and clean off shav-
ings before continuing.
Continue until the desired depth is 6.
drilled.
Turning
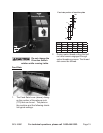
Turning is the removal of metal from
the outer diameter of a cylindrical work-
piece to reduce the diameter and to pro-
duce a smooth nish on the metal. Longer
workpieces may need to use a dead or live
center in the tailstock to support the work-
piece.
Attach tool to the chuck.1.
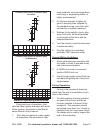
Adjust the angle of the tool holder so 2.
the tool is perpendicular to the side of
the workpiece. The left side of the tip
of the tool should engage the work,
but not the entire front edge.
Make sure the half nut and feed le-3.
vers are disengaged.
Turn the motor on. The leadscrew 4.
should now be rotating counterclock-
wise.
Position the tool beyond the end of 5.
the workpiece and engage the half-
nut lever. The carriage should move
slowly to the left under power from
the leadscrew. When the tool gets to
within about 1/4” of the chuck, disen-
gage the half-nut to stop the carriage
motion.
Repeat until the desired diameter is 6.
reached.
Note: When cutting under power be care-
ful to not run the tool into the chuck.
Thread Cutting
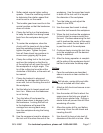
Set the machine up for the desired 1.
thread pitch.
Insert the appropriate tool into the 2.
chuck and secure.
Start the machine and engage the 3.
half nut.
When the tool reaches the workpiece, 4.
it will cut the initial threading pass.
When the tool reaches the end of the 5.
cut, stop the machine by turning the
motor off.
Back the tool out of the workpiece so 6.
that it clears the thread. Do not disen-
gage the half nut lever.
Reverse the motor direction to allow 7.
the cutting tool to traverse back to the
starting point.
Repeat until you have obtained the 8.
desired results.


