Page 9SKU 45885
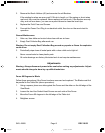
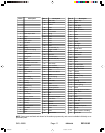
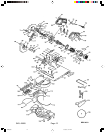
3. Remove the Brush Holders (48) and examine the old Brushes.
If the existing brushes are worn past 3/16 inch in length, or if the spring or shunt wires
are burnt, they must be replaced. Never replace just one brush. If the brushes are only
dirty, and not worn down, you can use a pencil eraser to clean the brush tips.
4. Replace the Field Case and Screws.
5. Connect the Power Cord Plug to an electrical outlet, then turn on the saw to test its
operation.
General Maintenance
1. After use, blow table and motor holes clean with an air hose.
2. Empty Dust Collector Bag after each use.
Warning: Do not empty Dust Collection Bag around any sparks or flame. An explosion
could occur.
3. Periodically wipe down all metal parts with a clean cloth and a light oil.
Never use solvents to clean plastic parts.
4. All motor bearings are factory lubricated and do not require maintenance.
Adjustments
Warning: Always disconnect power to the saw before making any adjustments. Adjust-
ments should always be done by a qualified technician.
Fence 90 Degrees to Blade
Follow these procedures if the Fence has been removed and replaced. The Blade must first
be parallel to the Table Slot (above procedure).
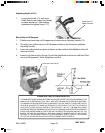
1. Using a square, place one side against the Fence and the other on the left edge of the
Saw Blade.
2. Loosen the two Hex Socket Head Screws on each side of the Fence.
3. Move the Fence 90 degrees to the left edge of the Table slot.
4. Retighten screws.
REV 10/03
45885.p65 10/15/03, 10:41 AM9


