


SKU 91938 For technical questions, please call 1-800-444-3353. Page 13
Operation
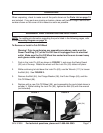
Warning!! Make sure the Swing Guard (53) and the Fixed Guard (60) are in
place whenever operating the Saw. Keep your hands and fingers away from
the Cut-Off Wheel (56).
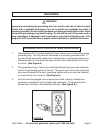
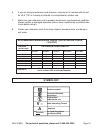
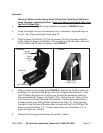
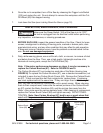
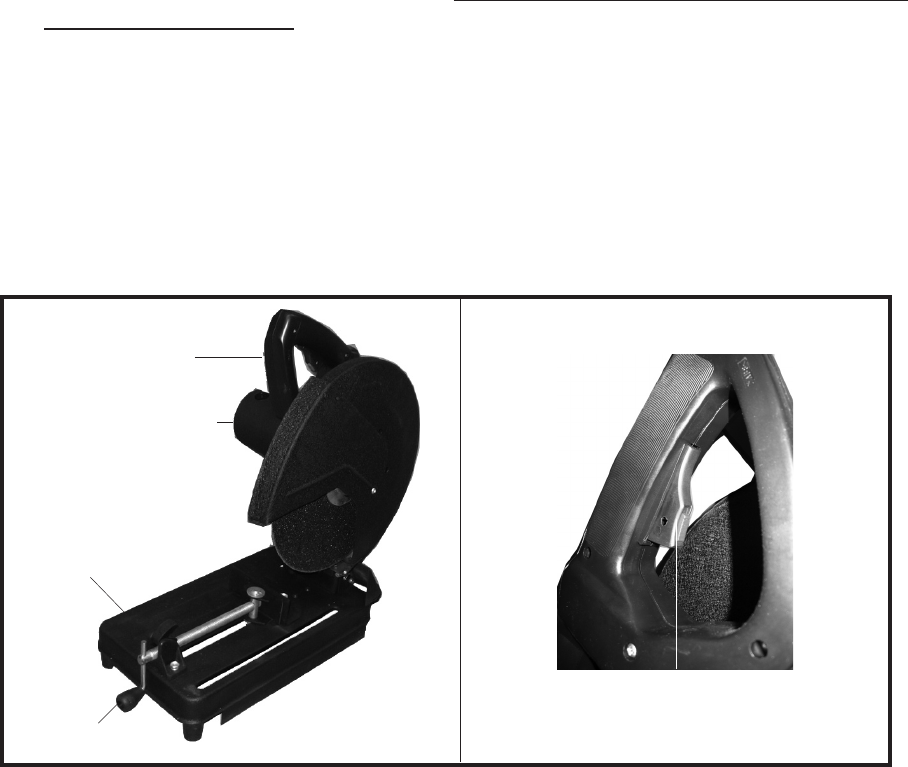
1. Make sure the Saw is in the upright position as shown in FIGURE 6 below.
2. Using the clamps, secure your workpiece and, if necessary, adjust the angle of
the cut. See Clamp and Angle Scale, page 12.
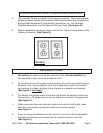
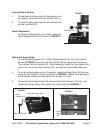
3. Plug the Power Cord/Plug (107) into the nearest 120 volt, grounded, electrical
outlet. Slide the Trigger Lock/Switch (103) and pull it to start the Saw. Allow the
Cut-Off Wheel (56) to attain full speed. See FIGURE 7.
FIGURE 7
Trigger Lock/
Switch (103)
4. With one hand on the Handle (See FIGURE 6), slowly bring the Saw down onto
the Base (13), letting the Saw do the work. Do not apply excessive force. If the
Cut-Off Wheel (56) does not cut all the way through the workpiece, raise the
Saw and release the Trigger Lock/Switch (103). Unplug the unit. Wait until the
unit comes to a full stop. Remove the workpiece. Set the depth adjustment to
a deeper setting (see Setting Depth Adjustment on page 12). After adjusting
the depth, bring the Saw all the way down to make sure the Cut-Off Wheel (56)
doesn’t contact the Base (13). If it does contact any part of the Base (13), re-
adjust the depth so it doesn’t.
5. Repeat the cutting process starting with number 1 above.
Base (13)
Handle
(100,109)
Motor
Housing
(75)
Vise Handle (28)
FIGURE 6