


2
598-1316-03
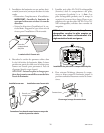
2. Mounting light on a solid, vertical surface
(wall) using two round-head screws.
• Determine mounting location. IMPORTANT:
Mount fixture with the light above the sen-
sor.
• Open battery com-
partment door and
remove batteries and
tab. Note: Discard
plastic tab.
• Drill one 1/16" pi-
lot hole for keyhole
mounting screw and
insert screw. Note:
Leave approximately
1/8" (3 mm) of the
screw threads ex-
posed.
• Using the keyhole
on the back of the
light, temporarily
hang light fixture on
screw.
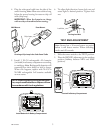
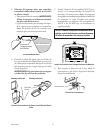
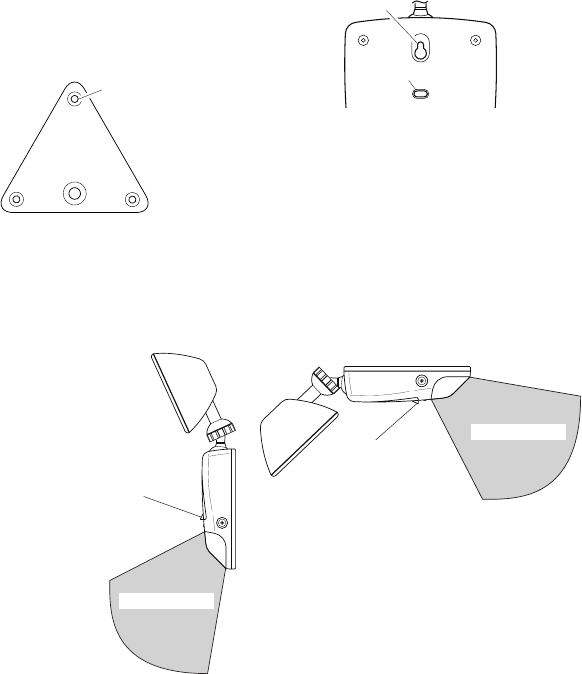
Rear of Light Fixture
Keyhole Slot
Mounting Hole
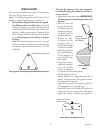
Eave Mounted Light
3. Mounting light on a solid, horizontal surface
(eave) using two round-head screws.
• Determine mounting location. IMPORTANT:
Mount fixture with the sensor facing the
detection zone.
• Follow the directions for vertical surface
mounting to complete installation. Note:
e light fixture will not need to be leveled
for horizontal mounting.
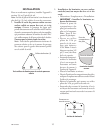
INSTALLATION
For best performance, mount the fixture about 8
feet (2.4 m) above the ground.
Note: Mounting fixture higher than 8 ft. (2.4 m)
will reduce coverage distance.
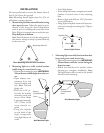
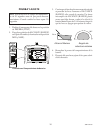
1. Mount solar panel base on a solid surface using
three tapered screws. Adjust the panel to point
directly at the noon sun. Avoid obstructions
such as trees or buildings that may block sun
light. Allow for enough wire to reach the case.
Keep ball joint at bottom.
Note: You will want to re-aim the solar panel as
the seasons change to keep it pointed directly
at the noon sun.
Three Mounting Holes for Solar Panel Base
Mounting Holes (3)
• Level light fixture.
• From inside the battery compartment, mark
location of second screw in the mounting
hole.
• Remove light and drill one 1/16" pilot hole
in second location.
• Hang light on keyhole screw and insert sec-
ond screw through mounting hole. Tighten
securely.
Detection Zone
Wall Mounted Light
Detection Zone
Battery
Compartment
Door
Battery
Compartment
Door