


H.E.R.O. INDUSTRIES 1150GSD MANUAL - “B” VERSION
27
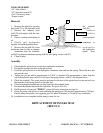
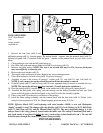
TOOLS
REQUIRED
-5/16" wrench
-3/64" Allen
wrench
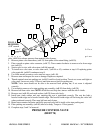
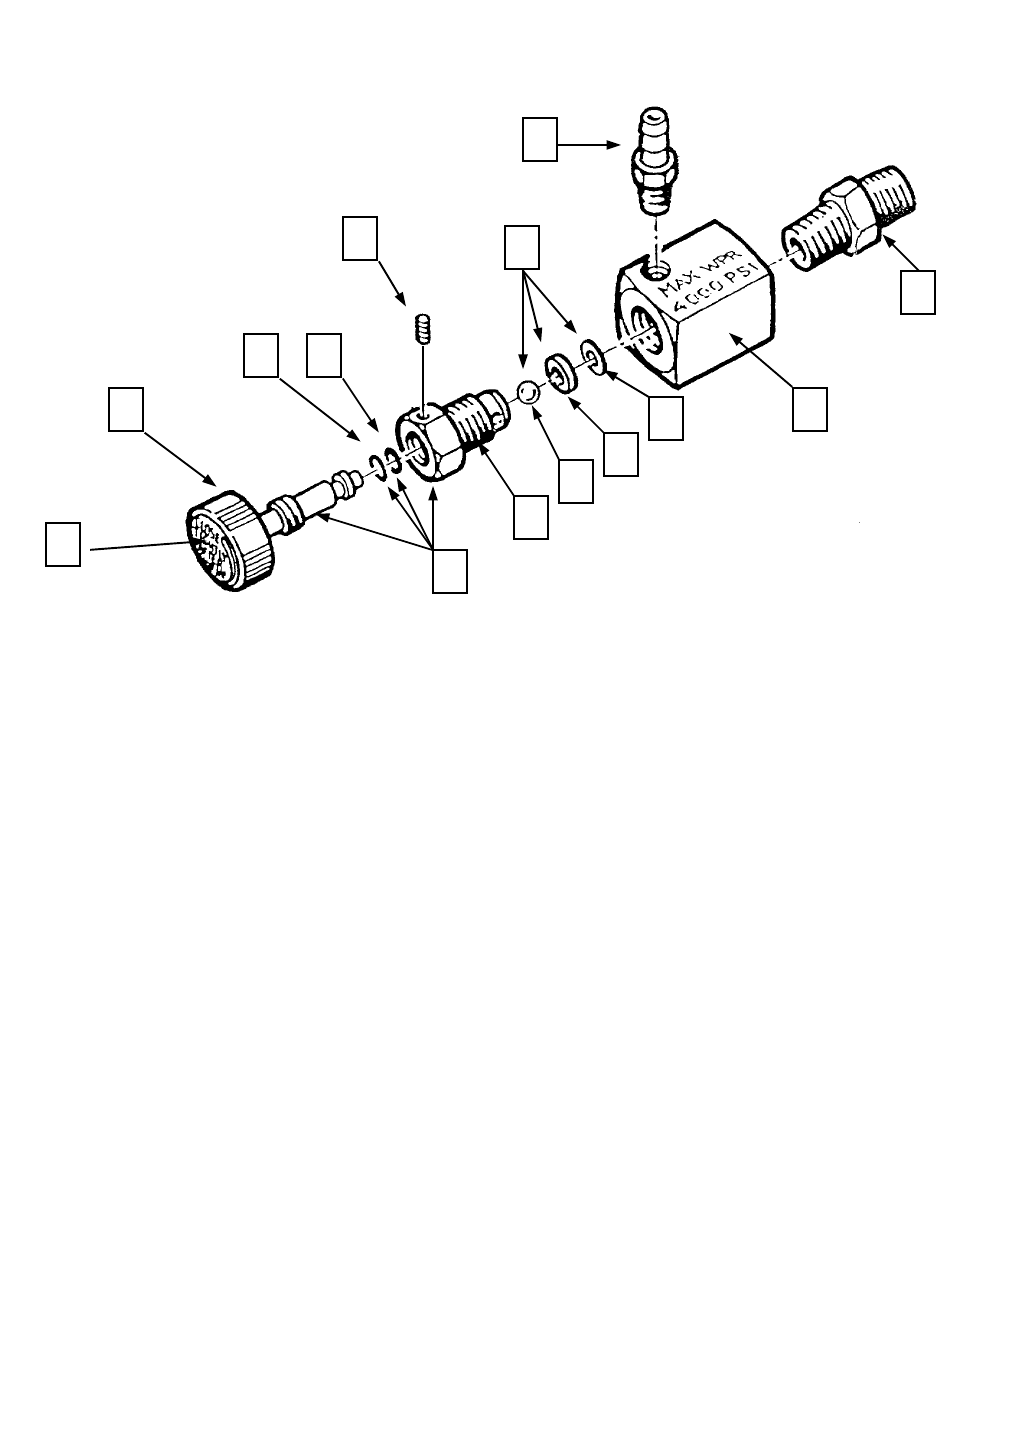
1. O p e n p r i m e
valve, (ref# 36) to release pressure from material side of pump.
2. Remove prime valve return hose, (ref# 51) from prime valve return fitting, (ref# 50).
3. Place wrench on prime valve connector, (ref# 37). Turn counter-clockwise to remove valve from outgo
tee, (ref# 35).
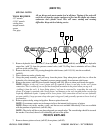
4. Secure valve in vise, with valve stem, (ref# 46) upward.
5. To install new valve stem, or valve stem seals, (ref# 44 or 45), continue at step 6. If replacing prime
valve repair kit, (ref# 42) continue at step 9.
6. Use Allen wrench to remove valve stem set screw, (ref# 48).
7. Remove stem and inspect for wear or damage. Replace as required.
8. Thread repaired stem into packing nut, (ref# 43) until in closed position. Turn in set screw until tight on
valve stem. Loosen set screw 1/2 turn or until stem moves freely in packing nut.
NOTE: Valve stem should not be able to be removed from packing nut, if set screw is adjusted
correctly.
9. Use wrench to remove valve stem packing nut assembly, (ref# 49) from body, (ref# 38).
10. Remove ball from valve stem. NOTE: If ball does not drop free, remove with the aid of a knife.
11. Remove seat, (ref# 40) and crush washer, (ref# 39) from valve body.
12. Install new crush washer and seat, ensuring the seat is positioned correctly. The seat has both a
beveled inside edge and a beveled outside edge. The beveled inside edge will be facing the valve ball
when positioned correctly. Place new ball onto end of stem.
13. Rotate stem counter-clockwise until fully open and valve ball is inside valve stem packing nut.
14. Place packing nut assembly, (ref# 49) into valve body. Torque to 12 foot pounds.
15. Complete steps 3 and 2 of removal.
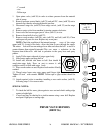
PRESSURE CONTROL VALVE
(REF# 74)
44
4
4
5
3
4
4
4
4
4
3
4
3