


– 18 –
English
9. When the cut is complete, move the trailing edge of
the workpiece beyond the blade guard foot. Turn the
scroll saw OFF (O).
NOTE: When cutting a narrow workpiece, use push
sticks.
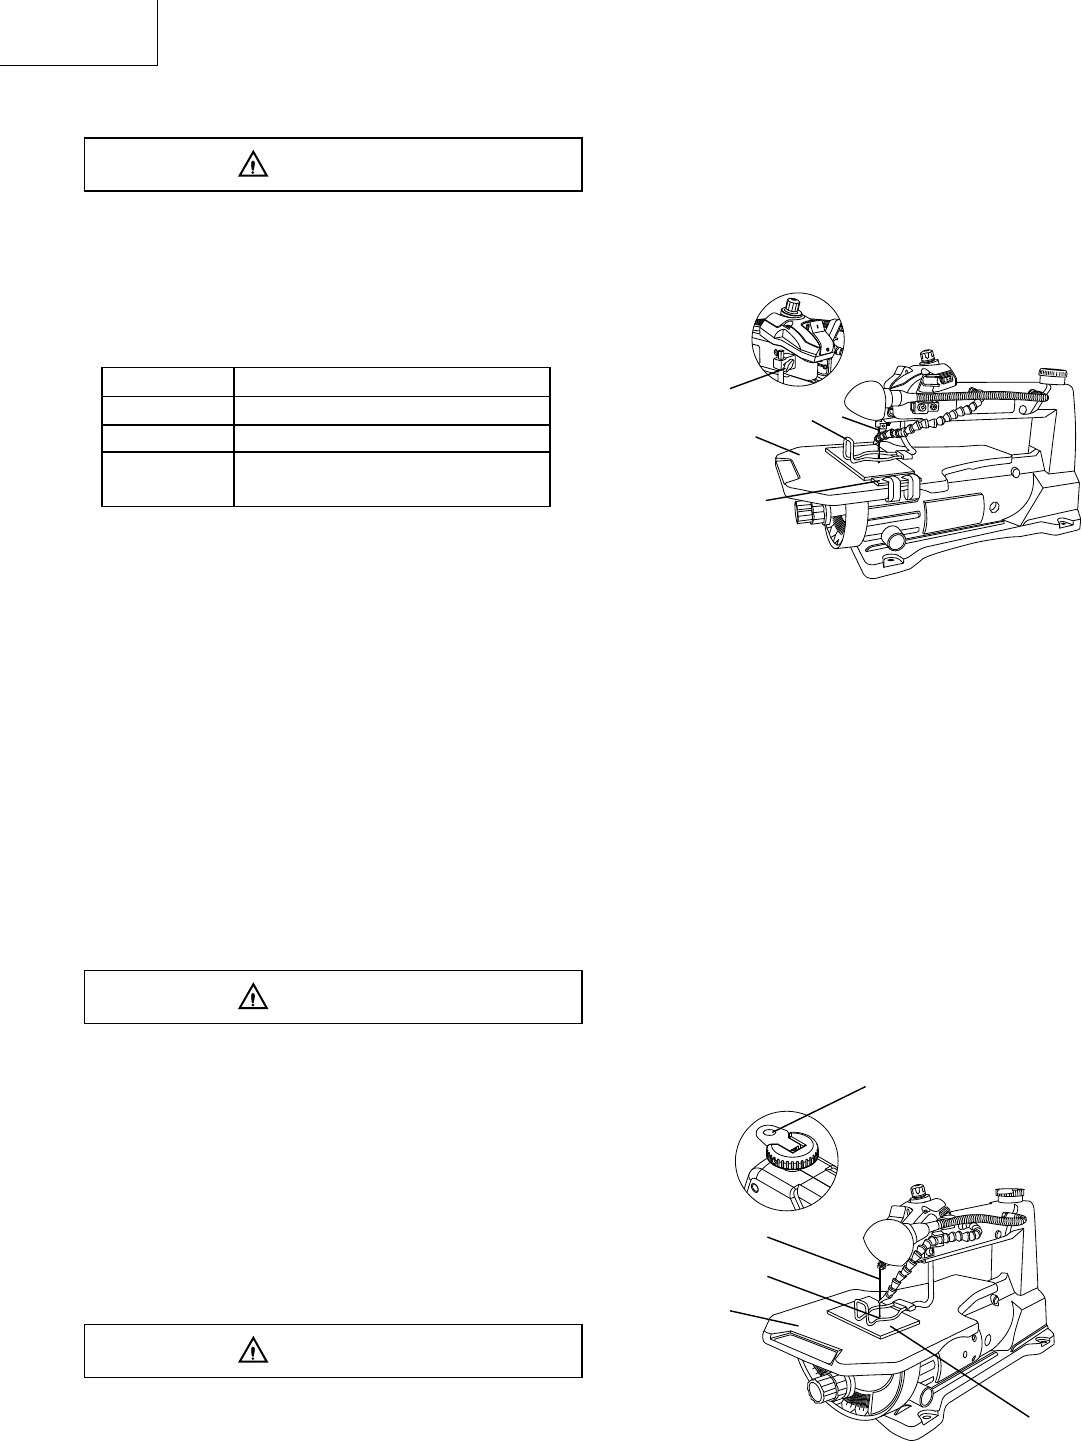
Fig. W
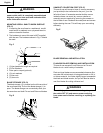
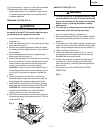
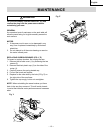
RIP OR STRAIGHT LINE CUTTING (FIG. W)
WARNING
To avoid injury from accidental starting, make sure
the switch is in the OFF (O) position and the plug is
not connected to the power outlet before moving,
replacing blade or making adjustments.
Tools Needed (Not Included)
1. Raise the blade guard foot (1) by loosening the
blade guard foot lock knob (2) on the right side of the
upper arm. Measure from the tip of the blade (3) to
the desired distance. Position the straight edge (4)
parallel to the blade at that distance.
2. Clamp the straight edge to the table (5).
3. Recheck your measurements, using the workpiece to
be cut, and make sure the scrap wood is secure.
4. Position the workpiece against the blade and place
the blade guard foot (1) slightly above the top surface
of the workpiece.
5. Secure the blade guard foot in place by tightening
the blade guard foot lock knob.
6. Remove the workpiece from the blade prior to
turning the scroll saw ON (I). Set the desired
speed by turning the control knob clockwise or
counterclockwise.
WARNING
In order to avoid uncontrollable lifting of the workpiece
and to reduce blade breakage, do not turn the saw ON
(I) while the workpiece is against the blade.
7. Position the workpiece against the straight edge (4)
prior to touching the leading edge of the workpiece
against the blade (3).
8. Slowly feed the workpiece into the blade, guiding the
workpiece against the straight edge and press the
workpiece down against the table while cutting.
WARNING
Do not force the leading edge of the workpiece into the
blade. The blade will deflect, reducing accuracy of cut,
and may break.
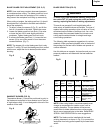
QUANTITY DESCRIPTION
2 Small C-clamps
1 Ruler or Measuring Tape
1
12-inch Straight Scrap of Wood
(Thickness to match workpiece)
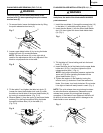
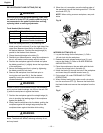
INTERIOR CUTTING (FIG. X)
1. Lay out the design on the workpiece (1). Drill a
1/4-inch hole into the workpiece.
2. Release the quick release tension lever (2), and
remove the blade (3). Refer to BLADE REMOVAL
AND INSTALLATION.
3. Place the workpiece on the saw table with the hole
(4) over the access hole in the table (5).
4. Install the blade (3) through the hole in the workpiece
and lower the quick release tension lever (2).
5. Follow steps 3-8 under FREEHAND CUTTING
OPERATIONS.
6. When finished making the interior scroll cuts simply
turn the scroll saw OFF (O). Remove the blade from
the blade holder and remove the workpiece from the
table.
Fig. X
I
2
4
3
1
5
I
2
3
4
5
1