


Excessive
exposure
to vibration, working in awkward
positions and repetitive work motions
can cause injury to hands and arms.
Stop using any tool if discomfort,
numbness, tingling or pain occur and
consult a physician.
OPERATOR’S RESPONSIBILITY:
Before operating the nailer, read and
understand all safety warnings and
labels. Follow the operating instructions
outlined in this manual.
EMPLOYER’S RESPONSIBILITY:
Distribute this instruction manual to all
users before allowing use of the nailer.
Ensure all operators read, understand
and follow all safety warnings, labels
and instructions outlined in this manual.
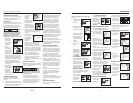
Danger
indicates
an imminently hazardous situation
which, if not avoided, will result in
death or serious injury.
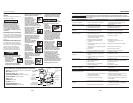
• Do not use any type
of flammable gases
or oxygen as a power
source for the nailer.
Use filtered, lubricated,
regulated compressed air only. Use
of a compressed gas instead of
compressed air may cause the nailer
to explode which will cause death or
serious personal injury.
• Do not exceed maximum
operating pressure of the
nailer (120 psi). The nailer
will not function properly.
Do not use a compressed
2
Operating Instructions
General Safety Information
(Continued)
air source capable of more than 200
psi. The nailer could explode which
will cause death or serious personal
injury.
• Never use gasoline or
other flammable liquids to
clean the nailer. Never use
the nailer in the presence
of flammable liquids or
gases. Vapors could ignite by a spark
and cause an explosion which will
result in death or serious personal
injury.
• Always remain in a firmly
balanced position when
using or handling the
nailer.
• Do not modify or
disable the Work
Contact Element
(WCE). Do not tie
or tape the WCE or
trigger in a depressed
position. Death or
serious personal injury could result.
• Do not touch the
trigger unless driving
nails. Never attach air
line to nailer or carry
nailer while touching
the trigger. The tool
could eject a fastener
which will result in death or serious
personal injury.
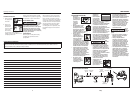
Warning
indicates
a potentially hazardous situation which,
if not avoided, COULD result in death or
serious injury.
• Always
disconnect
nailer from
air line before
clearing jams,
adjusting or
servicing the nailer, relocating the
nailer, or when the nailer is not in
use. Always reconnect the air line
BEFORE loading any fasteners. The
nailer could eject a fastener causing
death or serious personal injury.
• Protect your eyes and
ears. Wear Z87 safety
glasses, with side shields.
Wear hearing protection.
Employers and users are
responsible for ensuring the user or
anyone near the nailer wears this
safety protection. Serious eye injury
or permanent hearing loss could
result.
• Do not use a
check valve or
any other fitting
which allows air
to remain in the
nailer. Death or
serious personal
injury could occur.
• Never place hands or any
other body parts in the
nail discharge area of the
nailer. The nailer might
eject a fastener and could
result in death or serious personal
injury.
• Never carry the nailer
by the air hose or pull
the hose to move the
nailer or a compressor.
Keep hoses away from
heat, oil and sharp
edges. Replace any
hose that is damaged, weak or worn.
Personal injury or tool damage could
occur.
• Always assume the nailer contains
nails. Never use the nailer as a toy.
Do not engage in horseplay. Always
keep others at a safe distance from
the work area in case of accidental
O
CO
2
120 psi
MAX.
O
IL
D
A
I
LY
O
x
y
g
e
n
N
i
t
r
o
g
e
n
H
y
d
r
o
g
e
n
C
a
r
b
o
n
D
i
o
x
i
d
e
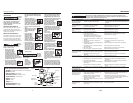
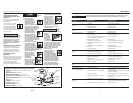
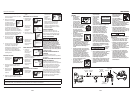
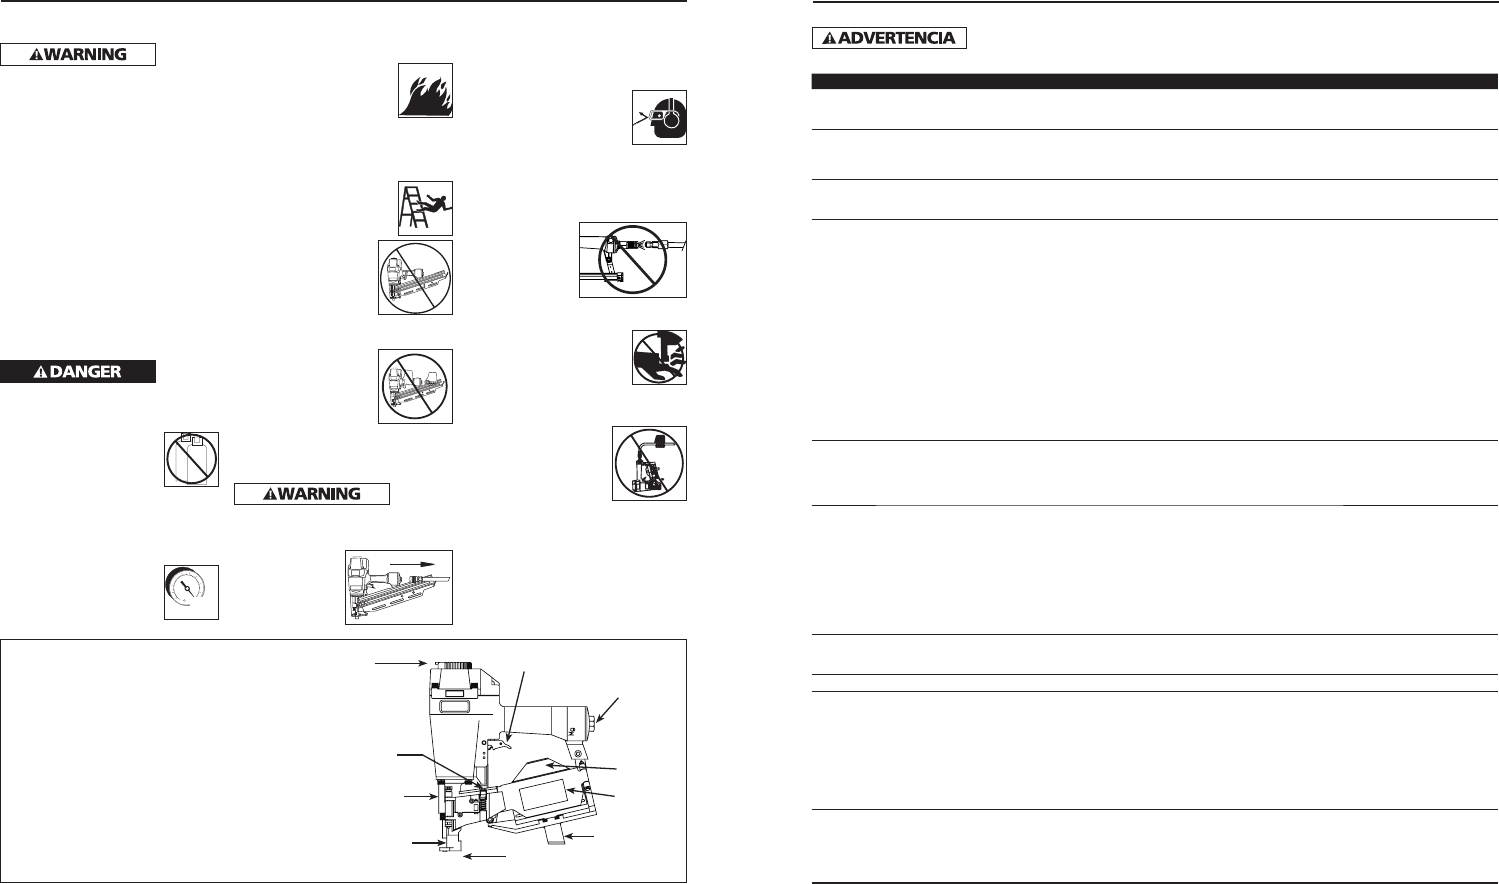
Nailer Components And Specifications
• REQUIRES: 4.5 SCFM with 25 nails per minute @ 90 psi
• AIR INLET: 1/4” NPT
• NAIL SIZE RANGE: 7/8” to1-3/4”
• MAGAZINE CAPACITY: 120 Nails per load
• SHANK DIAMETER: .120" Diameter
• WEIGHT: 5 lbs., 8 oz.
• LENGTH: 10 1/8”
• HEIGHT: 11 1/2”
• MAXIMUM PRESSURE: 120 psi
• PRESSURE RANGE: 70 - 120 psi
Adjustable
Exhaust
Door Latch
Adjustable
Depth Control
Work
Contact
Element
Nail
Discharge Area
Shingle
Guide
Magazine
Magazine
Cover
Air Inlet
Trigger
23-Sp
HDN16450AV
Tabla de Identificación de Problemas
Deje de usar la clavadora inmediatamente si alguno de los si guientes problemas ocurre.
repuestos. Podría resultado le heridas graves. Cualquier reparación o reemplazo de piezas los
debe hacer un técnico califi cado personal de un centro autorizado de servicio.
Síntoma Causa(s) Posible(s) Medida Correctiva
Hay una fuga de
aire en el área de la
válvula del gatillo
1. Los anillos en O de la cubierta de la
válvula del gatillo están dañados
1. Debe reemplazar los anillos en O & chequear el
funcionamiento del elemento de funcionamiento al
contacto
Hay una fuga de aire
entre la cubierta y la
boquilla
1. Los tornillos de la cubierta están flojos 1. Debe apretar los tornillos
2. Los anillos en O están dañados 2. Debe reemplazar los anillos en O
3. La defensa está dañada 3. Debe reemplazar la defensa
Hay una fuga de aire
entre la cubierta y la
tapa
1. Los tornillos están flojos 1. Debe apretar los tornillos
2. El empaque está dañado 2. Debe reemplazar el empaque
La clavadora deja de
clavar un clavo
1. La defensa está desgastada 1. Debe reemplazar la defensa
2. La boquilla está sucia 2. Debe limpiar el canal del sistema de impulso
3. La suciedad o daños evitan el
desplazamiento libre de los clavos o el
mecanismo de impulso en el cargador
3. Debe limpiar el cargador
4. El resorte del mecanismo de impulso está
dañado
4. Debe reemplazar el resorte
5. El flujo de aire hacia la clavadora es
inadecuado
5. Chequée las conexiones, la manguera o el
compresor
6. El anillo en O del pistón está desgastado o
le falta lubricación
6. Debe reemplazar los anillos en O. Lubríquelos.
7. Los anillos en O de la válvula del gatillo
están dañados
7. Debe reemplazar los anillos en O
8. Hay fugas de aire 8. Debe apretar los tornillos y las conexiones
9. Hay una fuga en el empaque de la tapa 9. Debe reemplazar el empaque
La clavadora funciona
lentamente o pierde
su potencia
1. La clavadora no está bien lubricada 1. Necesita lubricar la clavador
2. El resorte de la tapa del cilindro está roto 2. Debe reemplazar el resorte
3. El orificio de salida de la tapa está
obstruído
3. Debe reemplazar las partes internas dañadas
Hay clavos atascados
en la clavadora
1. La guía del mecanismo de impulso está
desgastada
1. Debe reemplazar la guía
2. Los clavos no son del tamaño adecuado. 2. Debe usar los clavos recomendados para esta
clavadora
3. Los clavos están doblados 3. Reemplácelos con clavos en buenas condiciones
4.
Los tornillos del cargador o de la boquilla
están flojos
4. Debe apretar los tornillos
5. El mecanismo de impulso está dañado 5. Debe reemplazar el mecanismo de impulse de
clavos
Hay una fuga de aire
en el vástago de la
válvula del gatillo
1. Los anillos en O o los sellos están dañados 1. Debe reemplazar los anillos en O o los sellos
CLAVADORES DE BOBINA
El clavador omite
clavar un clavo o no
alimenta los clavos
adecuadamente
1. Pistón de alimentación de clavos está seco 1. Lubricar el pistón con lubricante extraligero
2. Juntas tóricas dañadas enel pistón de
alimentación de clavos.
2. Reemplazar las juntas tóricas. Revisar el tope y el
resorte. Lubricar el conjunto
3. Verificar atascamiento del trinquete 3. Verificar el trinquete y el resorte de la puerta
4. Parte inferior del cargardor no está
ajustada correctamente
4. La parte inferior del cargador debe ser ajustada de
acuerdo al largo de los clavos usados
5. Alambres soldados en la bobina de clavos
están rotos
5. No utilice los clavos
Los clavos están
bloqueados en el
cargador
1. Tamaño incorrecto de los clavos 1. Debe usar los clavos recomendados para el clavador
2. Alambres soldados en la bobina de clavos
están rotos
2. No utilice los clavos