


22
English
- Check fuel and oil level.
• ELECTRIC VERSION. Check the following:
ELECTRICAL SAFETY :
Operate this machine only on a supply
equipped with a 30 mA earthed current-
limiting circuit-breaker. Otherwise,
consult our catalogue for appropriate
models.
• PETROL VERSION. Consult the engine
maintenance manual.
Take into account the working conditions
from health and safety point of wiew.
- To start the engine, refer to the engine
operating instructions and paragraph 7
"Starting up".
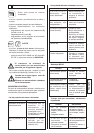
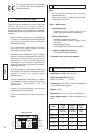
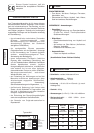
- Check the mains voltage (SINGLE PHASE, 230
V - THREE PHASE 400 V).
- Check that the motor is connected to electric
cable with conductors of 4 mm
2
section (single
phase) and 2.5 mm
2
(three phase) for lengths
less than 100 m. Above this length, double the
section.
- THREE PHASE : Check that the motor is
turning in the same direction as that of the
arrow located on rear cover of the motor (if not,
reverse 2 of the wires).
- To start the motor, refer to paragraph
7 "Starting up".
Always take care.
Get into a comfortable, balanced
position.
Remove all adjustment tools and
wrenches from floor and machine
• PETROL VERSION:
- Refer to the manufacturers manual.
- Let the engine warm up.
• ELECTRIC VERSION:
- The planer is operated by the on/off switch
(emergency stop using the handle (I)).
• DUST EXTRACTOR:
- Fit the suction (U) hose directly onto connector
located on the back of the machine (health and
safety) [
SEE FIG. 5].
7 Starting up
To start the planer, grasp the dead
man’s handle (I) on the steering shaft.
The motor stops if this is released. As
a safety precaution, check regularly
that it operates correctly. Do not lock
it in position.
• To mill concrete, pass the machine over several
times according to the nature of concrete and
until desired result is obtained.
• Millimetric depth adjustment [
SEE FIG. 6] :
- Action the fly-wheel (C) that will act on the
screw (D).
- Turn the nut (E) to lock the screw and secure
the cutting depth.
• Quick release:
- Pull lever (B) backwards to release the drum
quickly.
- And push forwards at the preselected depth to
resume work.
8 Working procedure
• Check periodically belt tension and retighten it
when necessary but do not overtighten, by
means of the nut (S) and lock nut (T) [
SEE
FIG.
x7].
9 Belt tensioning
Never set belts beyond original
tension