31
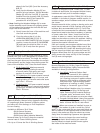
4) Tighten the Jam Nut [YY] against the Motor /
Engine Platform until the Belt Tensioning
Drawbolt [UU] is locked in position.
5) Re-tighten the four
Capscrews [ZZ] that
attach the motor / engine platform [FIG. 3].
9. Important Advise
10. Accessories
• When storing for an extended period of time, use
a wire brush to remove hard, caked sludge. Clean
and thoroughly lubricate moving parts - so the next
job the machine is ready for operation.
• Drive belts must be tight. When the belts are loose,
power is lost. Replace worn belts without delay!
• Replace noisy bearings immediately! Worn bearings
will quickly destroy the tools.
The following accessories and kits are available for this
machine. See the Parts List section of this document for
the part number. For additional information contact
your local dealer or call our Toll free Customer Service
Telephone number shown on the back cover:
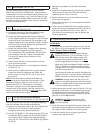
• Weight Kit [FIG. 12, FIG. 13]:
a) Items included in kit:
1)
Weight Tray [Z] and Weight Tray Attaching
Hardware [AA].
2)
Removable Weight Box [BB] and Safety
Bolts [CC].
3) Nine (9)
Steel Weight Bars [DD] totaling
58 Lbs. (26 kg), and Weight Bar Attaching
Hardware [EE]. Note: Can hold an additional
Nine (9) Weight bars (Sold Separately) for a
Total Maximum Weight of 117 Lbs. (53 kg).
b)
Installation of Kit (Also See Parts List):
1) Remove the four (4) existing Capscrews
installed in the weight tray mounting holes
(used to plug the holes in the gearbox).
2) Mount the
Weight Tray [Z] using the
Weight Tray Attaching Hardware [AA]
supplied in the kit (Four Capscrews,
Lockwashers, and Washers).
3) Install the
Weight Bars [DD] into the Weight
Box [BB]. Use the Weight Bar Attaching
hardware [EE] to install the Weight Bars
inside the Weight Box. Install the Capscrews so
that the heads are to the front of the weight
box (outside of machine). Place the smaller
washers between the larger washers to form
a “notch” that will hold the box assembly in
place on the machine. Tighten the Locknuts so
that the Weight Bars [DD] are held securely in
the Weight Box [BB].
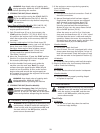
4) Lift the assembled Weight Box [BB] onto the
Weight Tray [Z] (installed on the machine).
Align the Washers so that they fit into the
slots in the back of the Weight Tray [Z]. Lower
the Weight Box [BB] onto the Weight Tray [Z].
5) Use the
Hold-Down Bolts [CC] as a method
to hold the Weight Box [BB] securely to the
machine. If the Hold-Down Bolts [CC] are
not used the Weight Box can be lifted off
of the machine, but this is not recommended
if the machine is to be used of a rough sur-
face, or if the machine is to be lifted into the
air for any reason.
WARNING: DO NOT lift the machine into
the air unless the Weight Box [BB] is securely
fastened to the machine using the Hold-Down
Bolts [CC]. The recommended method is to
remove the Weight Box [BB] BEFORE lifting
the machine. The machine will then remain
horizontal when lifted, using the lifting point.
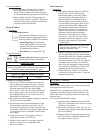
• Water Tank Kit [FIG. 1, FIG. 11, FIG. 31]:
a) Items included in kit (See Diagram 4):
1)
Water Tank Assembly [QQ1]. Includes Lid,
Water Valve [QQ2], and Hose.
2)
Water Tank Bracket [QQ3] and Attaching
Hardware.
3) Nozzle Bracket Assembly (Not Shown), and
Attaching Hardware.
4)
Hose Clamps [QQ4] and Attaching Hardware.
b)
Installation of kit (Also See Parts List):
1)
Water Tank Assembly [QQ1] comes
pre-assembled. Place Water Tank Assembly
[QQ1] in frame as shown in FIG. 1. Leave the
end of the hose free.
2) Mount the
Water Tank Bracket [QQ3] INSIDE
of the handle supports (frame) as shown in
FIG. 1, FIG 2 and FIG. 3. Using two (2) each
of the M8 Capscrews, Lockwashers, Washers
included in the kit, secure the Water Tank
Bracket [QQ3] in position.
3) See FIG. 31. At the back of the machine,
to the right side of the Dust Port [XX]
find the Hose Port Cover [AAA]. Using
the small end of the Wrench [V] loosen
the two (2) M8 Capscrews that hold
this cover in position, then rotate it
counter-clockwise until the Hose Port
is exposed. Re-tighten the M8 Capscrews
until the Hose Port Cover is secured in
its lowered position.
4) Move the Axle into the
Transport Position [E]
[FIG. 11] and tilt the machine backwards until
the handles are resting on the ground.


