


10
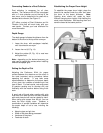
Fine Tuning Drum Alignment
When sanding boards wider then the drum,
drum alignment is critical and must be adjusted
exactly level to slightly high on the outboard end.
This should prevent any ridges from developing
in the stock. Always test on scrap wood before
sanding workpiece.
Run a piece of scrap wood approximately 6”
wide by 30” - 40“ through the sander sideways
so that the end of board extends past the end of
drum.
Turn board 180 degrees and sand the same
side of the workpiece without changing the
sanding height.
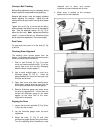
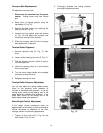
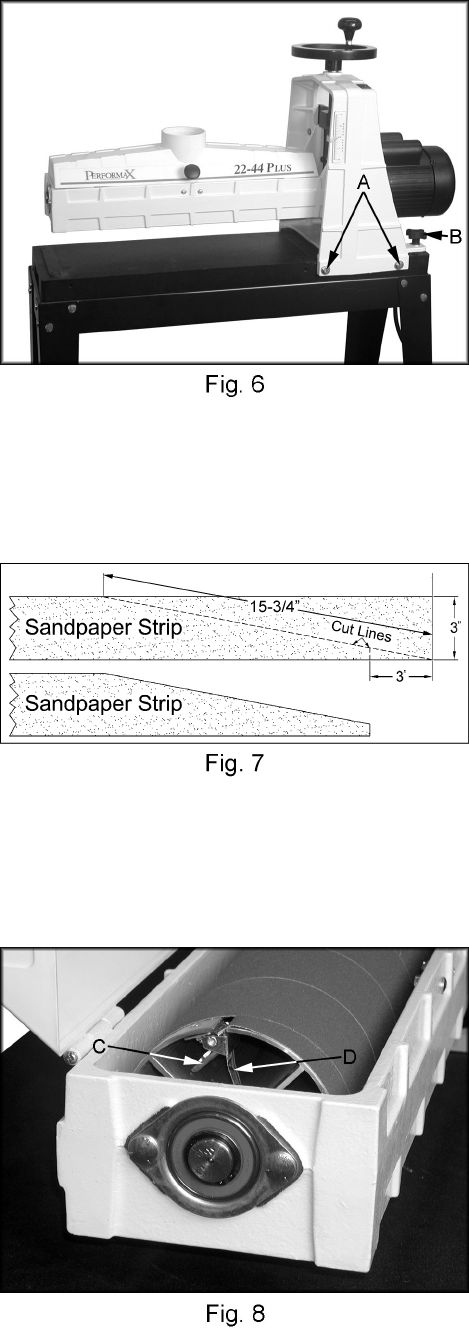
If a ridge is visible due to drum overlap loosen
the four hex cap bolts (A, Fig. 6) and turn the
adjusting knob (B, Fig. 6) slightly. Turn the
adjusting knob clockwise to raise the outboard
end of the drum. Tighten the four hex cap bolts.
Repeat process until ridge is gone and the entire
workpiece is sanded.
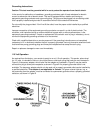
Wrapping Abrasive Strips
Note: When using Performax “Ready to Wrap”
and “Ready to Cut” abrasives, not all of the
steps below are necessary. You can use the
original abrasive belt that comes with the sander
as a template for cutting your own strips.
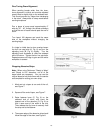
1. Mark and cut a taper at one end of the roll,
see Figure 7.
2. Square off the end of taper, see Figure 7.
3. Raise fastener lever (C, Fig. 8) on the
outboard end of drum, and insert the
tapered end of the abrasive (D, Fig. 8) so
that it uses most of the width of the slot.
Then release the clip lever to securely hold
the strip end to the fastener.
4. The square edge of the abrasive strip should
follow the edge of the drum, see Figure 8.