


8
Assembly and Setup
If you purchased the optional Performax 22-44
Plus Stand refer its assembly instructions before
proceeding with the drum and conveyor
assembly.
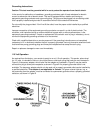
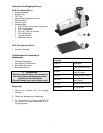
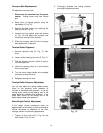
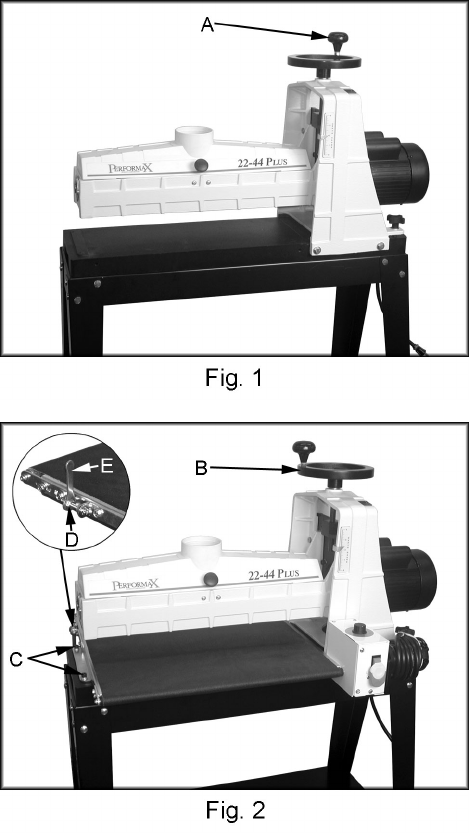
1. Attach the knob (A, Fig. 1) to the handwheel
and tighten with a 9/16” wrench.
2. Place the conveyor upside down on a table
surface.
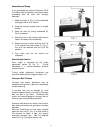
3. Raise the drum by turning handwheel (B,
Fig. 2) clockwise.
4. Align four holes in the conveyor with the four
holes in the base of drum assembly.
5. Secure conveyor in place with four 5/16”-18
x 3/4” socket head cap screws (C, Fig. 2),
four 5/16” lock washers and four 5/16” flat
washers.
6. Plug motor cord into the control box
receptacle.
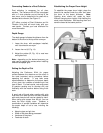
Drum Height Control
Drum height is controlled by the height
adjustment handle (B, Fig. 2). Turning
handwheel in a counter-clockwise direction
lowers the drum.
Turning height adjustment handwheel one
revolution lowers the drum approximately 1/16”.
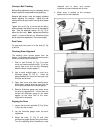
Conveyor Belt Tension
Conveyor belt tension adjustment may be
necessary during break in period to compensate
for belt stretching.
If conveyor belt can be stopped by hand
pressure applied directly to the top of conveyor
bed, the belt is too loose. Insufficient belt
tension will cause slippage of conveyor belt on
the drive roller during sanding operation.
Excessive belt tension can result in bent rollers,
bent take-up brackets and premature conveyor
belt wear.
After the PowerFeed unit has been installed
adjust the hex nuts (D, Fig. 2) on both sides of
the conveyor to obtain a tight, and equally
tensioned conveyor belt. Use the attached
wrench (E, Fig. 2) to adjust the hex nuts.