


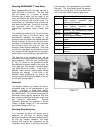


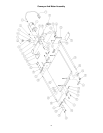


16
Conveyor Belt Replacement
To replace the conveyor belt:
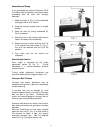
1. Disconnect the machine from the power
source. Unplug motor cord from control
box.
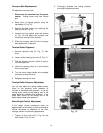
2. Raise drum to highest position using the
handwheel (A, Fig. 16).
3. Remove the belt tension by loosening the
take-up nuts (B, Fig. 16).
4. Unscrew the four socket head cap screws
(C, Fig. 16) that attach the conveyor and
remove the conveyor from the bed.
5. Slide the conveyor belt off of the conveyor
and replace with a new belt.
Tension Roller Alignment
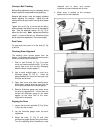
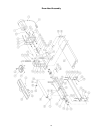
1. Remove abrasive strip (D, Fig. 17) from
drum.
2. Loosen all four bearing hex nuts (E, Fig. 17).
3. This will allow the tension rollers to drop to
the lowest position.
4. Lower the sanding drum so it just touches
the conveyor bed.
5. Turn the drum height handle one complete
revolution to raise the drum.
6. Retighten bearing hex nuts.
Tension Roller Pressure Adjustment
You can also adjust the spring loaded screws,
found on the pressure roller brackets, to
increase or decrease roller pressure. If you are
having snipe marks at the leading end of the
board adjust the outfeed roller pressure. If the
snipe mark occurs on the trailing end of the
board adjust infeed roller pressure.
Drum Height Control Adjustment
If the height control mechanism does not
operate easily or smoothly, or there is excessive
vertical movement or deflection of the drum
carriage, perform the following adjustments.
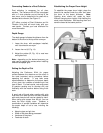
1. Tighten all four lock nuts (F, Fig. 18) and
then loosen 1/8 to 1/4 turn.
2. Thoroughly lubricate the mating surfaces
and height adjustment screw.