


14
Changing Operating Frequency
If several devices are controlled by the same type
remote control unit, each remote control unit can be
set to operate at its' own unique operating frequency
as follows:
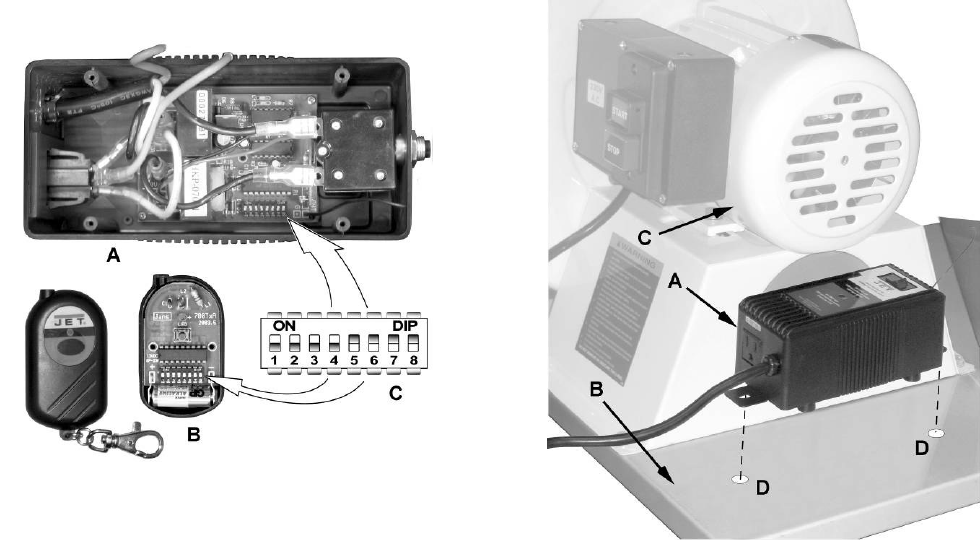
Referring to Figure 14:
1. Unplug the DC-RC Remote Power Control unit.
2. Remove the back covers of the main unit (A) and
remote control switch (B).
3. Locate the DIP switch (C) in each unit.
4. Change the position of the DIP switches in the
main unit (A) to any combination desired as long
as they are not the same as other units that may
be present and located within the radio frequency
range.
5. Set the DIP switches (C) in the remote control
switch (B) to match the switch settings in the
main unit (A).
6. Replace the back covers to the main unit and
remote control switch.
7. Operate a device as described in Turning the
DC-RC On & Off and verify that other devices
using the same type remote control do not turn
on.
Figure 14
Installing the DC-RC Remote Power
Control (Optional Accessory)
The DC-RC Remote Power Control unit can be
placed anywhere for convenience and portability if
used to control other machines or it can be mounted
as a permanent part of a machine, such as the DC-
1100 Dust Collector.
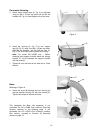
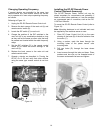
To mount the DC-RC Remote Power Control (refer to
Figure 15):
Note: Mounting hardware is not inlcluded and must
be supplied by the machines owner or user.
1. Place RC Power Control Unit (A) on the open
clearing of the base (B) of the dust collector near
the motor (C).
2. Using a marker, mark the base through the
mounting holes of the power control units
mounting tabs.
3. Drill two holes (D) through the base where
marked.
4. Insert screws through the tabs and base. Place
washers and hex nuts on the threaded ends of
the screw underneath the base and tighten.
Figure 15