


10
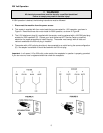
WARNING
Removing the belt guard exposes more of
the sanding belt! Replace the belt guards
immediately after completing any sanding
that requires it’s removal!
Failure to comply may cause serious injury!
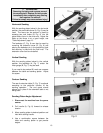
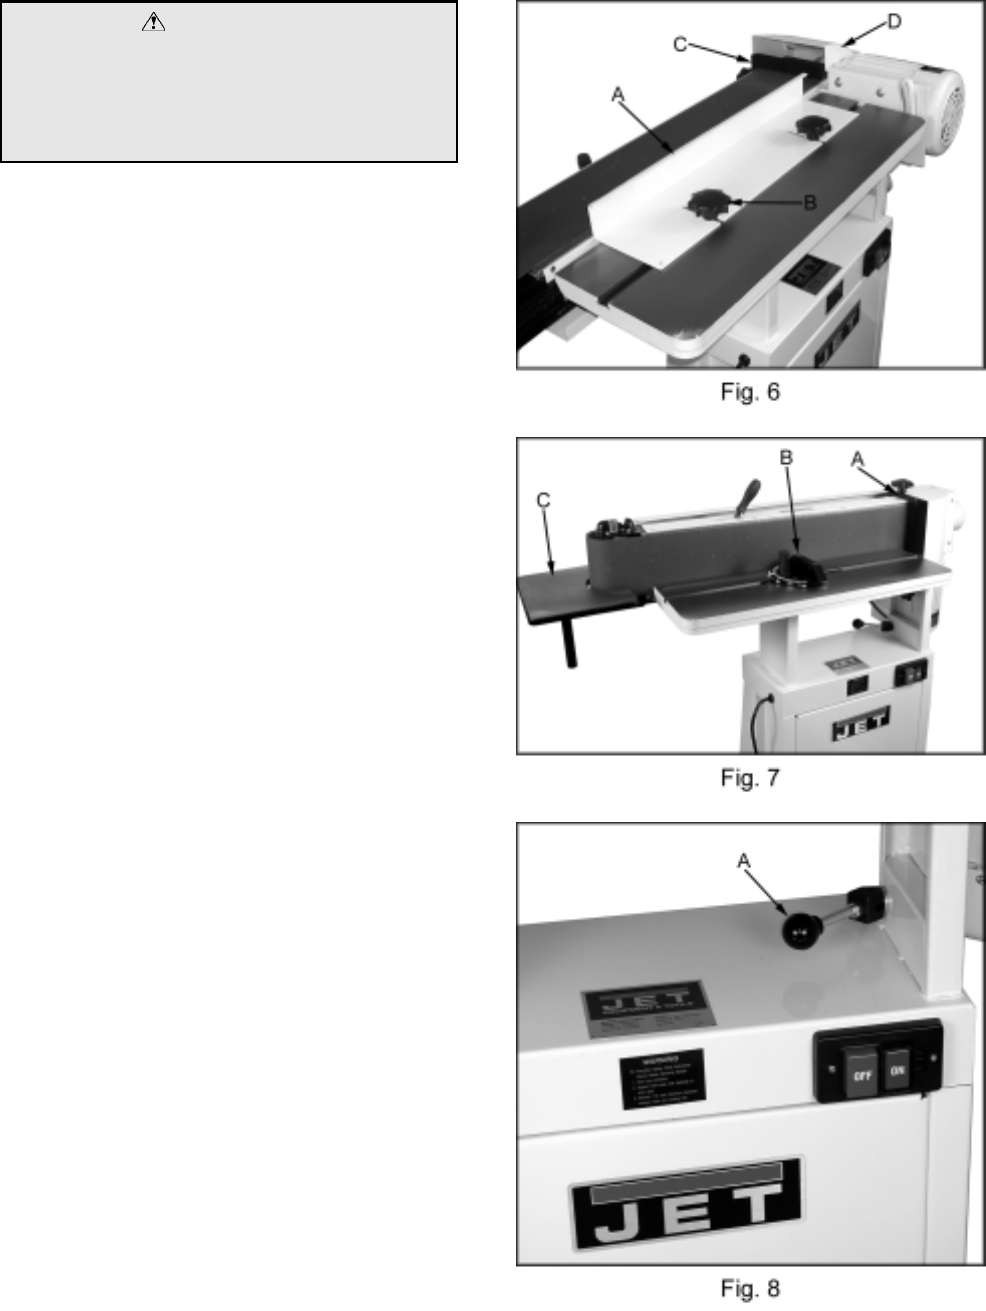
Horizontal Sanding
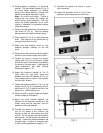
With the sanding platen locked in the horizontal
position, the removable fence (A, Fig. 6) may be
used. The fence can be secured in place by
screwing two lock knobs (B, Fig. 6) into the
guide blocks found in the miter slot. Adjust the
table so the fence is at a good height, see
“Table Adjustment” page 13..
Thebackstop(C,Fig.6)canalsobeusedby
removing the extension cover (D, Fig. 6) and
placing the backstop pin in the positioning hole
and securing in place with the lock knob. The
extension cover can be reinstalled.
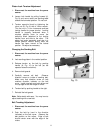
Vertical Sanding
With the sanding platen locked in the vertical
position, the backstop (A, Fig. 7) and/or the
miter gauge (B, Fig. 7) may be used.
If you need to do precise 90° work use a square
between the table and sanding platen. Adjust
for square.
Contour Sanding
The use of extension table (C, Fig. 7) is optional
according to the particular function of the
sanding operation. The end guard should
always be in place if the extension table is not
being used.
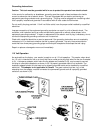
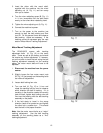
Sanding Platen Angle Adjustment
1. Disconnect the machine from the power
source.
2. Pull handle (A, Fig. 8) forward to release
tension.
3. Move sanding platen to desired position and
hold while locking handle.
4. Use a combination square between the
table and sanding platen to get precise
angles.