


12
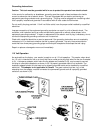
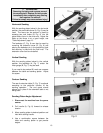
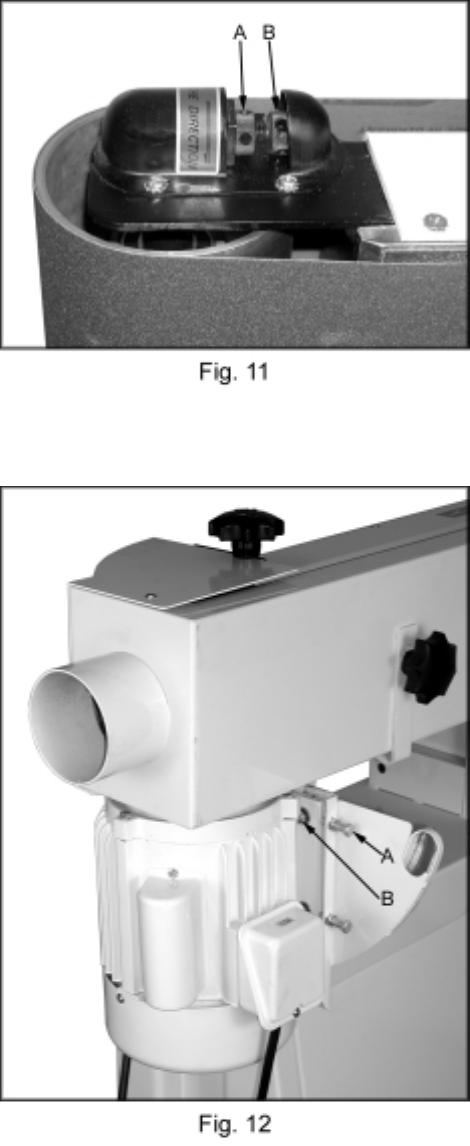
3. Insert the driver with the round shaft,
supplied with the machine into the micro
adjusting nut (A, Fig. 11) and turn away
from you to loosen.
4. Turn the micro adjusting screw (B, Fig. 11)
in ¼ turn increments until the belt tracks
evenly on the rollers when rotated by hand.
5. Tighten the micro adjusting nut (A, Fig. 11).
6. Connect the machine to power.
7. Turn on the power to the machine just
enough to start the belt rotating and then
turn off. Do this several times and observe
belt tracking. Adjust as necessary. If the
tracking cannot be corrected goto the next
section “Motor Mount Tracking Adjustment”.
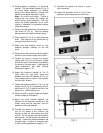
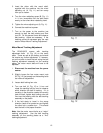
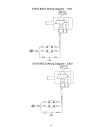
Motor Mount Tracking Adjustment
The EHVS-80CS comes with tracking
adjustment bolts (A, Fig. 12) on the motor
plate. These are set at the factory and should
not require any further adjustment. If, however,
you are not able to track the belt using the belt
tracking adjustment assembly on the sanding
platen, the motor mount bolts will have to be
adjusted:
1. Disconnect the machine from the power
source.
2. Slightly loosen the four motor mount nuts
(B, Fig. 12) just enough so the tracking bolts
can make an adjustment.
3. Loosen both locking hex nuts.
4. Turn one bolt (A, Fig. 12) a ¼ turn and
rotate the sanding belt by hand to observe
which direction the belt is tracking. If it is
traveling in the direction needed to correctly
track the belt, tighten both locking nuts and
fine tune the tracking with the belt tracking
assembly on the platen.
5. If the belt starts to travel in the wrong
direction, back off a quarter turn and tighten
the other bolt a quarter turn. This should
start the belt in the proper direction.
Note: Use the motor mount bolts as a “major”
tracking adjustment. Use the belt tracking
assembly on the sanding plates as a “fine”
tracking adjustment.