


8
Installation and Assembly
Remove all crating and plastic from around the
band saw. Remove any lag screws or holding
straps which secure the band saw to the wood
pallet.
Unpainted areas of the machine have been
treated with a rust preventative. This should be
removed with a soft cloth and a mild solvent. Do
not use paint thinner, lacquer thinner, gasoline
or mineral spirits; these will damage painted and
plastic surfaces. Do not use an abrasive pad.
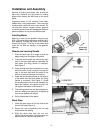
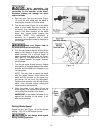
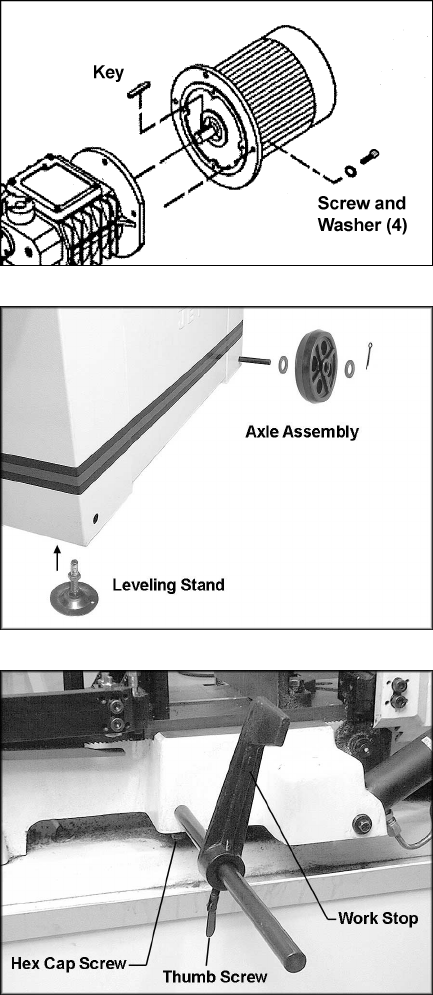
Installing Motor
Mount the motor to the gearbox using the four
M10 x 30 socket head cap screws and four M10
lock washers, through the holes in the motor’s
flange. See Figure 1. The key in the motor shaft
must line up with the keyway in the gearbox
opening.
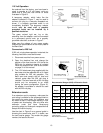
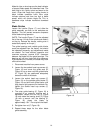
Wheels and Leveling Stands
1. Slide the band saw at an angle so that the
edges hang over the sides of the pallet.
2. Insert the axle through the holes at the right
end of the band saw cabinet (opposite the
end where the lifting handle is mounted).
See Figure 2.
3. Install a wheel and two flat washers on each
end of the axle. Insert a split pin through the
hole in the axle and bend the ends of the
split pin to secure the wheel on the axle.
4. Install the two leveling stands at the left end
of the band saw (the end where the lifting
handle is mounted). See Figure 2. Screw
the leveling stand into the hole beneath the
band saw cabinet, and tighten the top hex
nut against the bottom of the cabinet.
5. The leveling stands can be later adjusted for
level by rotating the stand and re-tightening
the hex nut against the cabinet.
6. Roll the band saw off the pallet.
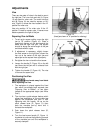
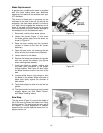
Stock Stop
1. Insert the stock stop rod into the hole at the
front of the base (Figure 3).
2. Secure the rod by tightening the hex cap
screw below the casting.
3. Slide the stock stop onto the rod, and
tighten the thumb screw. The stock stop can
be mounted so it faces either direction.
Figure 1
Figure 2
Figure 3