


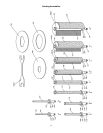
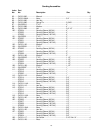
9
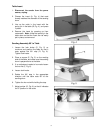
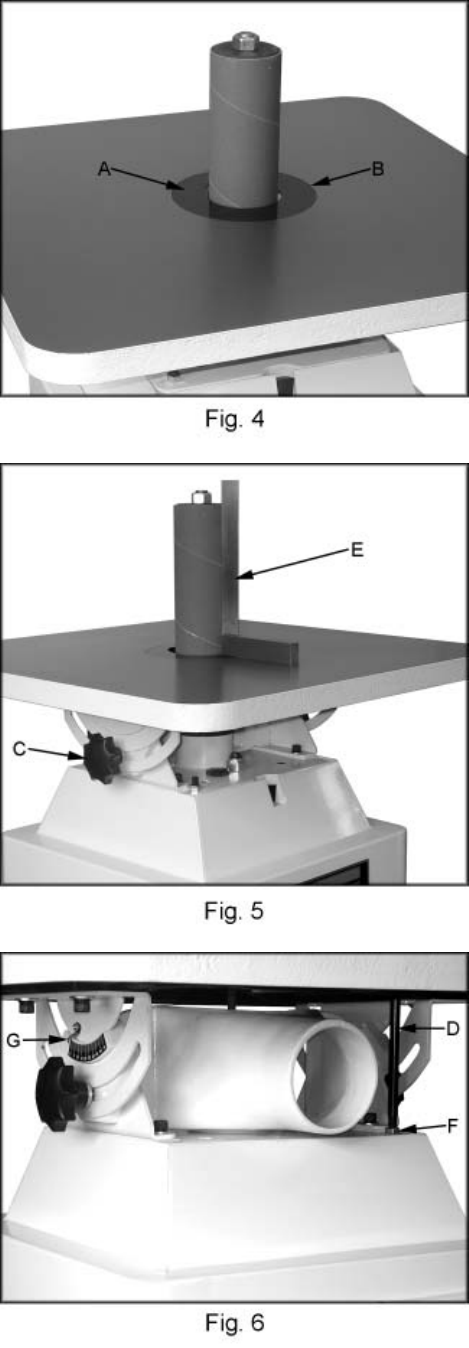
Table Insert
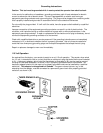
1. Disconnect the sander form the power
source, unplug.
2. Choose the insert (A, Fig. 4) that most
closely matches the diameter of the sanding
drum.
3. Line up the notch in the insert with the
spring pin in the table (B, Fig. 4), and press
in place.
4. Remove the insert by pressing up from
underneath. Note: Keep the opening in the
table clean so that the insert can be easily
put in place, and removed.
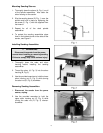
Sanding Assembly 90° to Table
1. Loosen the lock knobs (C, Fig. 5) on
trunnions and position the table so that it
rests against the 90° stop (D, Fig. 6).
Tighten lock knobs.
2. Place a square (E, Fig. 5) on the working
side of the table, and make sure the sanding
drum is perpendicular to the table.
3. If an adjustment needs to be made loosen
the hex nut (F, Fig. 6).
4. Loosen lock knobs.
5. Rotate the 90° stop in the appropriate
direction until the table rests 90° to the
sanding drum.
6. Tighten the hex nut while holding the stop.
7. Adjust pointer (G, Fig. 6) so that it indicates
the “0” position on the scale.