


11
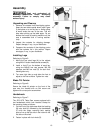
3. Slide the remainin
g
handwheel
(
E
)
with the
smaller mounting hole onto the shaft (F) on
the right side of the table saw, lining up the
flat side in the hole with the flat side on the
shaft.
4. Secure with an M5 lock washer (G) and
M5x12 socket head cap screw (H).
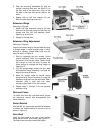
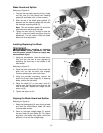
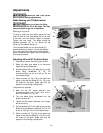
Extension Wings
Referring to Figure 8:
1. Attach the right extension wing to the saw
table on the right side using four M8 hex cap
screws and four M8 lock washers. Hand-
tighten only at this time.
2. Repeat for the left side.
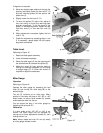
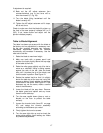
Extension Wing Adjustment
Referring to Figure 9:
Level the extension wing to the saw table by using
a straight edge. A metal straight edge is ideal,
although a carefully jointed board may also be
used, as shown in Figure 9.
1. Start by tightening the four screws (12mm
wrench required) under the extension wing
that secure it to the saw table. Tighten these
just enough to hold the wing in place but
loose enough to change the wing height by
tapping on it.
2. Lay the straight edge across the saw table
and extension wing, extending it out past the
edge of the wing as shown.
3. Move the straight edge to several places
along the wing, as you continue to nudge the
extension wing level with the saw table. When
extension wing is level with saw table,
securely tighten each of the four screws.
4. Repeat steps 1 through 3 for the opposite
extension wing.
Rails and Fence
To install front and rear rails and fence, consult
the instruction manual that accompanies your
fence assembly.
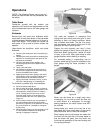
Switch Bracket
Use two M8 hex cap screws and M8 flat washers
to secure the switch bracket to the front rail as
shown in Figure 10.
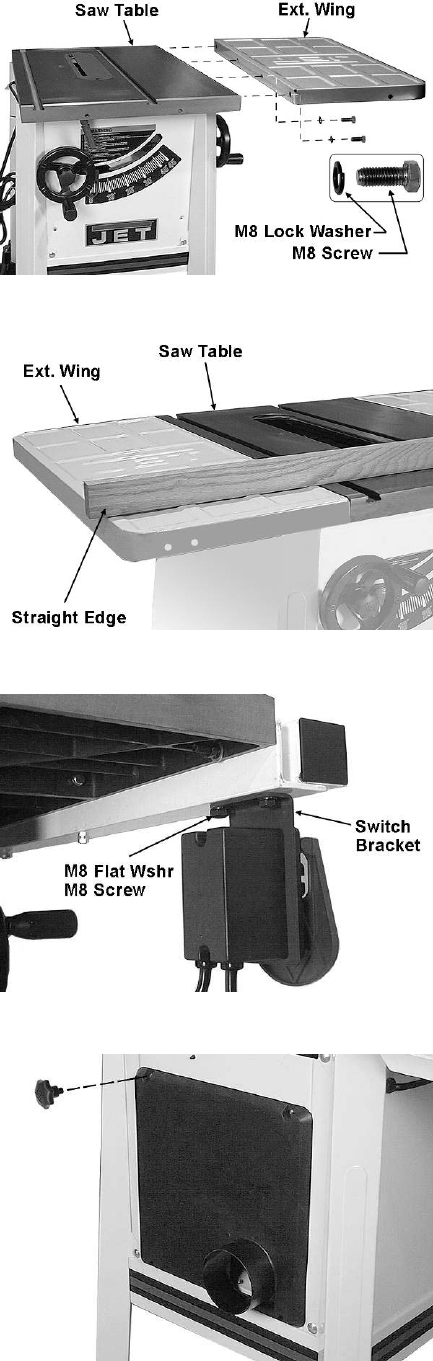
Dust Hood
Install the dust hood at the rear of the cabinet,
using the four small lock knobs (see Figure 11).
The dust chute should be toward the bottom.
Figure 8
Figure 9
Figure 10
Figure 11