


19
Rip Sawing
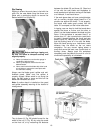
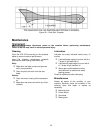
Ripping is where the work piece is fed with the
grain into the saw blade using the fence as a
guide and a positioning device to ensure the
desired width of cut (Figure 25).
Figure 25
Before starting a ripping cut,
be sure the fence is clamped securely and
aligned properly.
!
Never rip freehand or use the miter gauge in
combination with the fence.
!
Never rip workpieces shorter than the saw
blade diameter.
!
Never reach behind the blade with either hand
to hold down or remove the cutoff piece with
the saw blade rotating.
Always use the blade guard, splitter and anti-
kickback pawls. Make sure the splitter is
properly aligned. When wood is cut along the
grain, the kerf tends to close and bind on the
blade and kickbacks can occur.
Note: A caution decal is installed on the guard
and splitter assembly warning of the hazard of
misalignment.
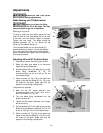
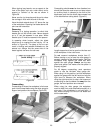
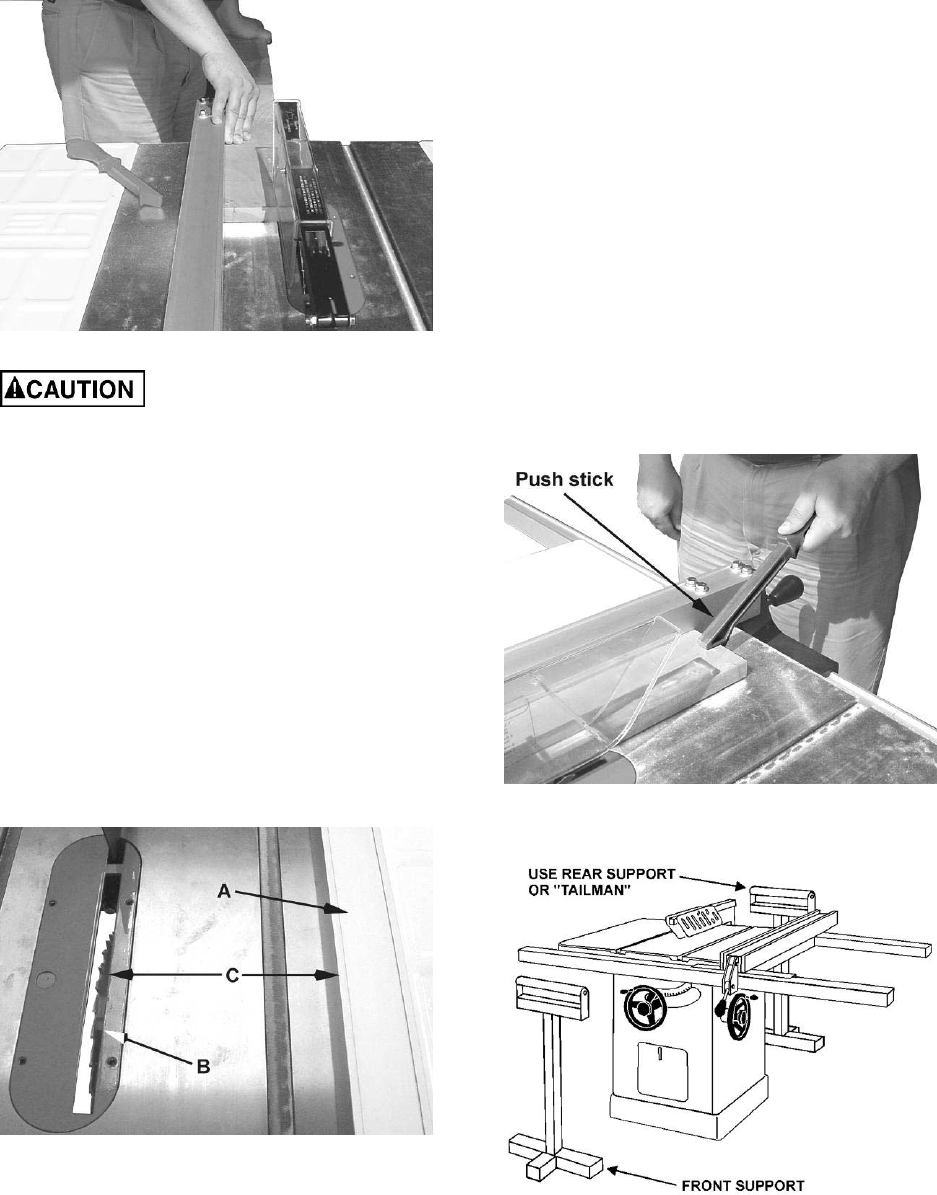
Figure 26
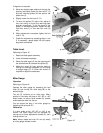
The rip fence (A, Fig. 26) should be set for the
width of the cut (C, Fig. 26) by using the scale
on the front rail, or by measuring the distance
between the blade (B) and fence (A). Stand out
of line with the saw blade and workpiece to
avoid sawdust and splinters coming off the blade
or a kickback, if one should occur.
If the work piece does not have a straight edge,
nail an auxiliary straight edged board on it to
provide one against the fence. To cut properly,
the board must make good contact with the
table. If it is warped, turn the hollow side down.
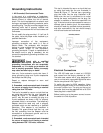
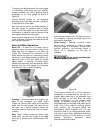
In ripping, use one hand to hold the board down
against the fence or fixture, and the other to
push it into the blade between the blade and the
fence. If the workpiece is narrower than 6" or
shorter than 12", use a push stick or push block
to push it through between the fence and saw
blade (Figure 27). Never push in a location such
that the pushing hand is in line with the blade.
Move the hand serving as a hold-down a safe
distance from the blade as the cut nears
completion. For very narrow ripping where a
push stick cannot be used, use a push block or
auxiliary fence. Always push the workpiece
completely past the blade at the end of a cut to
minimize the possibility of a kickback.
Figure 27
Figure 28