


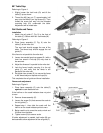

13
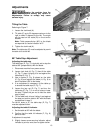
Loosen the hex cap screw (G, not visible) with
a 10mm wrench and adjust the entire assembly
back or forth to just clear the back of the saw
blade. Tighten screw (G), then fine tune the
adjustment by repeating the first part of this
step.
6. Secure the roller guide (A) by tightening the
thumbscrew (B, upper guide) or setscrew
(B, lower guide).
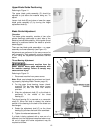
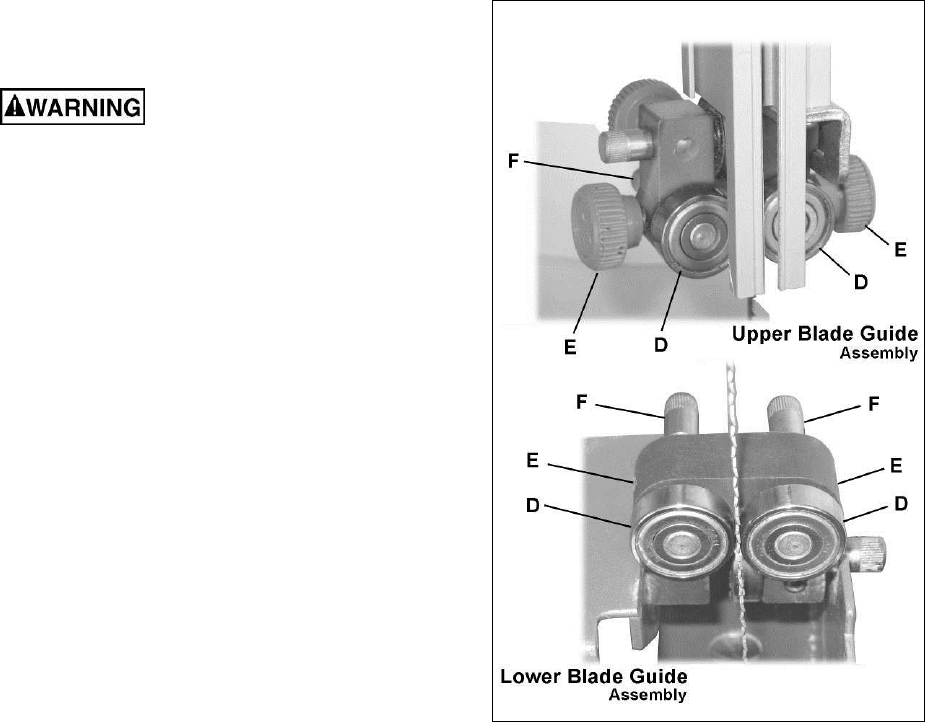
Guide Bearing Adjustment
Disconnect machine from the
power source! Never make adjustments with
the machine running! Failure to comply may
cause serious injury!
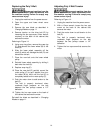
Referring to Figure 13:
1. Disconnect machine from power source.
Note: Blade must already be tensioned and track-
ing properly (Adjusting Blade Tension, page 11).
2. For the upper blade guide, loosen two thumb-
screws (E). For the lower blade guide, loosen
two setscrews (E) with the 3mm hex wrench
provided.
3. Slide the adjustment shaft (F) to position each
roller guide (D) approximately 1/16" behind the
gullets of the saw blade.
The roller guide (D) is mounted on a concentric
shaft (F). When the shaft is rotated, the relative
position of the guide to the blade can be changed.
4. Rotate each adjustment shaft (F) to position the
guides (D) within 1/32" of the saw blade.
5. Secure the roller guides (D) by tightening
thumbscrews (E, upper guide) or setscrews
(E, lower guide).
Operating Controls
On/Off Switch – located on front of machine: pull
switch out to start; push switch in to stop. When
yellow safety key is removed, machine will not
start.
Work Lamp Switch – located on front of machine
above On/Off switch. Turns LED work lamp on and
off.
Figure 13