


14
Replacing the Poly V-Belt
Disconnect machine from the
power source! Never make adjustments with
the machine running! Failure to comply may
cause serious injury!
1. Unplug the machine from the power source.
2. Open the upper and lower wheel cover
doors.
3. Remove the saw blade as described in
Changing Blades on page 11.
4. Remove tension on the drive belt (D) by
loosening the hex cap screw (13mm wrench
required) on the back of the cabinet that
secures the motor.
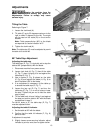
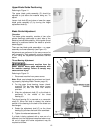
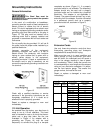
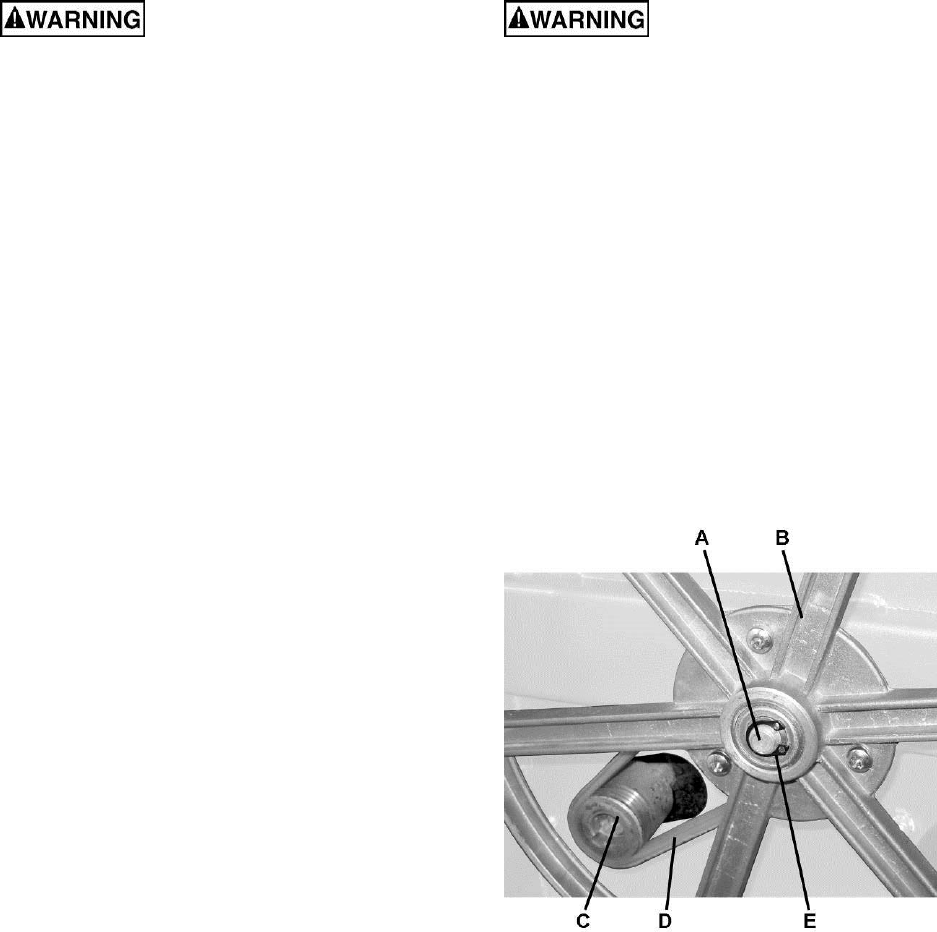
Referring to Figure 14:
5. Using snap ring pliers, remove the snap ring
(E) that secures the lower wheel (B) to the
shaft (A).
6. Slide the lower wheel assembly off the
shaft (A) which will dislodge the belt (D) and
discard the old belt.
7. Place the new belt onto the lower wheel
pulley.
8. Reinstall lower wheel assembly by sliding it
back onto the shaft (A).
9. Replace snap ring (E).
10. Place the new belt (D) partially around the
motor pulley (C) to get it started, then turn
the wheel (B) by hand until the belt (D) is
completely seated on the motor pulley (C).
11. Push the motor down to add tension to the
belt (E).
The belt is properly tensioned when
moderate finger pressure on the belt
between the two pulleys causes a 1/2"
deflection.
12. Tighten the hex cap screw on the back of
the cabinet that secures the motor.
Re-install the blade as described in Changing
Blades on page 11.
Adjusting Poly V-Belt Tension
Disconnect machine from the
power source! Never make adjustments with
the machine running! Failure to comply may
cause serious injury!
Referring to Figure 14:
1. Unplug the machine from the power source.
2. With a 13mm wrench, loosen the hex cap
screw on the back of the cabinet that
secures the motor.
3. Push the motor down to add tension to the
belt (D).
The belt is properly tensioned when
moderate finger pressure on the belt
between the two pulleys causes a 1/2"
deflection.
4. Tighten the hex cap screw that secures the
motor.
Figure 14