


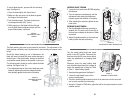

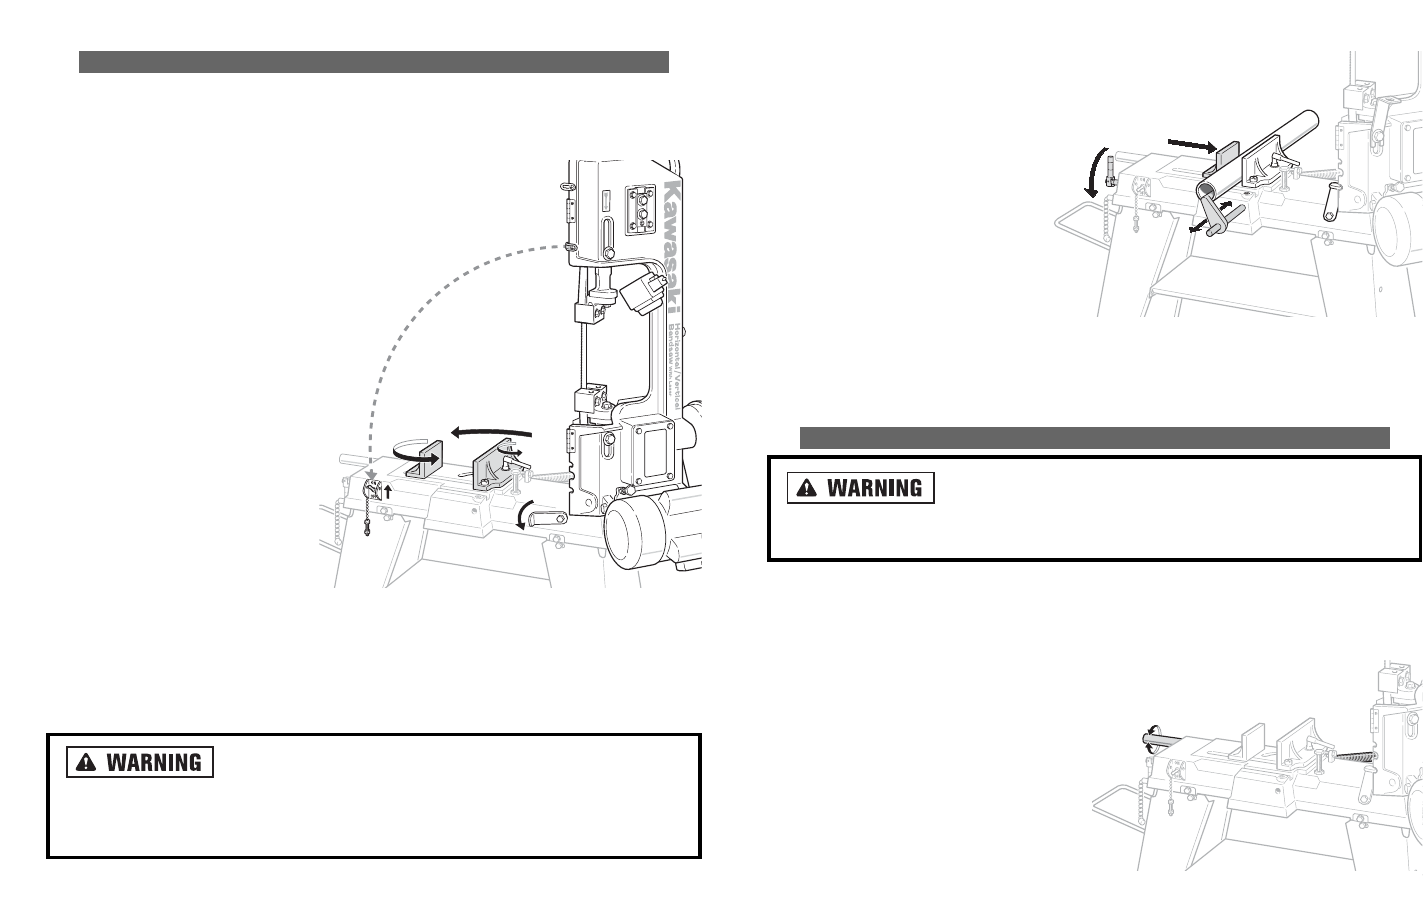
10. To set the vise for angled cuts,
loosen the two screws on the
front vise plate. A gauge
mounted on the side of the saw
base will line up with the vise
plate indicating the angle of
cut.
11. For precise angle cutting, open
the vise all the way and place a
protractor or other precise
measuring gauge against the
vise plate.
12. Tighten the two screws when the
desired angle is reached.
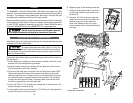
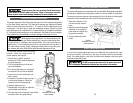
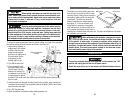
ADJUSTING THE FEED RATE
Turn the metal cutting band saw power switch to the OFF
position. Disconnect the band saw from the AC power source before make
any adjustments or changing blade speed.
The feed rate of the metal cutting band saw controls how the fast the blade is
pushed through the workpiece. Excessive feed pressure can bind or break the
blade. Insufficient feed pressure can cause the blade to become prematurely dull.
Adjust the feed rate of the band saw as
follows.
1. Turn the control arm located on the
motor-side of the saw base counter-
clockwise to increase the feed rate.
2. Turn the control arm clockwise to
decrease the feed rate.
3. Do not turn the control arm more
than one turn, in either direction, at a
time.
4. Place a piece of scrap material in the vise and clamp it securely.
5. Allow the band saw to cut the material. Observe the blade pressure and adjust
accordingly.
2625
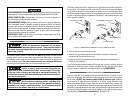
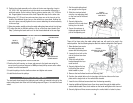
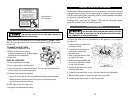
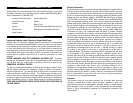
HORIZONTAL CUTTING
To set up the metal cutting band saw for horizontal cutting, proceed as follows. See
Figure 13 and 14. Setting the Band saw for Horizontal Cutting.
1. Raise the saw head to the
vertical position.
2. Open the vise wide enough to
accept the workpiece by turn-
ing the adjustment wheel at the
front end of the saw base
counterclockwise.
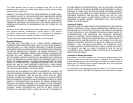
3. Place the workpiece into the
vise. If the workpiece is too
long or the trailing end wants
to drop downward, support it
with a stand. The workpiece
must be level in the vise for
proper cuts.
4. If a specific length is to be cut
off or if multiple pieces are to
be cut the same length, set the
stop to the side of the vise and
tighten the setscrew.
5. Tighten the workpiece securely in the vise by turning the adjustment wheel at
the front end of the saw base clockwise.
6. Turn ON the band saw.
Do not attempt to hold the workpiece with hands during
cutting operations. This could cause the blade to bind or even break result-
ing in severe damage to the band saw and possibly severe injuries to the
operator.
7. Grip handle on front end of saw head and slowly lower the band saw blade into
the workpiece. DO NOT DROP the blade against the workpiece. The weight of
the saw head will do the cutting.
8. The band saw will automatically turn off when the cut is finished.
9. The vise can be set to cut any angle from 0 to 45 degrees.
FIGURE 13.
HORIZONTAL CUTTING
FIGURE 14.
HORIZONTAL CUTTING
FIGURE 15.
ADJUSTING THE FEED RATE