


12
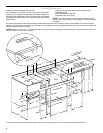
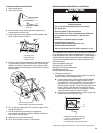
2. Square the tank tray mounting brackets and mark the
mounting hole locations in the island base.
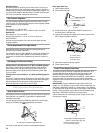
3. Remove the top nuts (4) from the tank tray assembly and lift
the tank tray off of the mounting brackets.
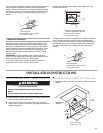
4. Install the tank tray mounting brackets to the base or floor of
the island using the proper size and type of mounting
hardware (not supplied). Tighten mounting hardware.
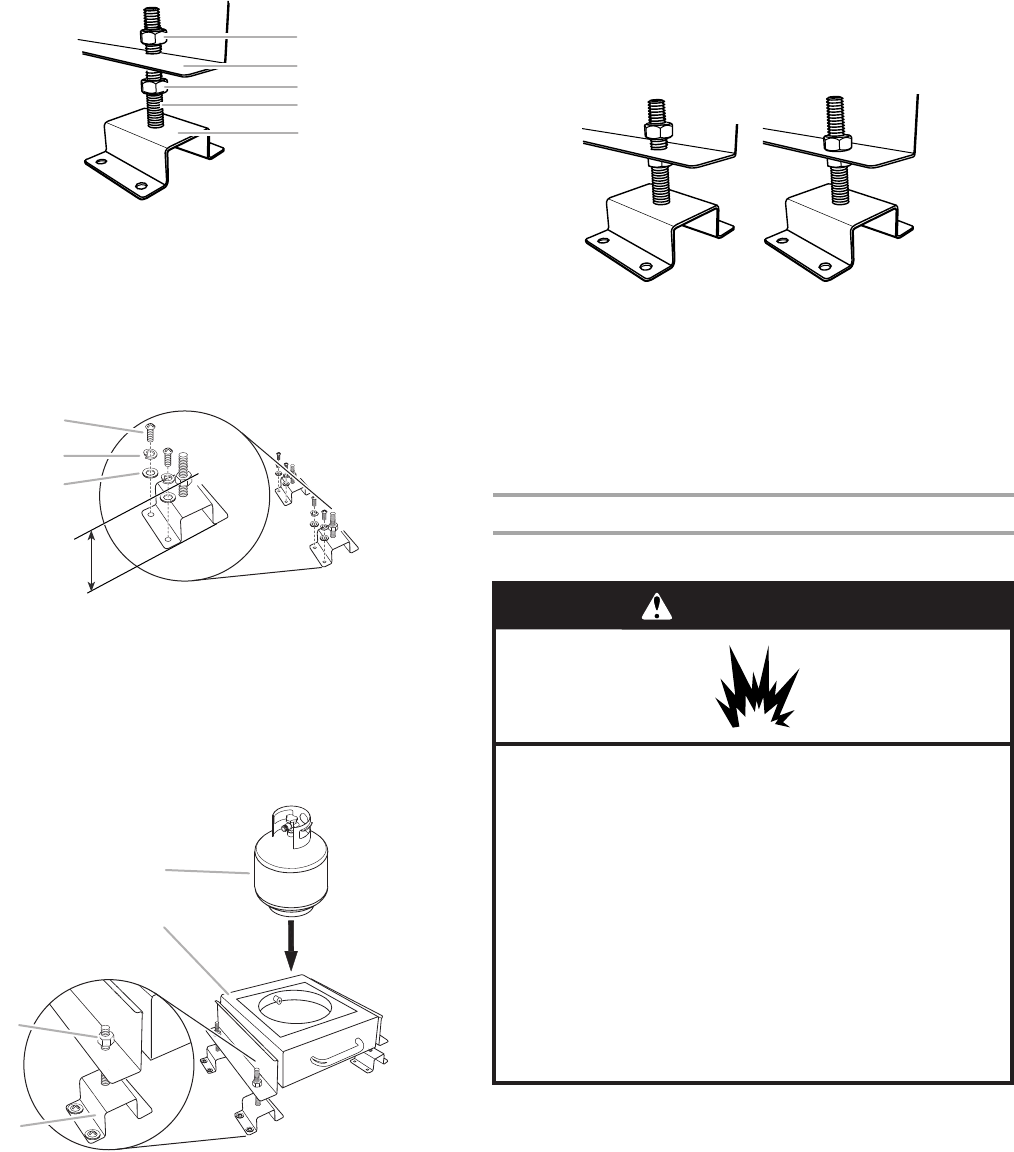
5. Pre-adjust each of the bottom nuts on the mounting brackets
to 3" (7.6 cm) from the base of the island to the top of the
nuts.
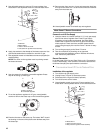
6. Remount the tank tray back onto the mounting brackets.
Replace the 4 top nuts, but do not tighten.
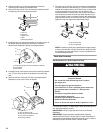
7. The tank tray for the 20 lb LP gas fuel tank must be adjusted
so that the bottom of the tank tray is ¹⁄₈" (0.32 cm) above the
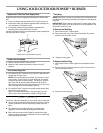
cabinet door opening and is level. The top nut on each of the
mounting brackets is to be loose. Turn the bottom nuts
counterclockwise to raise the tank tray and turn the bottom
nuts clockwise to lower the tank tray. When the tank tray is
level and slides in and out without touching the cabinet door
opening at the bottom or top with the 20 lb LP tank installed,
tighten the top nuts against the adjustment flange.
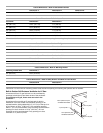
NOTE: A bracket or shelf (not supplied) that is large enough
to keep a second 20 lb LP gas fuel tank from being stored in
the storage area under the Power™ burner is required to be
mounted inside the island.
Make Gas Connection
Gas Connection to a 20 lb LP Gas Fuel Tank
If converting to local LP or Natural gas, follow the instructions in
the “Gas Conversions” section.
IMPORTANT: A 20 lb LP gas fuel tank must be purchased
separately.
IMPORTANT: The gas pressure regulator/hose assembly
supplied with the Power™ burner must be used. Replacement
gas pressure regulator/hose assembly specific to your model, is
available from your outdoor Power™ burner dealer.
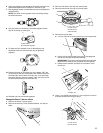
A.Top nut
B.Tank tray
C.Bottom nut
D.Bolt
E.Mounting bracket
A.Screw (Use proper screw for island floor material.)
B.Lock washer
C.Flat washer
A.20 lb LP gas fuel tank
B.Tank tray for 20 lb gas fuel tank
C.Top nut (do not tighten)
D.Mounting bracket
A
B
C
D
E
A
B
C
3"
(7.6 cm)
A
D
C
B
A.Top nut loosened
B.Top nut tightened
A
B
WARNING
Explosion Hazard
Use a new CSA International approved “outdoor”
gas supply line.
Securely tighten all gas connections.
If connected to LP, have a qualified person make sure
gas pressure does not exceed 11” (28 cm) water
column.
Examples of a qualified person include:
licensed heating personnel,
authorized gas company personnel, and
authorized service personnel.
Failure to do so can result in death, explosion, or fire.