


!&+,$$,!'&
**$&T(*'0,*%
THUMB
SCREW
GUN
-&'&&,!'&
$,*!+ '#64A><??
S,HEAG;8<ACHGCBJ8E'4GG;8J8?7
<A:CBJ8EFBHE68589BE8<AFG4??4G<BABE
6;4A:<A:7E<I8EB??F4A7BE:H<78F
SBABGGBH6;8?86GE<64??L?<I8C4EGF
S/;8A<A6;<A:J<G;G;8:HAGE<::8E8?86GEB78
4A77E<I8@86;4A<F@4E8;BGGBJBE>4A7
:EBHA74A76BH?7E8@4<A8A8E:<M87F8I8E4?F86
BA7F49G8EG;8:HAGE<::8E<FE8?84F87
SBABGBC8E4G8J<G;6BI8EFC4A8?FBE:H4E7F
E8@BI87BEBC8A
S'A?LDH4?<9<87C8EFBAA8?F;BH?7C8E9BE@@4<AG8
A4A68JBE>
------------------------------------------------------------------------
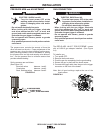
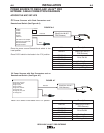
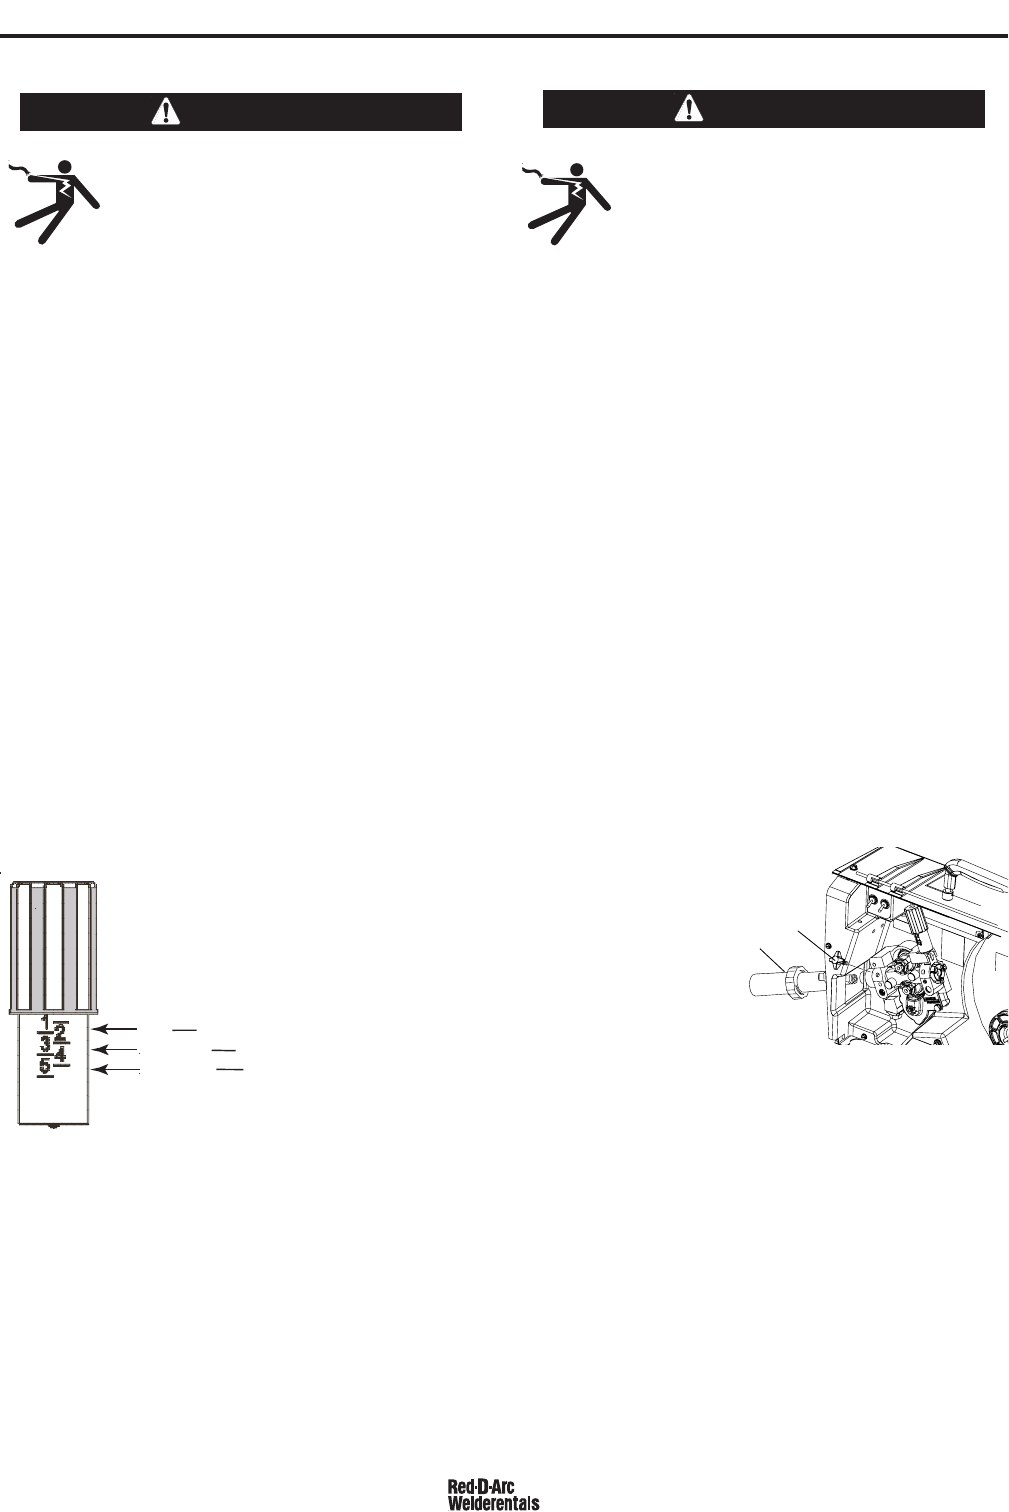
The RED-D-ARC LN-25™ PRO EXTREME comes
with a K1500-2 gun adapter installed. (See Figure
A.4)
To install a gun,
1. Turn power OFF.
2. Remove the thumb screw.
3. Push the gun the completely into the gun bushing.
4. Secure the gun in place with the thumb screw.
5. Connect the trigger cable from the gun to the trigger
connector on the front of the feeder.
Note: Not all gun bushings require the use of the
thumb screw.
!-*
/*&!&
(*++-**%4A7"-+,%&,
$,*!+ '#64A><??
S,HEAG;8<ACHGCBJ8E'4GG;8
J8?7<A:CBJ8EFBHE68589BE8<AFG4?
?4G<BABE6;4A:<A:7E<I8EB??F4A7BE
:H<78F
SBABGGBH6;8?86GE<64??L?<I8C4EGF
S/;8A<A6;<A:J<G;G;8:HAGE<::8E8?86GEB78
4A77E<I8@86;4A<F@4E8;BGGBJBE>4A7
:EBHA74A76BH?7E8@4<A8A8E:<M87F8I8E4?F86
BA7F49G8EG;8:HAGE<::8E<FE8?84F87
SBABGBC8E4G8J<G;6BI8EFC4A8?FBE:H4E7F
E8@BI87BEBC8A
S'A?LDH4?<9<87C8EFBAA8?F;BH?7C8E9BE@@4<AG8
A4A68JBE>
------------------------------------------------------------------------
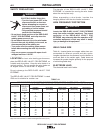
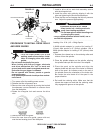
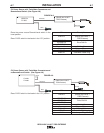
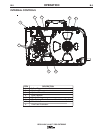
The pressure arm controls the amount of force the
drive rolls exert on the wire. Proper adjustment of the
pressure arm gives the best welding performance.
Many welding problems can be attributed to setting
the pressure arm too high and causing wire deforma-
tion. Set the pressure arm to minimum amount that
provides reliable feeding.
Set the pressure arm as follows:
(See Figure A.3)
Aluminum wires between 1 and 2
Cored wires between 1 and 3
Steel, Stainless wires between 3 and 5
!-*
/*&!&
6
Al
FCAW
GMAW
ALUMINUM WIRES
CORED
WIRES
STEEL, STAINLESS WIRES
6
Al
FCAW
GMAW
ALUMINUM WIRES
CORED
WIRES
STEEL, STAINLESS WIRES