


12
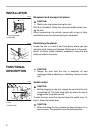
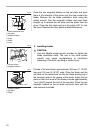
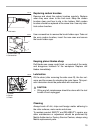
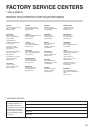
Loosen the thumb screws which secure the chip cover.
Attach the hood to the planer and secure the chip cover and
the hood together by tightening the thumb screws.
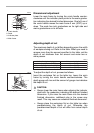
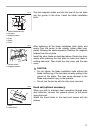
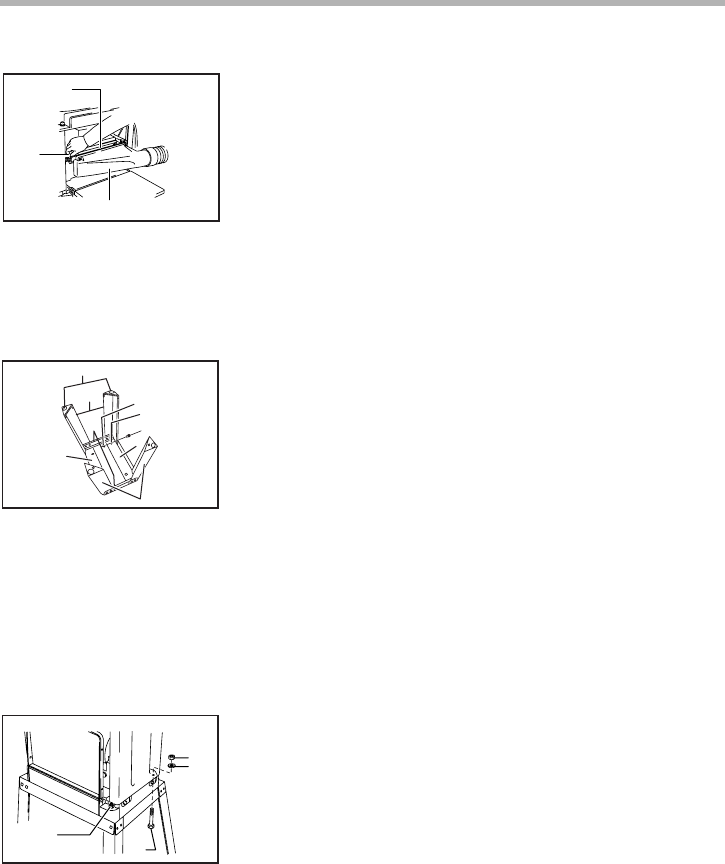
Planer stand (optional accessory)
Place the stays on a level location and assemble the legs
inside. Secure with the cap square neck bolts, spring wash-
ers and hex nuts, then attach the rubber caps to the ends of
the legs.
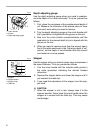
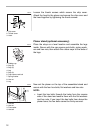
Now set the planer on the top of the assembled stand and
secure with the four hex bolts, flat washers and hex nuts.
NOTE:
• Insert the hex bolts through the holes from the reverse
side of the stand and secure them with the flat washers
and hex nuts. If you insert the hex bolts from above the
planer base, the hex bolts cannot be firmly secured.
1. Chip cover
2. Thumb screw
3. Hood
1
2
3
003723
1. Rubber cap
2. Stay (B)
3. Stay (A)
4. Leg
5. Stay (A)
6. Cap square neck bolt
7. Spring washer
8. Hex nut
9. Leg
1
2
3
4
5
6
7
8
9
003719
1. Hex bolt
2. Hex nut
3. Flat washer
4. Hex bolt
2
3
4
1
003720