


8
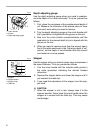
Depth adjusting gauge
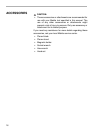
Use the depth adjusting gauge when you need to predeter-
mine the depth of cut more accurately. To do so, proceed as
follows.
1. First, plane the workpiece at the predetermined depth of
cut. Measure the thickness of the planed piece to know
how much more stock you need to remove.
2. Turn the depth adjusting gauge on the crank handle until
the 0 graduation is aligned with the groove on the tool.
3. Now turn the crank handle counterclockwise until the
graduation for the desired depth of cut is aligned with the
groove on the tool.
4. When you need to remove more than the amount speci-
fied in the table mentioned in the “Adjusting depth of cut”
section, set the depth of cut shallower than the amount
and make two or more passes.
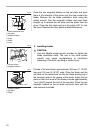
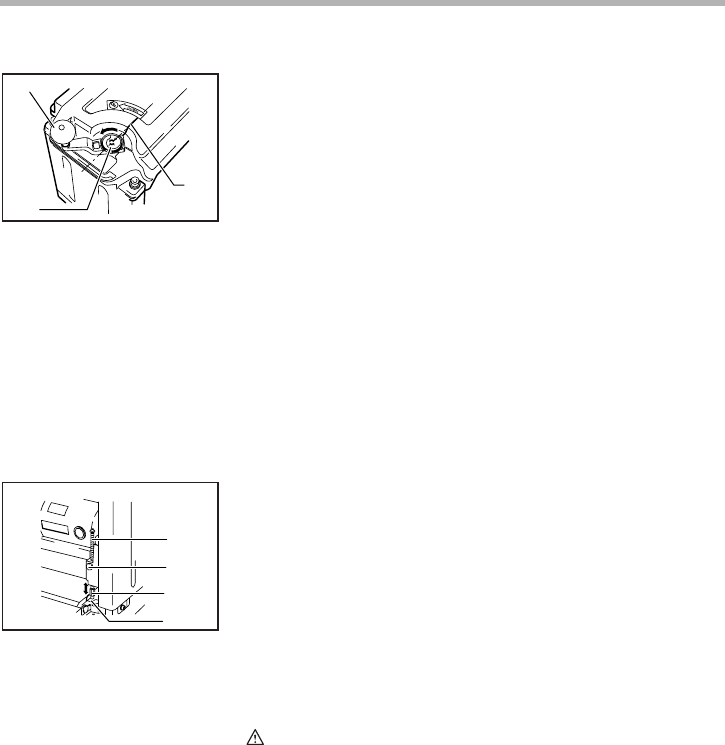
Stopper
Use the stopper when you need to plane many workpieces to
the same thickness. To do so, proceed as follows.
1. Turn the crank handle until the indicator plate points to
the scale graduation indicating the desired finished
dimension.
2. Depress the stopper button and lower the stopper until it
just contacts the table top.
3. If you need fine adjustment of the stopper, turn the stop-
per knob.
CAUTION:
• When the stopper is not in use, always raise it to the
topmost position. Never force the crank handle when the
stopper is in contact with the table top. This may cause
tool damage.
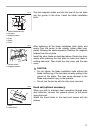
1. Crank handle
2. Groove
3. Depth adjusting gauge
1
2
3
003713
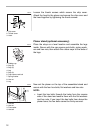
1. Stopper
2. Stopper button
3. Stopper knob
4. Table top
1
2
3
4
003714