


7
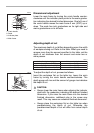
Dimensional adjustment
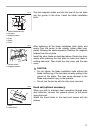
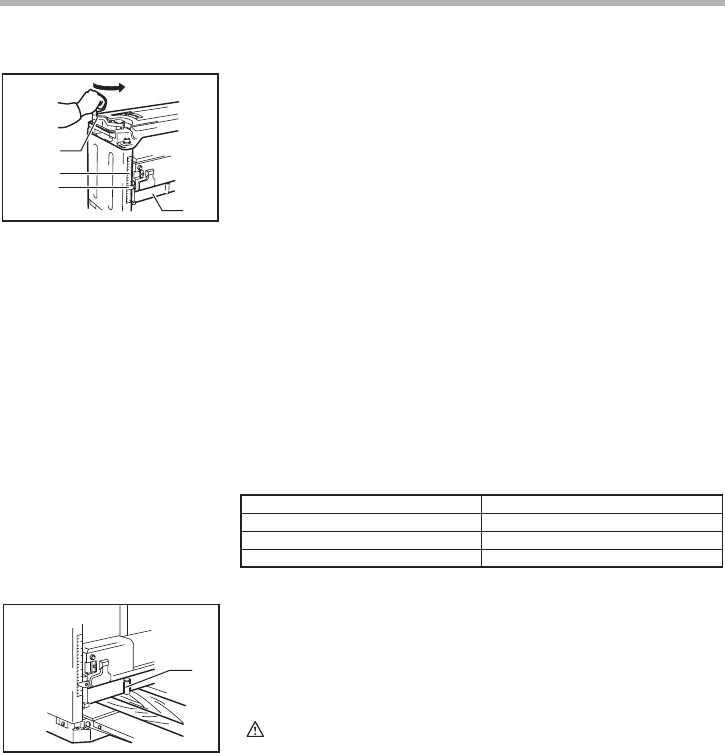
Lower the main frame by turning the crank handle counter-
clockwise until the indicator plate points to the scale gradua-
tion indicating the desired finished dimension. One full turn of
the crank handle moves the main frame 2 mm (3/32”) up or
down. The scale has inch graduations on its right side and
metric graduations on its left side.
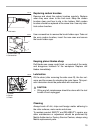
Adjusting depth of cut
The maximum depth of cut differs depending upon the width
of workpiece being cut. Refer to the table. When you need to
remove more than the amount specified in the table, set the
depth of cut shallower than the amount and make two or
more passes.
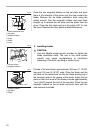
To adjust the depth of cut, proceed as follows.
Insert the workpiece flat on the table top. Lower the main
frame by turning the crank handle counterclockwise. The
depth gauge will rise and the amount of gauge rise indicates
the depth of cut.
CAUTION:
• Always lower the main frame when aligning the indicator
plate with the graduation indicating the desired finished
dimension. If you raise the main frame into the desired
finished dimension, additional play in the screw may
result. This may cause an undesired finished dimension.
• Always place the workpiece flat on the table top when
predetermining the depth of cut. Otherwise, the
predetermined depth of cut will differ from actual depth
of cut.
1. Crank handle
2. Scale
3. Indicator plate
4. Main frame
1
2
3
4
003710
Width of workpiece being cut
Less than 150 mm (5-7/8”)
150 mm (5-7/8”) - 240 mm (9-1/2”)
240 mm (9-1/2”) - 304 mm (12”)
Maximum depth of cut
3.0 mm (1/8”)
1.5 mm (1/16”)
1.0 mm (3/64”)
003711
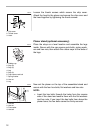
1. Depth gauge
1
003712