Installing or removing the bit
CAUTION:
Always be sure that the tool is switched off and the battery cartridge is removed before
installing or removing the bit.
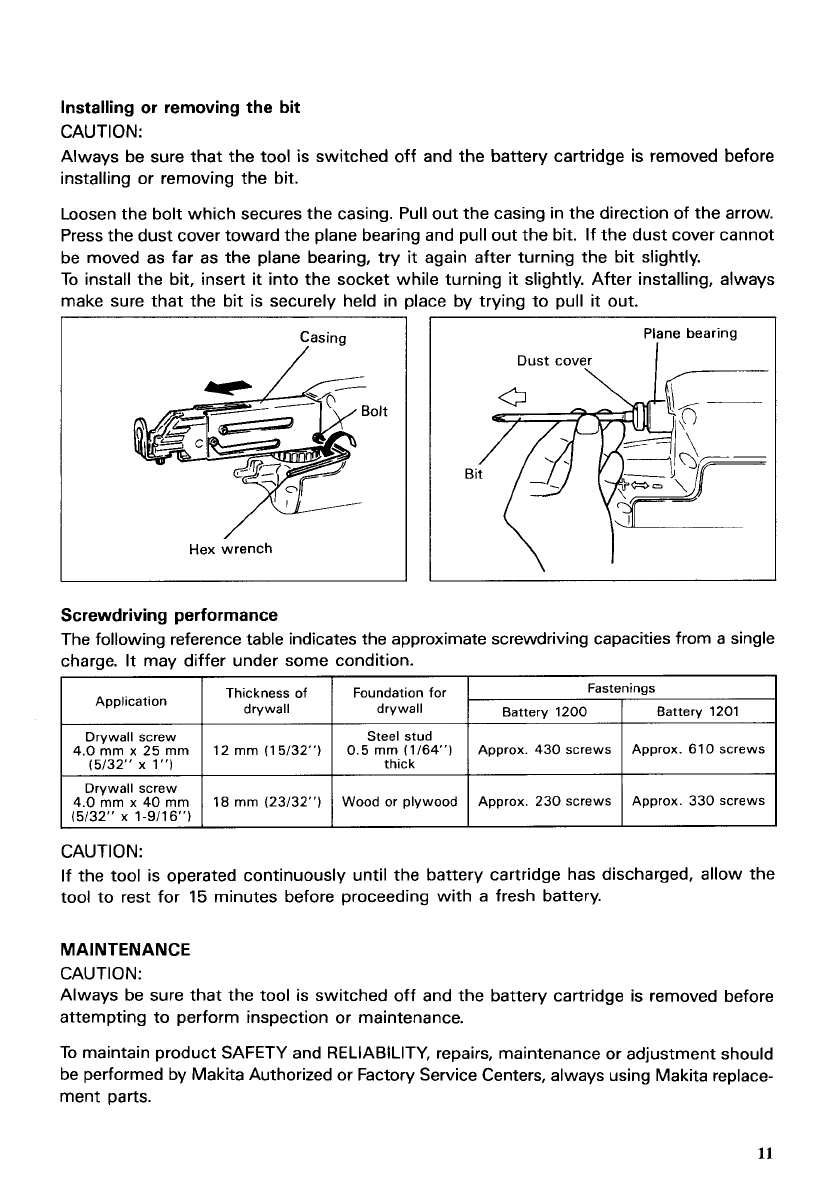
Loosen the bolt which secures the casing. Pull out the casing
in
the direction of the arrow.
Press the dust cover toward the plane bearing and pull out the bit. If the dust cover cannot
be moved as far as the plane bearing, try
it
again after turning the
bit
slightly.
To install the
bit,
insert
it
into the socket while turning
it
slightly. After installing, always
make sure that the bit is securely held
in
place by trying to pull
it
out.
Thickness
of
drywall
Application
7asing
Foundation for Fastenings
drywall Battery 1200 Battery 1201
Hex wrench
Drywall screw
4.0
mm
x 40
mm
(5/32" x 1-9/16")
Plane bearing
Dust cover
I
18
mm
(23/32") Wood or plywood Approx. 230 screws Approx. 330 screws
Screwdriving performance
The following reference table indicates the approximate screwdriving capacities from a single
charge.
It
may differ under some condition.
1
Drywall screw
Steel
stud
15/32" x 1") thick
4.0
mm
x
25
mm
12
mm
(1 5/32") 0.5
mm
(1/64") Approx. 430 screws Approx. 610 screws
CAUTIO N
:
If the tool is operated continuously until the battery cartridge has discharged, allow the
tool to rest for
15
minutes before proceeding with a fresh battery.
MAINTENANCE
CAUTl ON:
Always be sure that the tool
is
switched off and the battery cartridge is removed before
attempting to perform inspection or maintenance.
To maintain product SAFETY and RELIABILITY, repairs, maintenance or adjustment should
be performed by Makita Authorized or Factory Service Centers, always using Makita replace-
ment parts.
11


