


8
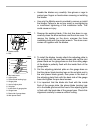
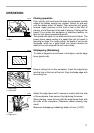
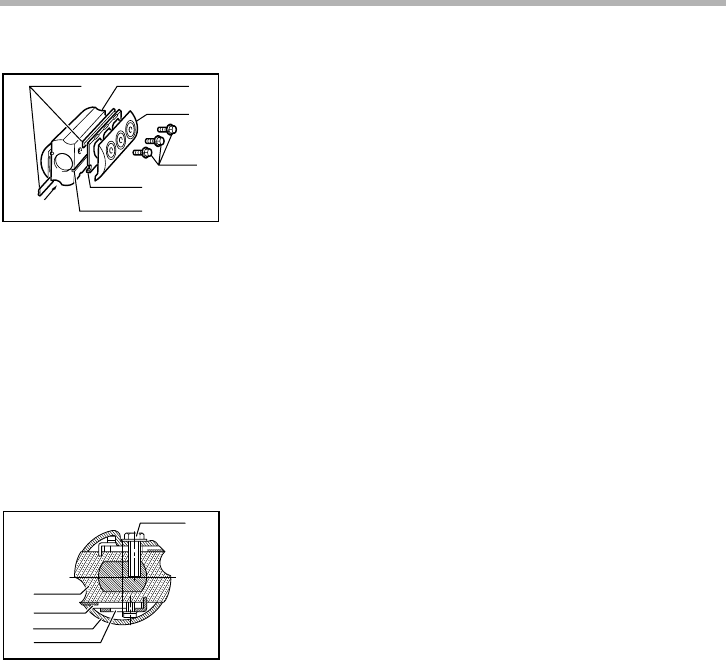
5. Slip the heel of the adjusting plate into the groove of the
drum.
6. Set the drum cover over the adjusting plate/set plate and
screw in the three hex flange head bolts so that a gap
exists between the drum and the set plate to slide the
mini planer blade into position. The blade will be posi-
tioned by the planer blade locating lugs on the set plate.
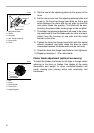
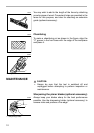
7. The blade’s lengthwise adjustment will need to be manu-
ally positioned so that the blade ends are clear and equi-
distant from the housing on one side and the metal
bracket on the other.
8. Tighten the three hex flange head bolts (with the socket
wrench provided) and hand rotate the drum to check
clearances between the blade ends and the tool body.
9. Check the three hex flange head bolts for final tightness.
10. Repeat procedures 1 - 9 for other blade.
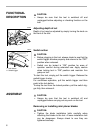
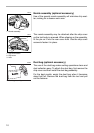
Planer blade adjustment (optional accessory)
To install the blades, first clean out all chips or foreign matter
adhering to the drum or blades. Use blades of the same
dimensions and weight, or drum oscillation/vibration will
result, causing poor planing action and, eventually, tool
breakdown.
1. Mini planer blade
2. Groove
3. Set plate
4. Hex. flange head bolt
5. Drum cover
6. Drum
1
2
3
4
5
6
002566
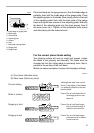
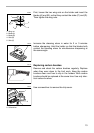
1. Bolt
2. Drum
3. Planer blade
4. Drum cover
5. Adjusting plate
1
2
3
4
5
002555