


OM-1592 Page 9
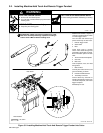
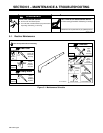
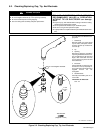
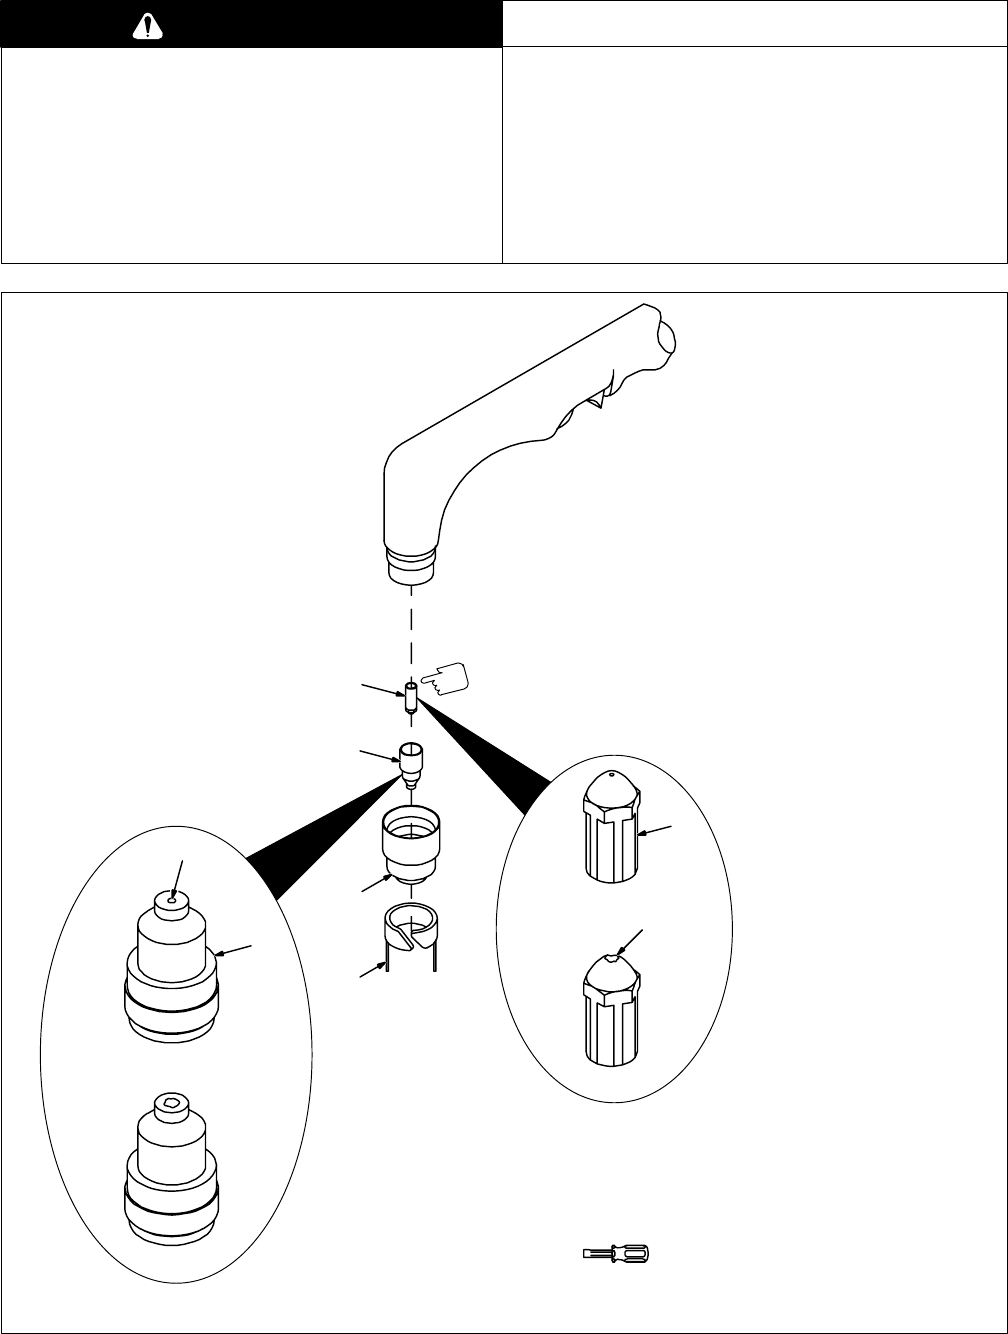
5-2. Checking/Replacing Cup, Tip, And Electrode
CAUTION
OVERTIGHTENING will strip threads.
• Do not overtighten electrode, tip, and cup during assembly.
• Do not cross-thread parts causing stripping.
• Use care during torch assembly and parts replacement.
TIP AND ELECTRODE WEAR BEYOND
RECOMMENDED VALUES or OPERATION
WITHOUT TIP OR ELECTRODE can damage
torch.
• Inspect cup, tip, and electrode before cutting or whenever cutting
speed has been significantly reduced.
• Do not operate torch without a tip or electrode in place.
• Be sure to use genuine replacement parts.
• A good practice is to replace both the tip and electrode at the same
time.
Do not overtighten electrode.
Ref. ST-800 897 / ST-800 973
Turn Off cutter, and disconnect in-
put power.
1 Shield Cup
Remove shield cup. Check shield
cup for cracks, and replace if need-
ed. Also, replace cup if it does not
cover the tip.
2Tip
3 Opening
Remove tip. Check tip, and replace
if opening is deformed or 50% over-
size. If inside of tip is not clean and
bright, clean with steel wool. Be
sure to remove any pieces of steel
wool afterwards.
4 Electrode
Check electrode. If center has a pit
more than a 1/16 in (2 mm) deep, re-
move and replace electrode using
supplied wrench. Do not
overtighten.
5 Standoff Guide
Carefully reassemble parts in re-
verse order.
Thread Size for Electrode:
5/16 - 24
New
Worn
3
4
1
4
2
2
New
Worn
1/16 in
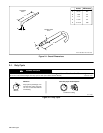
Tools Needed:
(Supplied 171 875)
(2 mm)
Pit
5
Figure 5-2. Checking/Replacing Cup, Tip, And Electrode