


OM-1592 Page 10
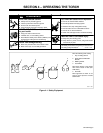
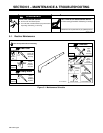
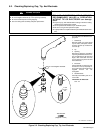
5-3. Troubleshooting
ELECTRIC SHOCK can kill.
• Do not touch live electrical parts.
• Turn Off cutter, and disconnect input power before
inspecting, maintaining, or servicing.
HOT PARTS can cause severe burns.
• Allow cooling period before maintaining or servicing.
Troubleshooting to be performed only by qualified
persons.
WARNING
swarn8.1* 2/93
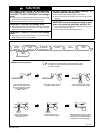
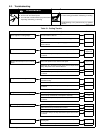
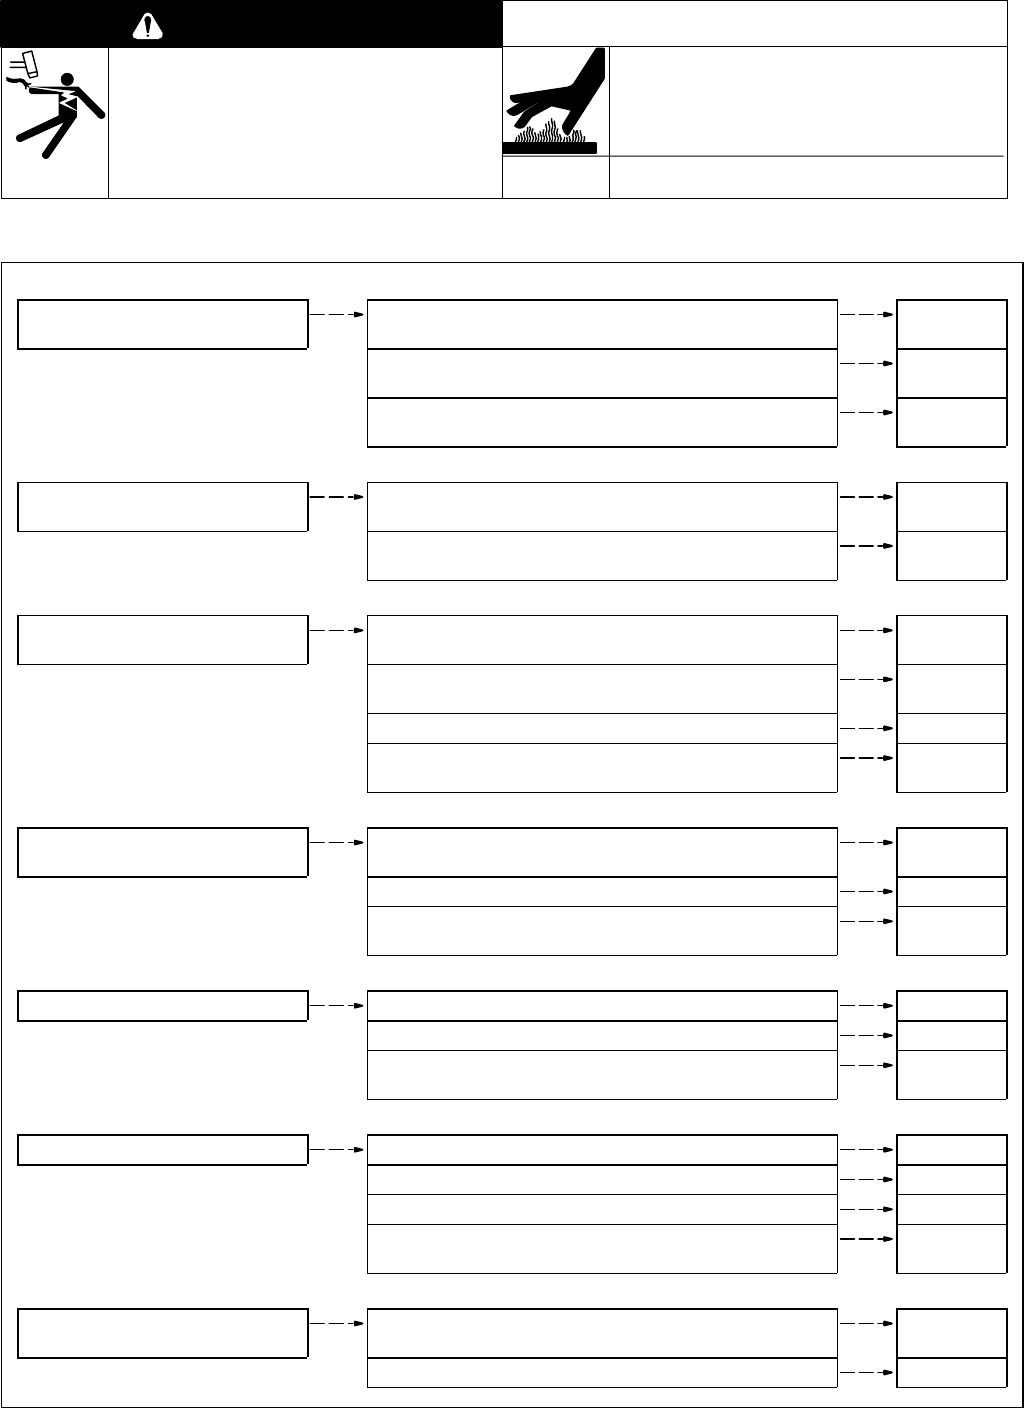
Table 5-1. Cutting Trouble
Trouble Remedy Section
Cutter Gas/Torch trouble light On; cutter
Power light Off; no cutting output.
Check for properly installed torch tip. Check for blocked hoses. See
also cutter Owner’s Manual.
5-2
Check to make sure torch electrode is not touching tip inside the
torch.
5-2
Check for clean and sufficient gas/air supply pressure. See cutter
Owner’s Manual.
– –
Unit pilots, but does not transfer. Shorten standoff distance from 1/8 to 1/16 in (3 to 1.6 mm). Figure 4-2,
Figure 4-3
Be sure work clamp is securely attached. See power source Own-
er’s Manual.
– –
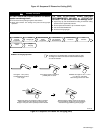
Sparks come out top of cut, or cut is not
clean.
Torch travel speed too fast; reduce travel speed. Figure 4-2
Metal being cut is too thick; increase power source output control
setting. See power source Owner’s Manual.
– –
Check torch tip and electrode, and replace if needed. 5-2
Be sure work clamp is securely attached. See power source Own-
er’s Manual.
– –
Arc goes out while cutting. Make sure torch tip is within 1/8 in (3 mm) standoff distance from
metal while cutting.
Figure 4-2
Increase travel speed, as needed. – –
Be sure work clamp is securely attached. See power source Own-
er’s Manual.
– –
Arc goes on and off while cutting. Torch travel speed is too slow; increase travel speed. Figure 4-2
Check torch tip and electrode, and replace if necessary. 5-2
Be sure work clamp is securely attached. See power source Own-
er’s Manual.
– –
Low cutting capability. Decrease cutting speed. Figure 4-2
Tighten loose torch tip and electrode if needed. – –
Check torch tip and electrode if needed. – –
Be sure work clamp is securely attached. See power source Own-
er’s Manual.
– –
Short torch consumable life. Maintain standoff distance of 1/16 to 1/8 in (1.6 to 3 mm), or use
standoff guide.
Figure 4-2
Tighten or replace torch tip and electrode if needed. – –