


8 9
WARNING
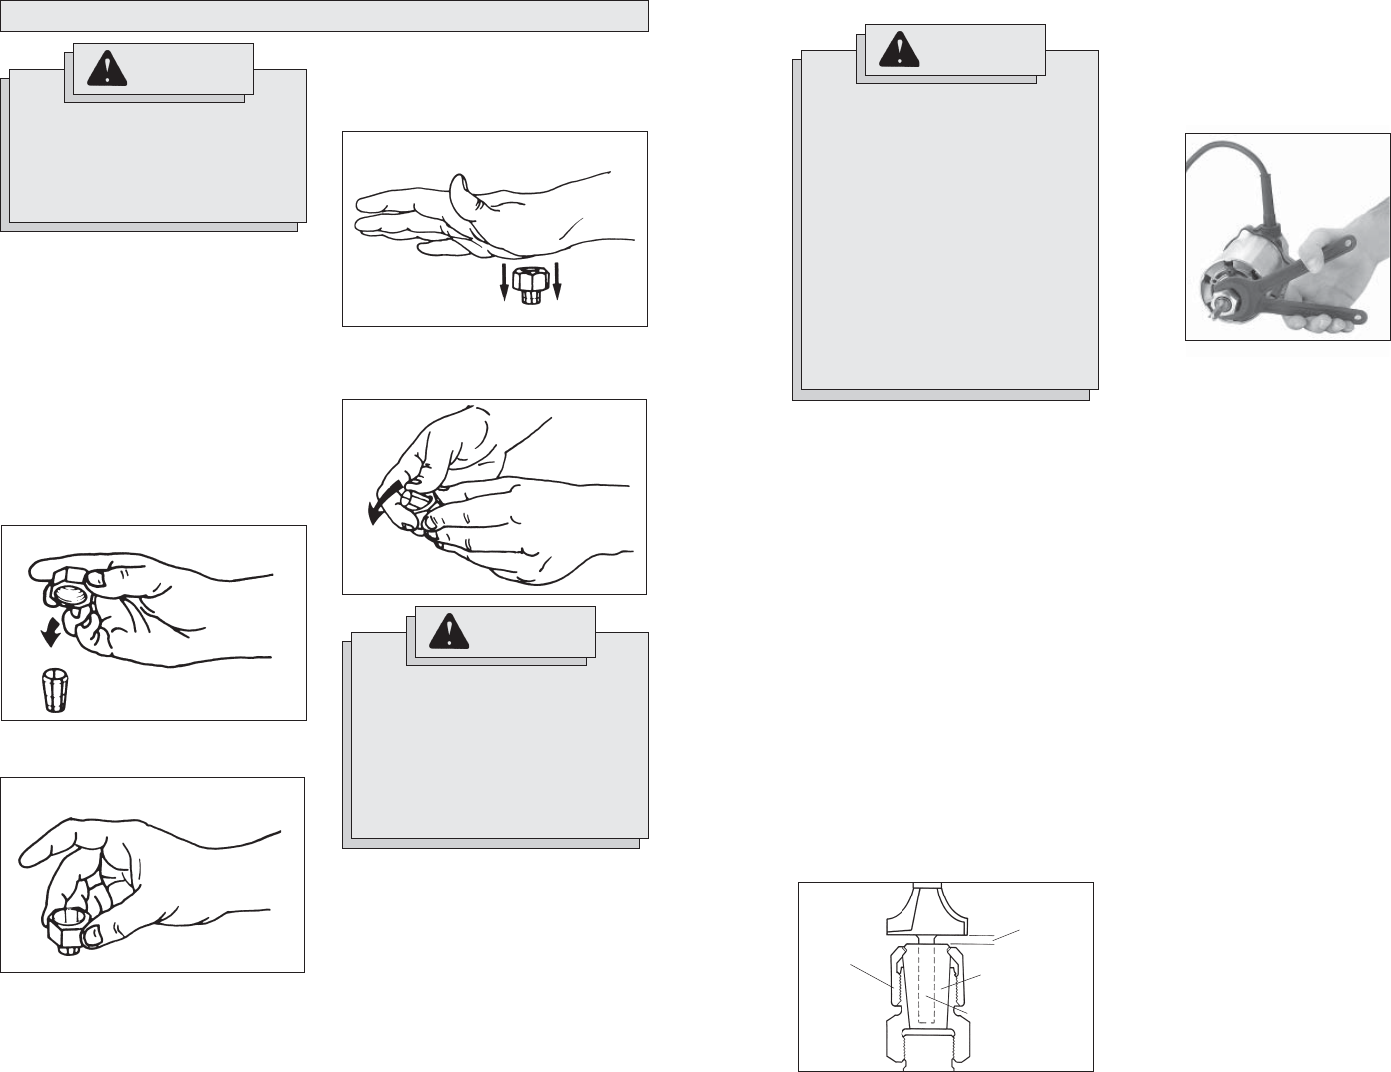
TOOL ASSEMBLY
To reduce the risk of injury, always
unplug tool before attaching or
removing accessories or making
adjustments. Use only specifi cally
recommended accessories. Others
may be hazardous.
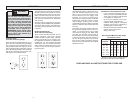
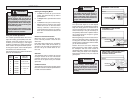
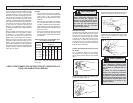
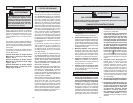
To remove collet from nut, hold nut fi rmly
with one hand and press the collet to one
side with the other hand (Fig. 4).
Collets
The collet must be attached to the collet nut
before it is put into the collet shaft. Be sure
that the size of the collet matches the size
of the bit shank being used. If the wrong
size bit shank is used, the collet may break.
For attaching or detaching the collet nut to
the collet, follow the illustrated instructions
on this page.
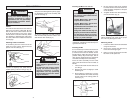
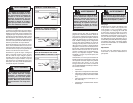
Attaching Collet to Collet Nut
To assemble, place the narrow end of the
collet on an even surface. Take the nut and
place it over the collet (Fig. 1).
Position nut squarely over collet with the
smaller opening of the nut facing up (Fig. 2).
Snap nut and collet together by fi rmly apply-
ing downward pressure into assembly with
palm of hand (Fig. 3).
Fig. 1
Fig. 2
Fig. 3
Fig. 4
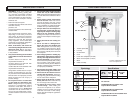
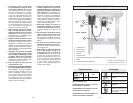
To install the motor into a router lift, read,
understand, and follow the instructions pack-
aged with the router lift.
Installing the Bit
It is not necessary to remove the motor from
the lift to install a collet assembly or a bit.
(If removal of the motor is desired, see the
lift instructions.) Raise the motor as high as
possible. Always wipe wood chips, dust or
other foreign materials from the collet shaft
and collet assembly before assembling.
Insert the collet assembly into the collet
shaft. Insert the bit shank into the collet as
follows:
1. Insert the bit shank into the collet as far
as it will go.
2. Back the bit shank out slightly to avoid
bottoming out.
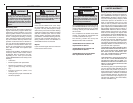
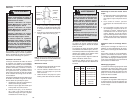
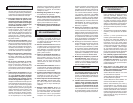
3. Be sure there is a minimum of 1/16" be-
tween the bottom of the collet assembly
and the radius to the cutting portion of
the bit (Fig. 5).
4. Be sure that the collet is not clamped
to a fl uted section on the bit shank. The
collet should be clamped to a solid part
on the bit shank.
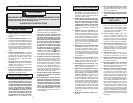
5. To tighten the bit in the collet assembly,
use two wrenches (Fig. 6).
Fig. 6
NOTE: Never tighten a collet assembly
without inserting a bit shank of the proper
size. This may damage the collet.
Removing the Bit
1. Loosen the collet nut from the collet shaft
using two wrenches.
2. Once loose, unscrew the collet nut by
hand until it feels tight again.
3. Return to using the wrenches until the
bit shank can be pulled out.
Fig. 5
Minimum
1/16"
Bit shank
Collet
Collet nut
Installing the Motor into the Lift
WARNING
To reduce the risk of injury, wear
safety goggles or glasses with side
shields.
To reduce the risk of injury, always
unplug tool before attaching or
removing accessories or making
adjustments. Use only specifi cally
recommended accessories. Others
may be hazardous.
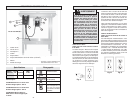
WARNING
To reduce the risk of injury, use only
the following router tables and lifts
with this motor.
JessEm Mast-R-Lift™ #02101 with
required Shim Kit #02116
JessEm Mast-R-Lift™ #02102 with
required Shim Kit #02116
JessEm Mast-T-Excel™ #02201 with
required Shim Kit #02116.
Using other tables and lifts may not
properly secure the Router Table Mo-
tor with Remote Power. An improp-
erly secured motor increases the risk
of injury or product damage.