


Installing the SmartNode 26
SmartNode 4980 & 4990 User Manual 3 • SmartNode installation
• IP addresses of central H.323 gatekeeper (if used)
• IP addresses and/or URL of SIP servers or Internet telephony services (if used)
• Login and password for PPPoE
Access
• Login and password for SIP or H.323 based telephony services
• IP addresses of central TFTP server used for configuration upload and download (optional)
Software tools
You will need a PC (or equivalent) with Windows Telnet or a program such as Tera Term Pro Web to config-
ure the software on your SmartNode.
AC Power Mains
If you suspect that your AC power is not reliable, for example if room lights flicker often or there is machinery
with large motors nearby, have a qualified professional test the power. Patton recommends that you include an
uninterruptible power supply (UPS) in the installation to ensure that VoIP service is not impaired if the
power fails. Refer to “Connecting the power supply” on page 28.
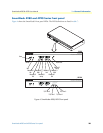
Location and mounting requirements
The SmartNode is intended to be placed on a desktop or similar sturdy, flat surface that offers easy access to
the cables. Allow sufficient space at the rear of the chassis for cable connections. Additionally, you should con-
sider the need to access the unit for future upgrades and maintenance.
Note
Under the rack mount option, the chassis can be equipped with rack mount
ears that allow for use in a 19” rack.
Installing the SmartNode
SmartNode hardware installation consists of the following:
• Placing the device at the desired installation location (see section “Placing the SmartNode” on page 26)
• Connecting the interface and power cables (see section “Installing cables”)
When you finish installing the SmartNode, go to chapter 4, “Initial configuration” on page 29.
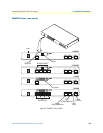
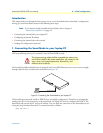
Placing the SmartNode
Place the unit on a desktop or similar sturdy, flat surface that offers easy access to the cables. The unit should
be installed in a dry environment with sufficient space to allow air circulation for cooling.
Note
For proper ventilation, leave at least 2 inches (5 cm) to the left, right, front,
and rear of the unit.
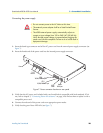
Installing cables
Do not work on the system or connect or disconnect cables during periods of
lightning activity.
WARNING