


32 Pelco Manual C573M-D (11/03)
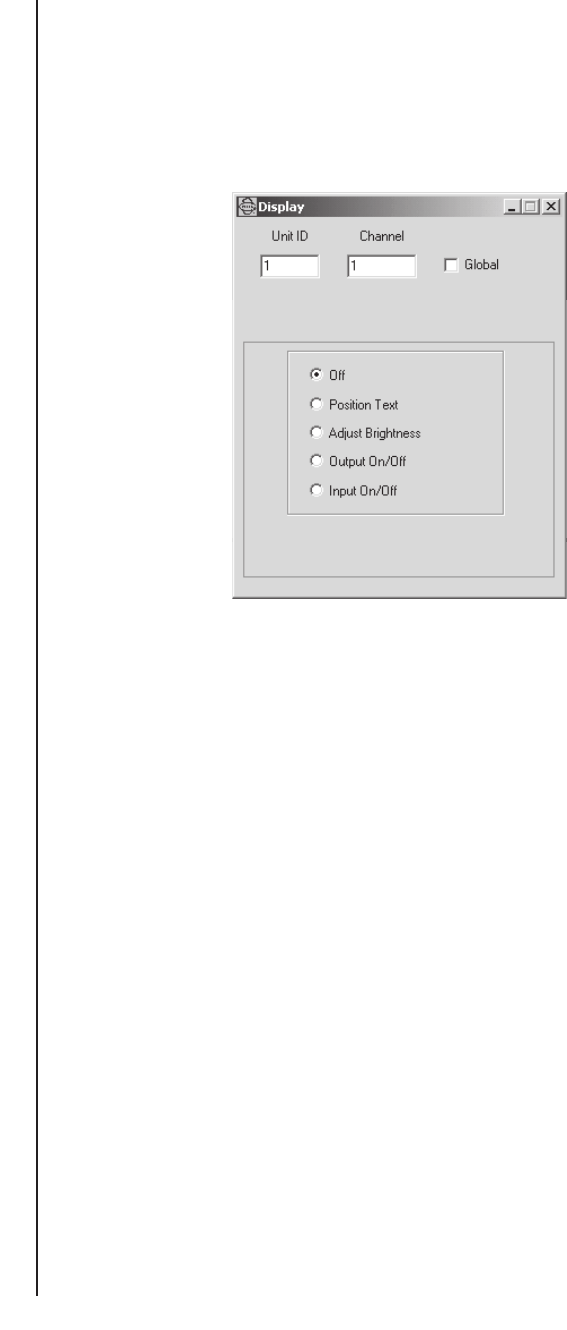
SET DISPLAY
The Display dialog box allows you to set the positions of the alphanumeric display (text
location) for each camera input. In addition, you can adjust brightness through eight levels.
You can also pick—for each camera input—what each of the four outputs associated with the
input video will have for a display; that is, the alphanumeric display is ON or OFF for each of the
four outputs.
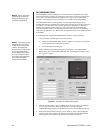
To access the Display dialog box, click Edit on the CM9760-MDA SETUP dialog box and
then click Display.
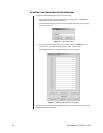
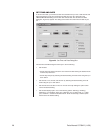
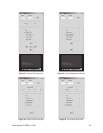
Figure 26. Display Dialog Box
At the top of the Display dialog box, you can set the unit ID and channel (camera) number.
To set the unit ID, enter the unit ID number (1-64) and then press Return. To set the
channel, enter the channel number (1-16) and then press Return. In addition, there is a
Global option for title position, brightness, output on/off, and input on/off that allows all
cameras of a unit to be set to the same state as the current channel. Also, there are five
options: (display) Off, Position Text, Adjust Brightness, Output On/Off, and Input On/Off.
The options are defined as follows:
Off This option turns the setup display off for the program.
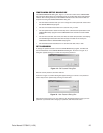
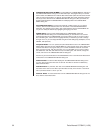
Position Text This option sets the position of text; that is, where text will appear on
all video outputs for the cameras selected that have the display option
ON. To position text on an NTSC video display, click the NTSC option
button (default setting). To position text on a PAL video display, click
the PAL option button. Use the up arrow, down arrow, left arrow, and
right arrow buttons to position the text on the video outputs. See
Figure 27, Position Text Dialog Box. As adjustments are made, they
appear in the blue screen at the bottom of the dialog box.
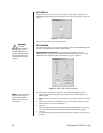
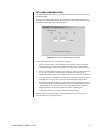
Adjust The brightness level option for the text display ranges from 1 (darkest)
Brightness to 8 (brightest). Use the up arrow and down arrow buttons to adjust
brightness. See Figure 28, Adjust Brightness Dialog Box. As adjust-
ments are made, they appear in the blue screen at the bottom of the
dialog box.
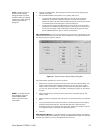
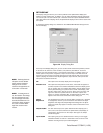
Output On/Off For each camera input, this option determines the output(s) (Out 1,
Out 2, Out 3, Out 4) that will have an alphanumeric (text) display. A
check-mark in the box turns on the output. See Figure 29, Output
On/Off Dialog Box.
Input On/Off This option gives you two selection boxes in which you can toggle
time/date and titles on and off. A checkmark in the box turns on the
selection. See Figure 30, Input On/Off Dialog Box.
NOTE:
Selecting both the
Off option and the Global
option causes all display
settings for the current
channel to be applied to all
of the other 15 channels.
NOTE:
If message text is
set, the Position Text dialog
box may indicate the posi-
tion of message text rather
than title/time/date text. For
information about message
text, refer to the
Set Mes-
sage Text
section of this
manual.