


16 © 2006 Pioneer Supply International
16 © 2006 Pioneer Supply International
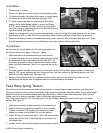
Operation Tips
¸ Lumber should be clean and dry. Inspect for defects like loose knots, warping, cupping, twisting, glue and
for foreign objects (nails, staples, imbedded gravel, etc,). If you have any question about the quality of
your lumber, do not use it. Wood with more than 20% moisture content or wood exposed to rain or snow,
will plane poorly and leave a feathery surface. Wet wood causes excessive wear to the knives and motor
and can also hasten rust and corrosion.
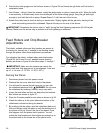
¸ In order to create even wear on the blades, alternate between the left, the right, and the middle when feed-
ing lumber into the planer. Your knives will remain sharp much longer and you won't get worn spots on the
blades.
¸ Plane ONLY natural wood fiber. No wood composites such as plywood, chipboard etc.
¸ Plane with the grain. Never feed end-cut or end-grained lumber into your planer.
¸ Avoid boards with loose knots, splits, cross grain or other obvious blemishes or defects. They can damage
the blades and pose the possibility of operator injury.
¸ Keep your work area clear and clean.
¸ Use the stock return rollers to move material from the outfeed area back to the infeed area when working
on long stock.
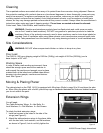
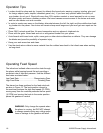
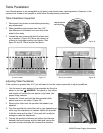
Operating Feed Speed
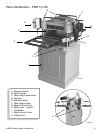
The infeed and outfeed rollers move the stock through
the planer while keeping boards flat and providing a
consistent rate of feed and pressure. Use the different
feed rates as stated below:
Low Feed Rate .............................Dimensioning Pass
High Feed Rate .................................... Finishing Pass
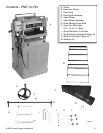
The planer has three positions for the feed rate knob
as seen in Figure 13. The knob position closest to
the machine produces the high feed speed (20 FPM);
moving away from the machine produces the low speed
(16 FPM) and moving the knob to the center position
places the gearbox in neutral.
WARNING: Only change the speeds when
the planer is running, but DO NOT attempt
to change speeds during any cutting opera-
tions or damage to the gearbox will result.
Figure 13
!
Figure 12