


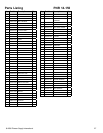

22 © 2006 Pioneer Supply International
22 © 2006 Pioneer Supply International
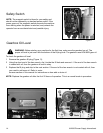
Table Parallelism
Your Pioneer planer is pre-set parallel at the factory and should rarely need adjustment. However, in the
instance that lumber is not parallel in width follow the adjustment procedures.
Table Parallelism Inspection
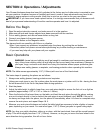
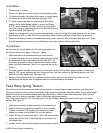
1 Disconnect from power source before performing
any adjustments.
2 Table parallelism adjustments less than .016”
(the difference in thickness from one side of the
board to the other)
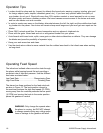
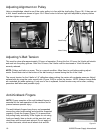
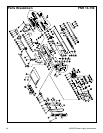
3 Loosen the caps screws that hold the head cast-
ing in position. (Figure 32) Move the casting up
or down to the proper position and tighten. See
figure 33 and 34. Plane another test piece.
Adjusting Table Parallelism
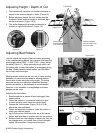
If the variance is greater than .016” you will need to turn the column sprockets to adjust parallelism.
1 You first need to gain access to the sprockets by tilting the
planer on its side.
!
WARNING:
The planer is very heavy
and should not be tilted by one person or by hand. Use
proper lifting methods.
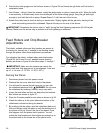
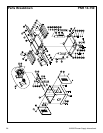
2 Loosen the 2 bolts that hold the idler sprocket which
places tension on the chain. (Figure 35)
3 Remove the chain from the sprocket that needs to be
adjusted.
4 Turn this sprocket by hand either left or right depending on
which way the adjustment is needed. Adjust this sprocket
to be the same as the other 3. One tooth will usually be
enough to make the adjustment.
5 Turning the sprocket clockwise will reduce the distance
between the head casting and the table and turning the
sprocket counter-clockwise will increase this distance.
Idler
Sprocket
Lock Bolts
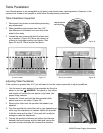
Figure 34Not Correct ParallelCorrect Parallel Figure 33
Cap Screws on
each Column
Figure 35
Figure 32