


DISPOSABLE PAPER MASKS ARE NOT ADEQUATE.
7. Keep food and drink out of the work area. Wash hands, arms, and face and rinse mouth
before eating or drinking. Do not smoke or chew gum or tobacco in the work area.
8. Clean up all removed paint and dust by wet mopping the floors. Use a wet cloth to clean all
walls, sills and any other surfaces where paint or dust is clinging. DO NOT SWEEP, DRY DUST
OR VACUUM. Use a high phosphate detergent or trisodium (TSP) to wash and mop areas.
9. At the end of each work session, put the paint chips and debris in a double plastic bag,
close it with tape or twist ties and dispose properly.
Such preventive safety measures reduce
the risk of exposure.
10. Remove protective clothing and work shoes in the work area to avoid carrying dust into
the rest of the dwelling. Wash work clothes separately. Wipe shoes off with a wet rag, then
wash that rag with the work clothes. Wash hair and body thoroughly with soap and water.
SAVE THESE INSTRUCTIONS!
MOTOR
Do not operate your tool on a current on which the voltage is not within correct limits.
Do not operate tools rated A.C. only on D.C. current. To do so may seriously damage the tool.
ASSEMBLY
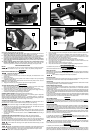
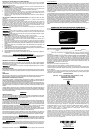
INSTALLING AND REMOVING THE ABRASIVE BELT
Disconnect tool from power source.
1. Place the sander on its left side.
2. Pull the lever (A) to the rear of the tool to retract the idler pulley and release tension on the
abrasive belt.
3. Remove the old belt.
4. Install the new belt with the arrow (printed on the inside of the belt) on the top and pointing
TOWARD the idler pulley (B).
NOTE: Some sanding belts are bi-directional and will not have arrows printed on them. You can
install them to run in either direction.
5. Engage the front pulley by pushing the lever (A) back to its original position.
OPERATION
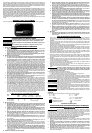
TO START AND STOP BELT SANDERS
1. Make sure that the switch is “OFF” and the power circuit voltage is the same as the voltage
shown on the specification plate. Connect the tool to the power circuit.
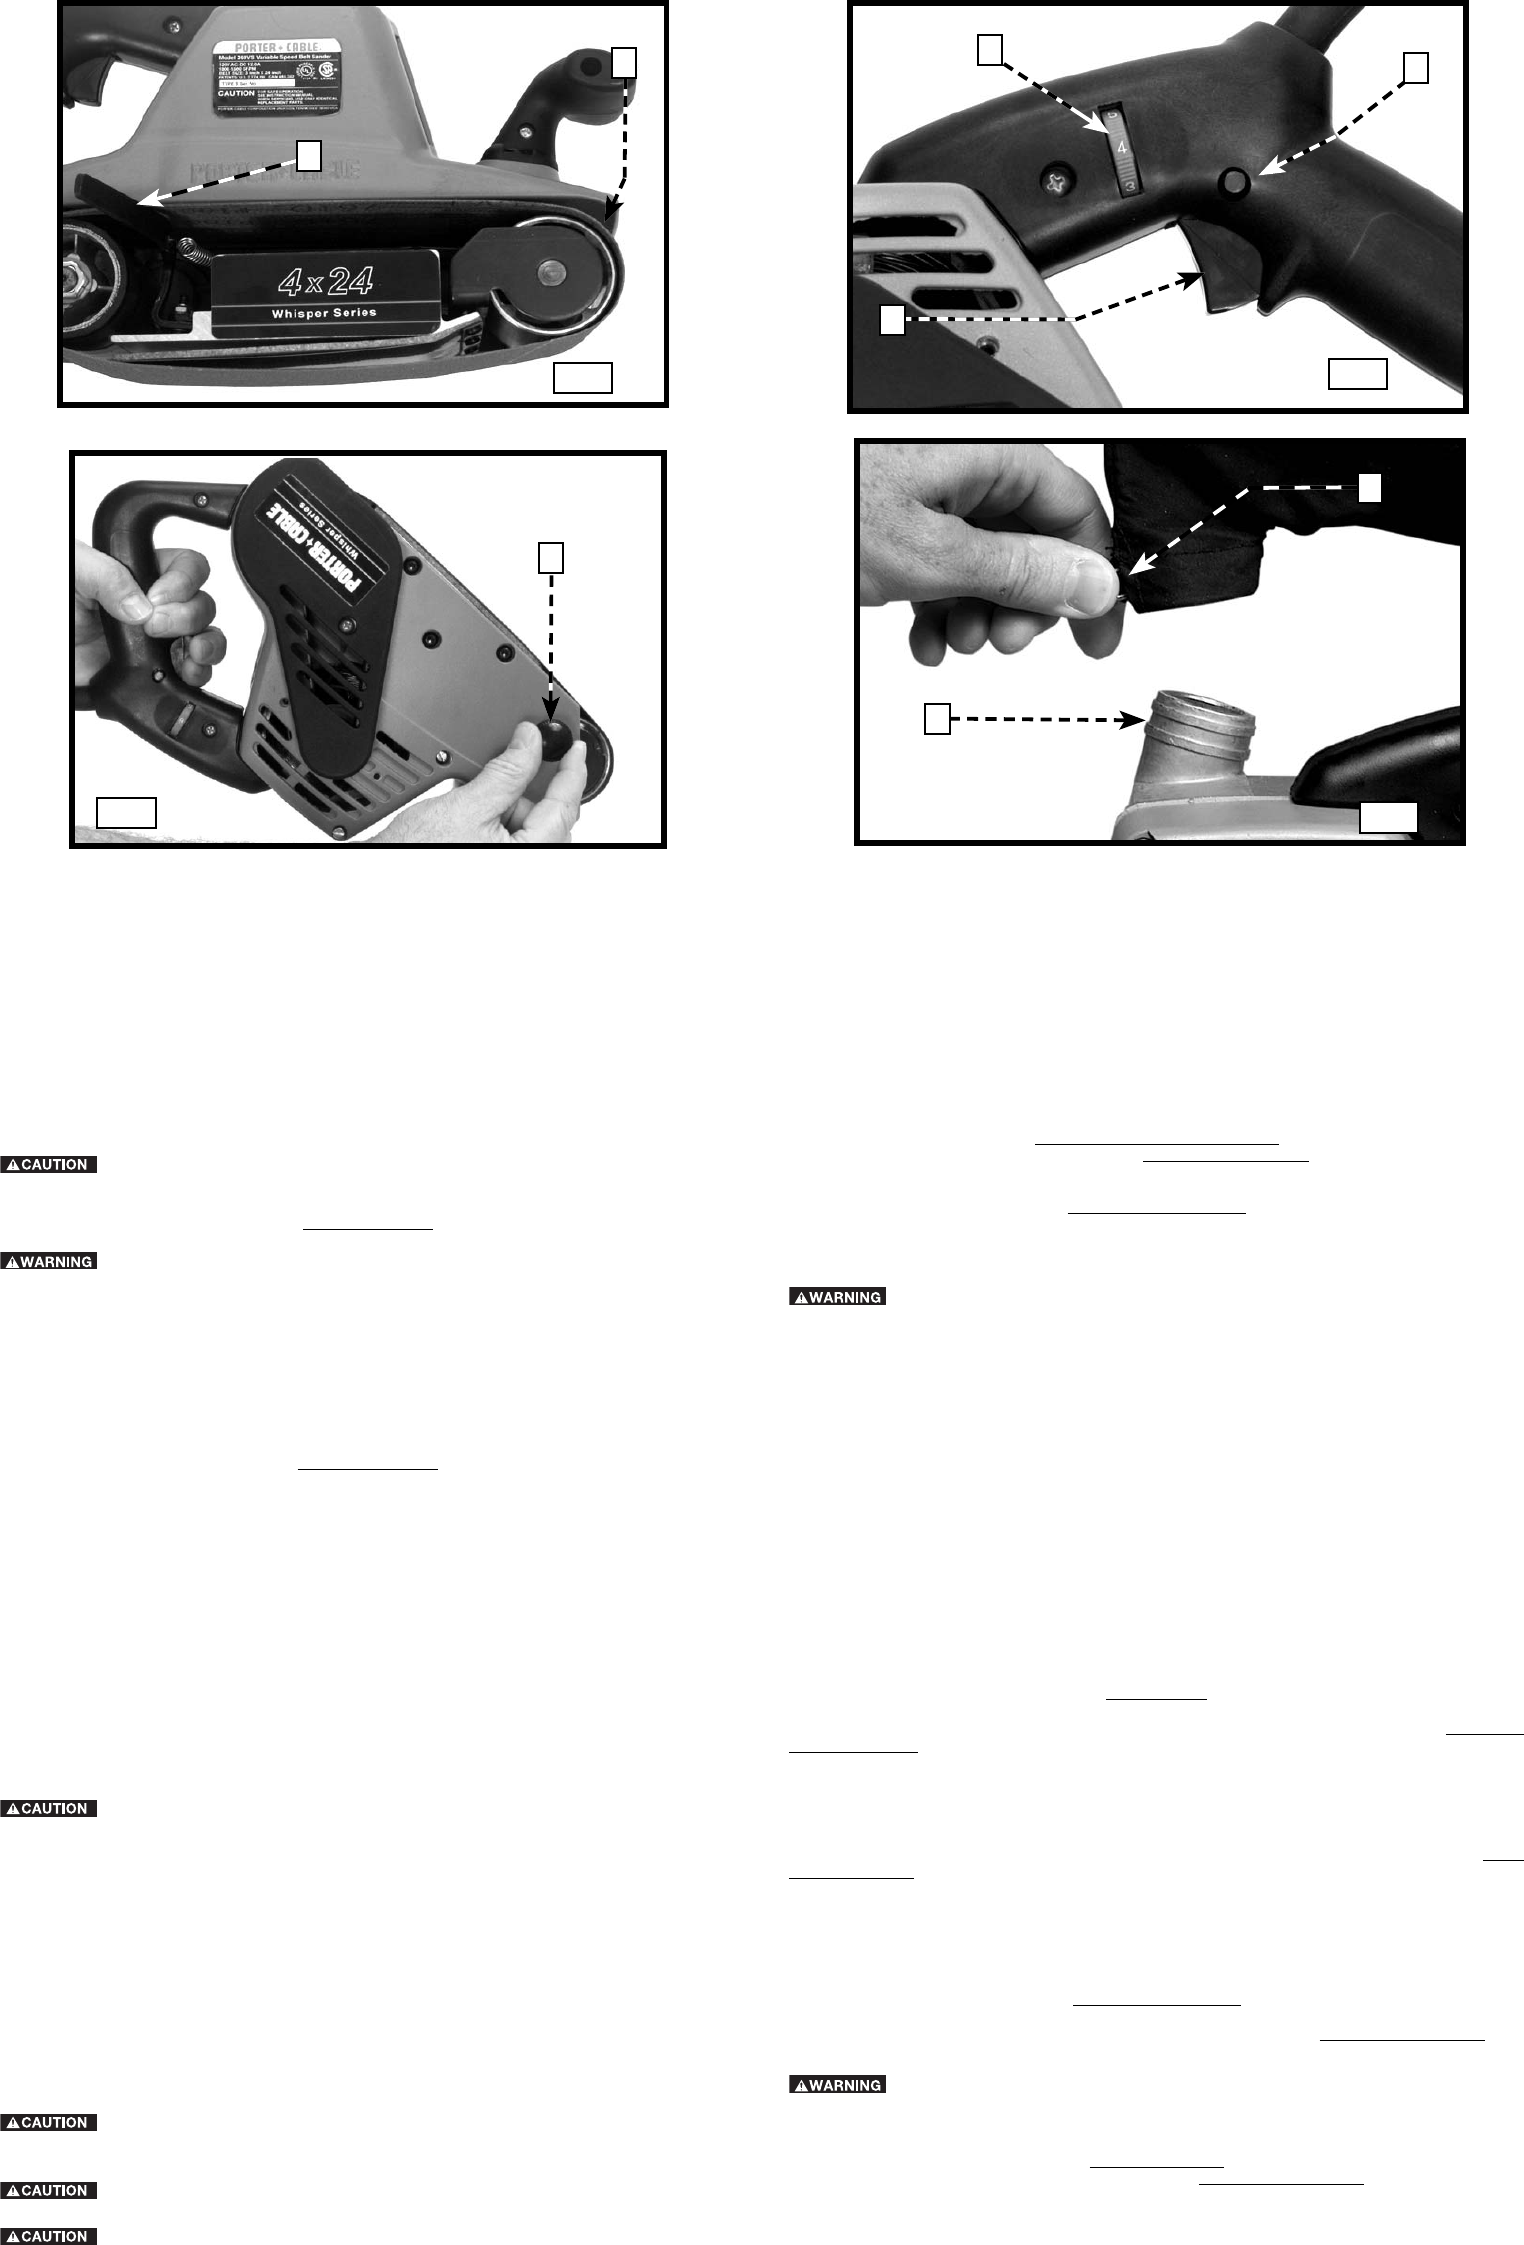
2. Squeeze the trigger (A) Fig. 2 to start the motor. Release the trigger to stop the motor.
3. To allow the motor to run without constantly holding the trigger, press the trigger switch (A),
push the lock button (B) Fig. 2, and release the trigger switch.
4. To release the lock button, squeeze the trigger and release.
VARIABLE SPEED CONTROL (Models 360VS, 362VSK and 362V only)
Models 360VS and 362VSK have Variable Speed Control. The operating speed is adjustable
between 1000 SFM (surface feet per minute) and 1500 SFM.
Adjust the speed by turning the thumbwheel (C) Fig. 2. Thumbwheel position #1 provides the
slowest operating speed (1000 SFM) while position #6 provides the fastest operating speed (1500
SFM). The speed can be changed with the motor running or not running.
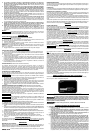
TRACKING THE ABRASIVE BELT
To prevent excessive wear on both the sander and belt, NEVER allow the abrasive belt to rub on
the sander frame. To make sure that the belt is tracking correctly, do the following:
Make sure that the trigger is in the “OFF” position before connecting the tool to the
power circuit.
1. Turn the tool over, rest the tool on its front handle, and grasp the rear handle with your left
hand. Rest your ring finger and little finger on the trigger (Fig. 3).
2. Start the motor by squeezing the trigger.
3. Turn the belt aligning screw (A) Fig. 3 in either direction until the edge of the belt is even with
the outer edge of the rear rubber-covered pulley. The edge of the belt will extend beyond the
edge of the front pulley.
4. Turn the motor “OFF” and allow the sander to come to a COMPLETE STOP before turning it
right side up.
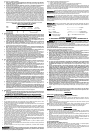
ATTACHING AND CARE OF DUST BAG (Models 360, 360VS, 362, 362V and 362VSK)
Depress the dust bag spring clips (A) Fig. 4, and place the dust bag spring (A) between the
ridges on the spout (B).
For most efficient operation, empty the dust bag when it is half full. To remove, squeeze the dust
bag spring clips (A) and pull the bag straight up. Unzip the rear of the bag and shake out the
dust. Every so often, turn the bag inside out and brush the accumulated dust from the inside.
For the models with a dust bag, do not operate the sander without the bag or a dust
collection hose.
GENERAL SANDING
SECURE THE WORKPIECE and maintain a FIRM GRIP on the sander. Movement of the
sanding belt against the workpiece will try to move the work backward and/or the sander forward.
Verify that the switch is “OFF” before connecting the sander to the power circuit.
1. Hold the sander off the work before starting the motor.
2. Lower the sander to the work, touching the rear part of the belt first. Level the machine when
moving it forward.
3. Guide the machine over the work in overlapping strokes. Allow the sander to do the work.
4. Avoid applying excessive pressure. The weight of the machine is usually sufficient for a fast
smooth finish. A slight increase in pressure may speed removal of material, but too much
pressure will slow the motor and decrease removal.
5. Work back and forth over a fairly wide area to obtain an even surface.
6. Do not let the tool tilt. The edge of the belt can make a deep cuts into the surface.
7. Do not pause in any one spot during the sanding operation. The belt will eat into the work
and make the surface uneven.
8. Lift the tool from the work before turning the motor off.
9. Always be sure that the motor has completely stopped before putting the tool down.
TROUBLESHOOTING
For assistance with your tool, visit our website at www.porter-cable.com for a list of service centers, or
call the Porter-Cable Customer Care Center at (888) 848-5175.
MAINTENANCE
KEEP TOOL CLEAN
Periodically blow out all air passages with dry compressed air. All plastic parts should be cleaned with a
soft damp cloth. NEVER use solvents to clean plastic parts. They could possibly dissolve or otherwise
damage the material.
Wear ANSI Z87.1 safety glasses while using compressed air.
FAILURE TO START
Should your tool fail to start, check to make sure the prongs on the cord plug are making good contact
in the outlet. Also, check for blown fuses or open circuit breakers in the line.
LUBRICATION
This tool has been lubricated with a suffi cient amount of high grade lubricant for the life of the unit under
normal operating conditions. No further lubrication is necessary.
BRUSH INSPECTION (If applicable)
For your continued safety and electrical protection, brush inspection and replacement on this tool
should ONLY be performed by a Porter-Cable Factory Service Center or a Porter-Cable Authorized
Warranty Service Center.
At approximately 100 hours of use, take or send your tool to your nearest Porter-Cable Factory Service
Center or a Porter-Cable Authorized Warranty Service Center to be thoroughly cleaned and inspected.
Have worn parts replaced and lubricated with fresh lubricant. Have new brushes installed, and test the
tool for performance.
Any loss of power before the above maintenance check may indicate the need for immediate servicing
of your tool. DO NOT CONTINUE TO OPERATE TOOL UNDER THIS CONDITION. If proper operating
voltage is present, return your tool to the service station for immediate service.
SERVICE
REPLACEMENT PARTS
Use only identical replacement parts. For a parts list or to order parts, visit our website at servicenet.
porter-cable.com. You can also order parts from your nearest Porter-Cable Factory Service Center or
Porter-Cable Authorized Warranty Service Center. Or, you can call our Customer Care Center at (888)
848-5175.
SERVICE AND REPAIRS
All quality tools will eventually require servicing and/or replacement of parts. For information about Por-
ter-Cable, its factory service centers or authorized warranty service centers, visit our website at www.
porter-cable.com or call our Customer Care Center at (888) 848-5175. All repairs made by our service
centers are fully guaranteed against defective material and workmanship. We cannot guarantee repairs
made or attempted by others.
You can also write to us for information at PORTER-CABLE, 4825 Highway 45 North, Jackson, Tennes-
see 38305 - Attention: Product Service. Be sure to include all of the information shown on the name-
plate of your tool (model number, type, serial number, etc.).
ACCESSORIES
A complete line of accessories is available from your Porter-Cable Factory Service Center or a Por-
ter-Cable Authorized Warranty Service Center. Please visit our Web Site www.porter-cable.com for a
catalog or for the name of your nearest supplier.
Since accessories other than those offered by Porter-Cable have not been tested with
this product, use of such accessories could be hazardous. For safest operation, only Porter-Cable
recommended accessories should be used with this product.
WARRANTY
To register
your tool for warranty service visit our website at
www.porter-cable.com
.
PORTER-CABLE LIMITED ONE YEAR WARRANTY: Porter-Cable warrants its Professional Power Tools for
a period of one year from the date of original purchase. We will repair or replace at our option, any part or
parts of the product and accessories covered under this warranty which, after examination, proves to be
A
Fig. 1
B
A
Fig. 3
A
Fig. 4
B
A
Fig. 2
B
C