


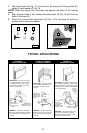


1. Allow your workpiece to overhang the base material by at least 1/8".
2. Firmly grasp the motor housing, being sure switch is in the “OFF” position.
3. Ensure that the bit is clear of foreign objects and that the cord will not “hang
up” on any obstructions.
4. Hold the workpiece firmly in place. Use clamps when necessary.
5. Plug in the power supply cord. Be alert to resist the starting torque of the
motor. Turn motor “ON”.
6. Allow the motor to reach “full speed”. Place the base of the trimmer on the
surface of the workpiece. Feed the trimmer into the work until the bit pilot
contacts the base material. When guiding on a previously laminated surface,
always wax or lubricate the area where the guide will ride.
NOTE: While operating the trimmer with
the tilt base at any tilt setting other than
“0” degrees, keep the long side of the base
perpendicular to the piloting surface to
prevent possible work spoilage.
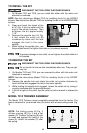
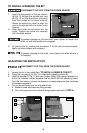
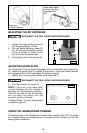
7. Feed from left to right with a smooth
steady motion (See Fig. 16).
8. When the operation is complete, turn
the switch “OFF”. Allow the motor to
come to a complete stop before laying
the trimmer down.
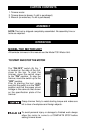
16
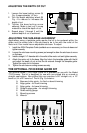
OPERATION
DISCONNECT THE TOOL FROM THE POWER SOURCE.
Always wear safety glasses while operating a laminate trimmer.
DISCONNECT THE TOOL FROM THE POWER SOURCE!
To attach the Underscribe Trimmer Base to the Model 7301 Trimmer Motor:
NOTE: The 43109 Trim Bit must be installed into the Trimmer Motor before
attaching the motor to the Underscribe Base.
UNDERSCRIBE 7320 TRIMMER ASSEMBLY
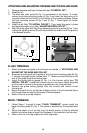
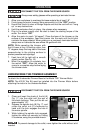
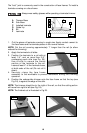
1. Clean and insert the shank of the bit (A)
Fig. 17, into the collet until the end of
the shank bottoms. Then pull the bit out
approximately 1/8".
2. Depress the spindle lock (B) Fig. 17, and
rotate the collet nut (C) clockwise by
hand until the lock engages the hole in
the motor spindle.
3. While holding the spindle lock engaged,
tighten the collet nut securely by turning
it clockwise, using the provided wrench.
B
Fig. 17
A
C
To prevent damage to the collet, never tighten the collet without a bit
inserted.
Fig. 16