9
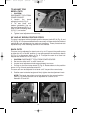
TO ADJUST FOR
BEVEL CUTS
1. CAUTION:
DISCONNECT TOOL FROM
POWER SOURCE.
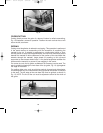
2. Loosen the bevel
adjusting knob (A) Fig. 5.
3. Tilt saw base until
desired graduation line on
the bevel segment (B) Fig. 5,
lines up with indicating mark
(C) Fig. 5, on bracket.
4. Tighten bevel adjustment knob firmly.
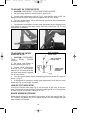
90° AND 45° BEVEL POSITIVE STOPS
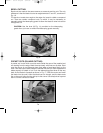
The saw is equipped with adjustable positive stops at both 90° (A) Fig. 6, and
45° (B) Fig. 6. It is recommended that the accuracy of these stops be checked
periodically and adjustments be made as necessary. These procedures are
explained fully in the following sections of this manual.
BACK CUTS
This saw can be adjusted for bevel cuts of up to 3° beyond the positive stop
at either the 45° or the 90° position. In normal operation the bevel stop sleeve
(C) Fig. 6, is aligned as shown in Fig. 6. To adjust the saw for a bevel cut
beyond the normal 45° to 90° range:
1. CAUTION: DISCONNECT TOOL FROM POWER SOURCE.
2. Set saw for either a 45° or a 90° bevel cut.
3. Loosen bevel adjustment knob approximately two turns.
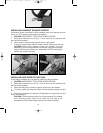
4. Pull out on the bevel stop sleeve (C) Fig. 6. Rotate sleeve to the position
shown in Fig. 6A and push sleeve back in.
The saw can now be adjusted for a bevel cut 3° beyond the normal stop.
5. Position saw to desired angle and firmly tighten bevel adjustment knob.
NOTE: The bevel stop sleeve must be returned to the normal position
(see Fig. 6), before the saw can be adjusted for a bevel cut of
between 45° and 90°.
Fig. 5
Fig. 6
Fig. 6A
900004 - 06-07-02.qxd 6/24/02 1:13 PM Page 9


