


10
3. Set REVERSING BUTTON for clockwise rotation.
4. CAUTION: Make sure work is held securely in vise or clamped in place
prior to starting drilling operation. Loose work may spin and cause bodily
injury.
5. Locate exact center for hole to be drilled and using a center punch, make
a small dent in work.
6. Place tip of drill bit in dent made by center punch, hold drill square with
work, and start the motor.
7. CAUTION: Applying too much pressure may cause the bit to overheat or
break resulting in bodily injury or damaged drill bits.
Apply steady, even pressure to keep drill bit cutting. Too little pressure will
keep the bit from cutting and dull the cutting edges due to excessive friction
created by sliding over the surface.
CAUTION: Always be alert and brace yourself against the twisting
action of the drill.
8. If drill stalls or becomes jammed in the hole, release trigger immediately,
remove drill bit from work and determine cause of stalling or jamming. DO
NOT SQUEEZE TRIGGER ON AND OFF IN AN ATTEMPT TO FREE A
STALLED OR JAMMED DRILL – THIS WILL DAMAGE THE MOTOR. The
direction of rotation may be reversed to help free a jammed bit. Be sure
direction of rotation is RESET before attempting to continue drilling.
9. Reduce the pressure on the drill just before the bit cuts through the work
to avoid splintering wood or stalling in metal.
10. When bit has completely penetrated work and is spinning freely, withdraw
it from the work while the motor is still running, then turn off drill.
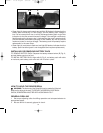
DRILLING WOOD
In addition to the instructions listed under GENERAL DRlLLlNG, the following
also apply:
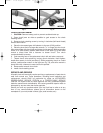
1. When using twist drills in wood, they should be withdrawn from the hole
frequently to clear chips built up in flutes to avoid overheating and burning
work.
2. If a backing block is used to keep back of work from splintering, it should
be clamped securely in place. If a backing block is not used with spade bits
or hole saws, ease up pressure as soon as bit point breaks through work, and
complete the hole from the opposite side.
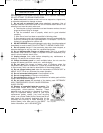
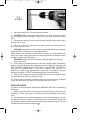
IT’S
A DRILL
Fig. 7
900469 - 11-30-00.QXD 9/25/02 11:26 AM Page 10