


19-ENG
D26998
Belt – Replacement and Adjustment
Serious injury or damage may occur if parts of the body or
loose items get caught in moving parts. Never operate the
unit with the belt guard removed. the belt guard should be removed only
when the air compressor is turned off the spark plug wire is disconnected.
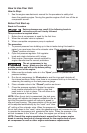
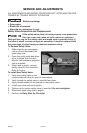
Belt Guard – Removal
1. Disconnect the spark plug wire on the engine and release all air tank pres-
sure.
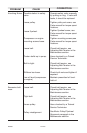
2. Remove the six screws (A) from
the belt guard. The front of the
belt guard can now be
removed.
Belt – Replacement
1. Disconnect the spark plug wire
on the engine and release all air
tank pressure.
2. Remove the front of the belt
guard as previously described.
3. Mark engine position on sad-
dle.
4. Loosen stiffener bracket screw on
engine.
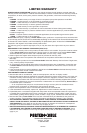
5. Being careful not to remove the stiffen-
er plate under the saddle, loosen the
six engine mounting bolts (C).
6. Slide engine toward pump to remove
tension from the belt, and then remove
the old belt.
7. Install the new belt over the pulleys.
NOTE: The belt must be centered over
the grooves on the engine pulley and flywheel.
8. Slide the engine back into its regular position. Line the engine up with the
mark made earlier on saddle.
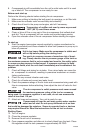
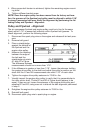
Belt Tension - Adjustment
1. Slide the engine back into its regular position. Line the engine up with the
mark made earlier on saddle.
2. Hold belt tension and secure-
ly tighten two engine mount-
ing bolts.
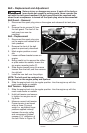
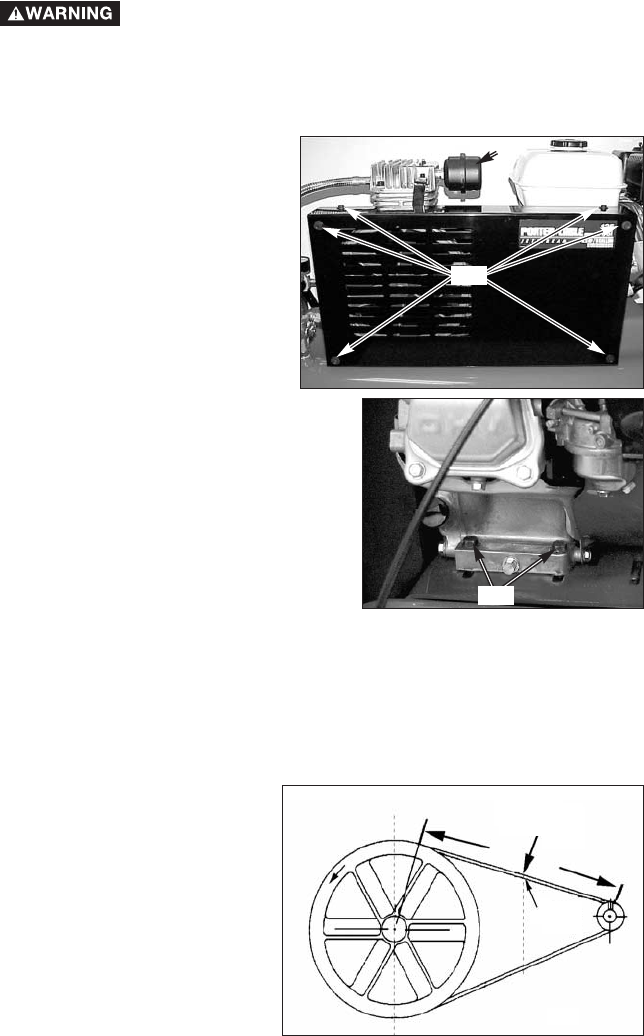
3. Measure correct belt tension.
Proper tension is achieved
when a three (3) pound
weight or equivalent finger
pressure applied midway
between the motor pulley
and compressor flywheel
causes a 1/4" deflection of
the belt. Refer to Figure 10.
B
3 Pound Force
At Midpoint
1/4 Inch
Deflection
A
C