


16
Installing/Changing Blades
Always wear gloves when
handling blades. New blades are usually
packaged in a coiled position; to prevent
injury uncoil them slowly and carefully, while
wearing gloves and safety glasses.
1. Disconnect machine from power source.
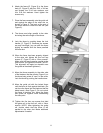
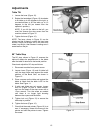
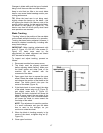
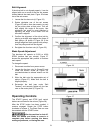
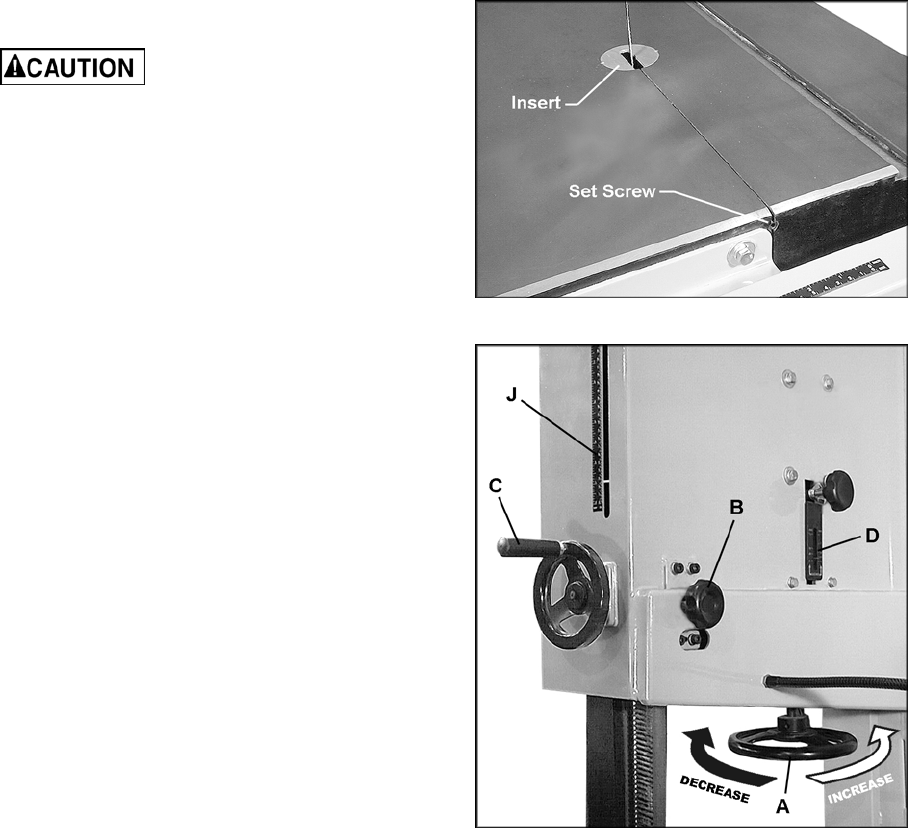
2. Decrease blade tension by rotating blade
tension handwheel (A, Figure 14) according
to the arrow direction in Figure 14, until the
handwheel stops.
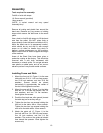
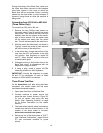
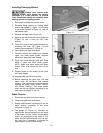
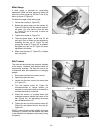
3. Remove the table insert (Figure 13).
4. Remove the set screw at the end of the slot
(Figure 13) with a 4mm (or 5/32”) hex
wrench.
5. Lower the upper blade guide assembly by
loosening the knob (B, Figure 14) and
rotating the handwheel (C, Figure 14).
6. Open upper and lower front doors.
7. Carefully remove the blade from between
upper and lower blade guides. Remove
blade from upper and lower wheels.
8. Guide new blade through table slot. Place
blade in upper and lower blade guides.
NOTE: Make sure blade teeth point down
toward table, and toward the front of the
saw.
9. Position blade on the middle of the upper
and lower wheels.
10. Replace table insert and set screw.
11. Before operating the band saw, the new
blade must be tensioned and tracked
properly. Find instructions for tensioning and
tracking the blade under “Blade Tension”
and “Blade Tracking.” The blade guides
must also be set properly according to the
instructions on pages 18 and 19.
Blade Tension
1. Disconnect machine from power source.
2. Close both upper and lower doors.
3. Rotate blade tension handwheel to set the
blade tension, according to the arrow
directions in Figure 14.
4. The gauge (D, Figure 14) indicates the
approximate tension according to the width
of the blade in inches. Initially, set the blade
tension to correspond to the width of your
blade. As you become familiar with the saw,
you may find it necessary to change the
blade tension from the initial setting.
Figure 13
Figure 14