


21
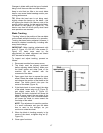
Belt Alignment
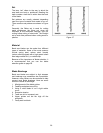
If the drive belt is not aligned properly, it can be
aligned with one or more of the four set screws
located behind the steel plate. Figure 25 shows
two of the set screws.
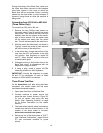
1. Loosen the four hex nuts (A, Figure 23)
2. Rotate clockwise one of the set screws
(Figure 25) with a 4mm hex wrench, to push
out the motor plate at that point. This will
shift slightly the angle of the motor. Use
whichever set screw is most effective in
adjusting the angle of the motor until the
drive belt is aligned.
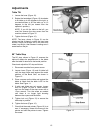
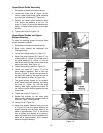
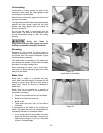
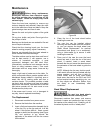
3. Confirm the alignment of the drive belt by
placing a straight edge against the faces of
both pulleys, as shown in Figure 26. If the
straight edge lies flush against both pulleys,
then the pulleys and belt are aligned.
4. Re-tighten the four hex nuts (A, Figure 23).
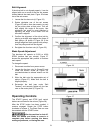
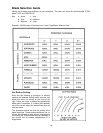
Blade Speed Adjustment
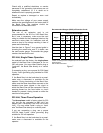
The bandsaw will operate at 2,000 or 4,000
SFPM (surface feet per minute). Figure 27
shows the appropriate belt position to achieve
each speed.
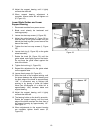
To change the speed:
1. Disconnect machine from power source.
2. Loosen the four hex nuts (A, Figure 23) and
rotate the tension screw (B, Figure 23)
counterclockwise to release tension on the
belt.
3. Slide the belt onto the appropriate set of
pulleys (Figure 27). Make sure the belt is
aligned properly.
4. Re-tension the belt (see under “Belt
Tension”) and securely tighten all four hex
nuts on the motor plate (A, Figure 23).
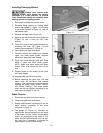
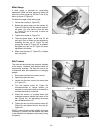
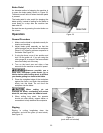
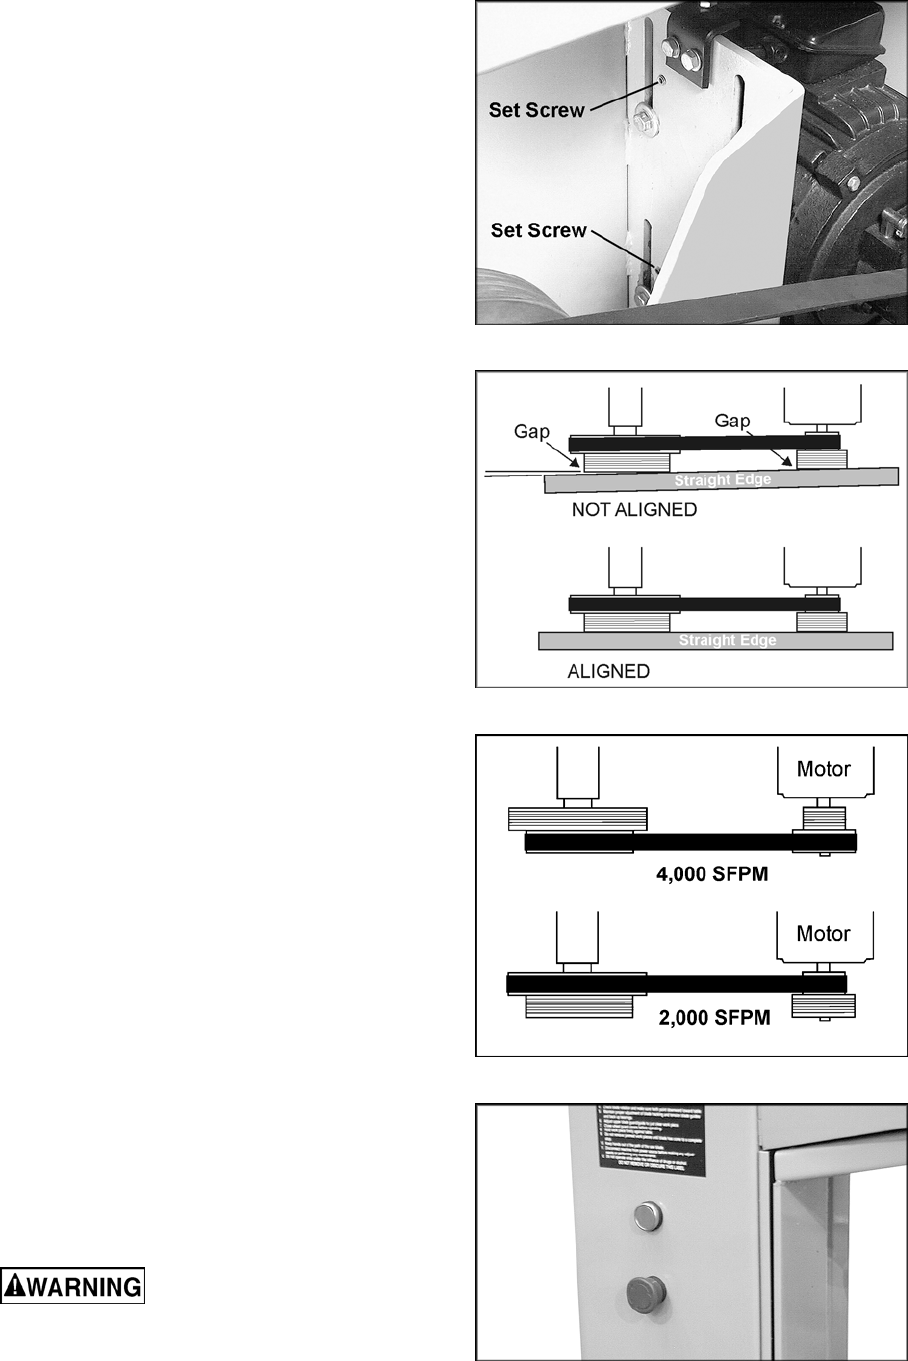
Operating Controls
The START (green) and STOP (red) control
buttons are mounted to the column (Figure 28).
After the STOP button has been pushed, it
remains engaged. Rotate the STOP button
clockwise to release it. The Band Saw can now
be restarted with the START button.
After the machine is shut off,
allow the wheels and blade to come to a
complete stop before opening the doors,
making adjustments, or leaving the area.
Figure 25
Figure 26
Figure 27
Figure 28