


10
Adjusting Fence Parallel to the Miter Slot
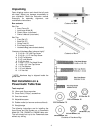
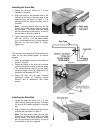
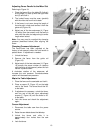
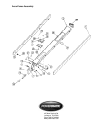
Referring to Figure 18:
1. Place the fence (A) on the table (B). Adjust it
so the edge (C) lines up with the right miter
slot (D) and lock it.
2. The locked fence must be even (parallel)
with the miter slot from front to back.
3. If the fence is not even along the length of
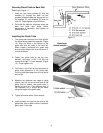
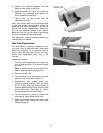
the miter slot, unlock and remove it from the
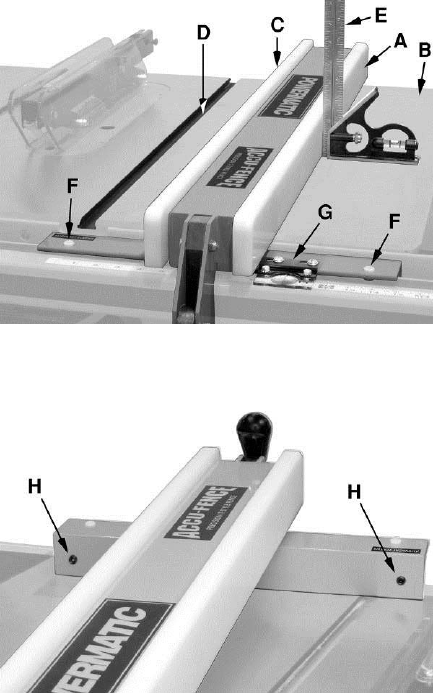
guide rail (Figure 19).
4. Adjust one of the two setscrews (H, Figure
19) with a 5mm hex wrench until the fence is
even with the miter slot edge along its entire
length when locked.
Note: You may need to re-adjust the clamping
pressure (described below) after aligning the
fence.
Clamping Pressure Adjustment
The Accu-Fence has been adjusted at the
factory to lock securely when the lock handle is
pushed down. If adjustment is needed:
1. Unlock the fence.
2. Remove the fence from the guide rail
(Figure 19).
3. Adjust each of the two setscrews (H, Figure
19) exactly the same number of rotations
until the fence is held securely when the lock
handle is pushed down.
A clockwise rotation of the setscrews will
increase the cam pressure. Counterclockwise
rotation will decrease cam pressure.
90° to the Table Adjustment
1. Place the fence on the saw table and lock it.
2. Place a square (E, Figure 18) on the table
next to the fence. The fence should be 90°
to the table.
3. If adjustment is necessary, unlock the fence,
and turn one of the two nylon adjustment
screws (F, Figure 18) until the fence is 90°
to the table.
4. Lock the fence and check the adjustment
again.
Cursor Adjustment
1. Disconnect the table saw from the power
source.
2. Raise the saw blade above the tabletop.
3. Unlock the fence and slide it to
approximately four inches from the saw
blade.
4. Lock the fence.
Figure 18
Figure 19