


11
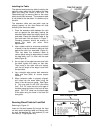
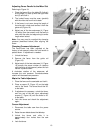
5. Measure the distance between the saw
blade and the inside of the fence.
6. Adjust the cursor (G, Figure 18) to read the
distance just measured and tighten the
cursor assembly to the fence.
7. Take a test cut and confirm that the
adjustment is correct.
Note: If the cursor does not have enough travel
to give the correct measurement, loosen the
guide rail and adjust as needed. If you still do
not get the correct measurement, loosen the
front rail and adjust as needed. If you have to
adjust the front rail you will need to go through
the front rail assembly instructions again.
This adjustment must be checked whenever a
different blade is installed.
Side Plate Replacement
The Accu-Fence is specially designed to save
you many hours of down-time when side plates
need to be replaced. In an operation that can
last an entire day with other fences, the Accu-
Fence side replacement takes only a few
minutes.
Here's how it's done:
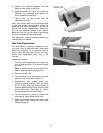
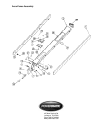
1. Turn the fence upside down and loosen the
five 1/4 lock nuts with a 7/16 wrench through
the slots.
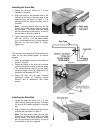
Note: A socket wrench can fit into the slot,
and will speed the process (Figure 20).
2. Remove the lock nuts.
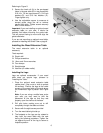
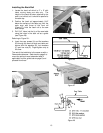
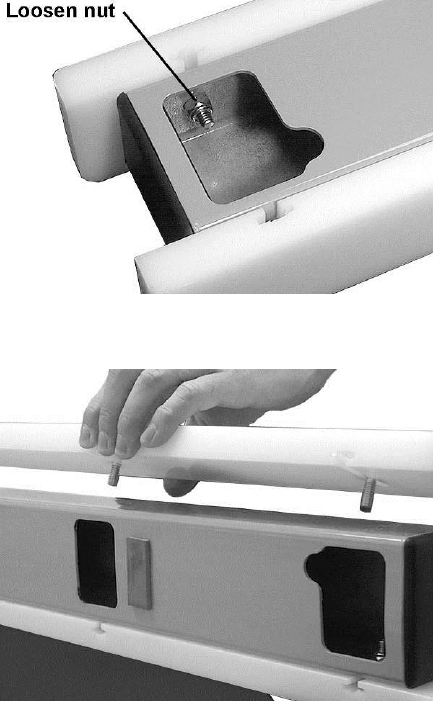
3. Turn the fence on its side and pull the side
plate from the main frame (Figure 21).
4. Replacement side plates come with
fasteners already attached. With the fence
still on its side, align the new side plate so
that the attached bolts line up with the holes
on the main frame. See Figure 21. Mount
the new side plate to the main frame.
5. Turn the fence on its back and secure the
side plate by lightly tightening all nuts.
6. Make any necessary adjustments to the side
plate height (see Setting the Side Plate
Height on page 9).
Figure 20
Figure 21