


12
Rail Installation on a
non-Powermatic Table Saw
The following instructions are for installing the
Accu-Fence and Rail System on a table saw
other than a Powermatic model. Some drilling is
required.
Tools required
10mm and 12mm wrenches
Philips screwdriver
Adjustable square
Rubber mallet (or hammer and block of
wood)
Straight edge
Electric drill with 1/4" and 5/16" bits
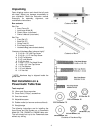
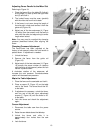
Installing the Front Rail
1. Identify the front rail, which is 3" x 3" with
notches on one side.
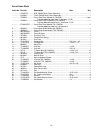
2. Place a mark 18" from the left end of the
front rail (Figure 22). This mark will be lined
up with the saw blade.
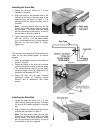
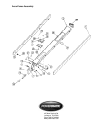
3. Lay a straight edge flush against the right
side of the saw blade, as shown in Figure
23, and place the notched side of the front
rail against the saw table as shown. Hold
front rail to the saw table with clamps. Make
sure the mark on the front rail lines up with
the left edge of the straight edge (and thus
in line with the blade).
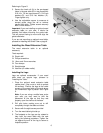
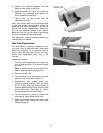
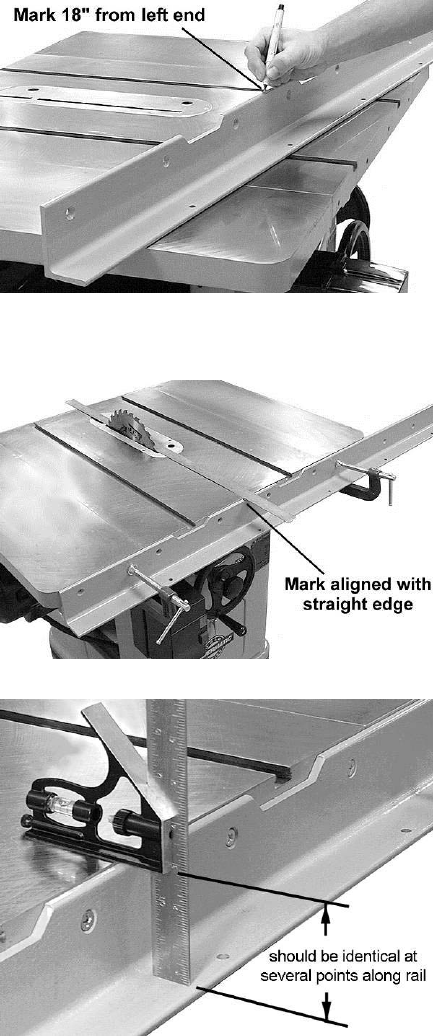
4. The front rail must be parallel to the table
top in order for the Accu-Fence system to
function properly. Place an adjustable
square on the table as shown in Figure 24.
5. Check the height of the front rail at several
locations along the surface of the saw table.
The measurements should be the same
along the length of the rail. Adjust as
needed.
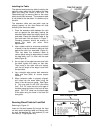
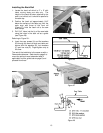
6. When the front rail has been correctly
positioned, and your mark still lined up with
the straight edge, drill 1/4" holes into the lip
of the table saw top, using the holes in the
front rail as a guide (Figure 25).
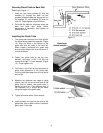
7. Lightly secure the front rail to the saw table
with four 1/4-20 x 1-1/2 flat head screws,
four 1/4 flat washers, four 1/4 lock washers,
and four 1/4 hex nuts (Figure 26). Finger-
tighten only.
Figure 22
Figure 23
Figure 24