


10
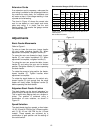
3. Clean the table surface, then peel away the
backing from the boring template in
increments, as you carefully apply the
boring template onto the table.
4. Center punch and drill four 10.5mm
diameter holes in the table surface, then tap
the holes with M12 x P1.75 threads.
5. Peel off the boring template and discard.
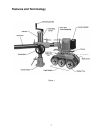
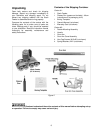
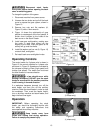
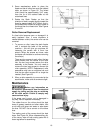
6. Place the column base in position (Figure
4), and align the four holes in the column
base with the holes in the table. Position the
column base so that its locking handle will
be in a convenient position.
7. Insert four M12x50 hex cap screws with four
M12 spring washers through the holes in the
stand. See Figure 4.
8. Tighten the four screws firmly with a wrench.
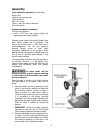
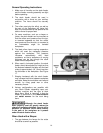
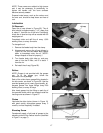
9. Install the small handle into the hole in the
elevating handle (Figure 5). Screw the small
handle into the hole, then tighten the hex
nut down against the elevating handle using
a 14mm wrench.
10. The small handle should still be able to
rotate freely. If it does not, loosen the hex
nut, back off the socket head cap screw with
a 5mm hex wrench as shown, then re-
tighten the hex nut.
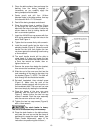
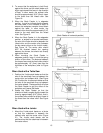
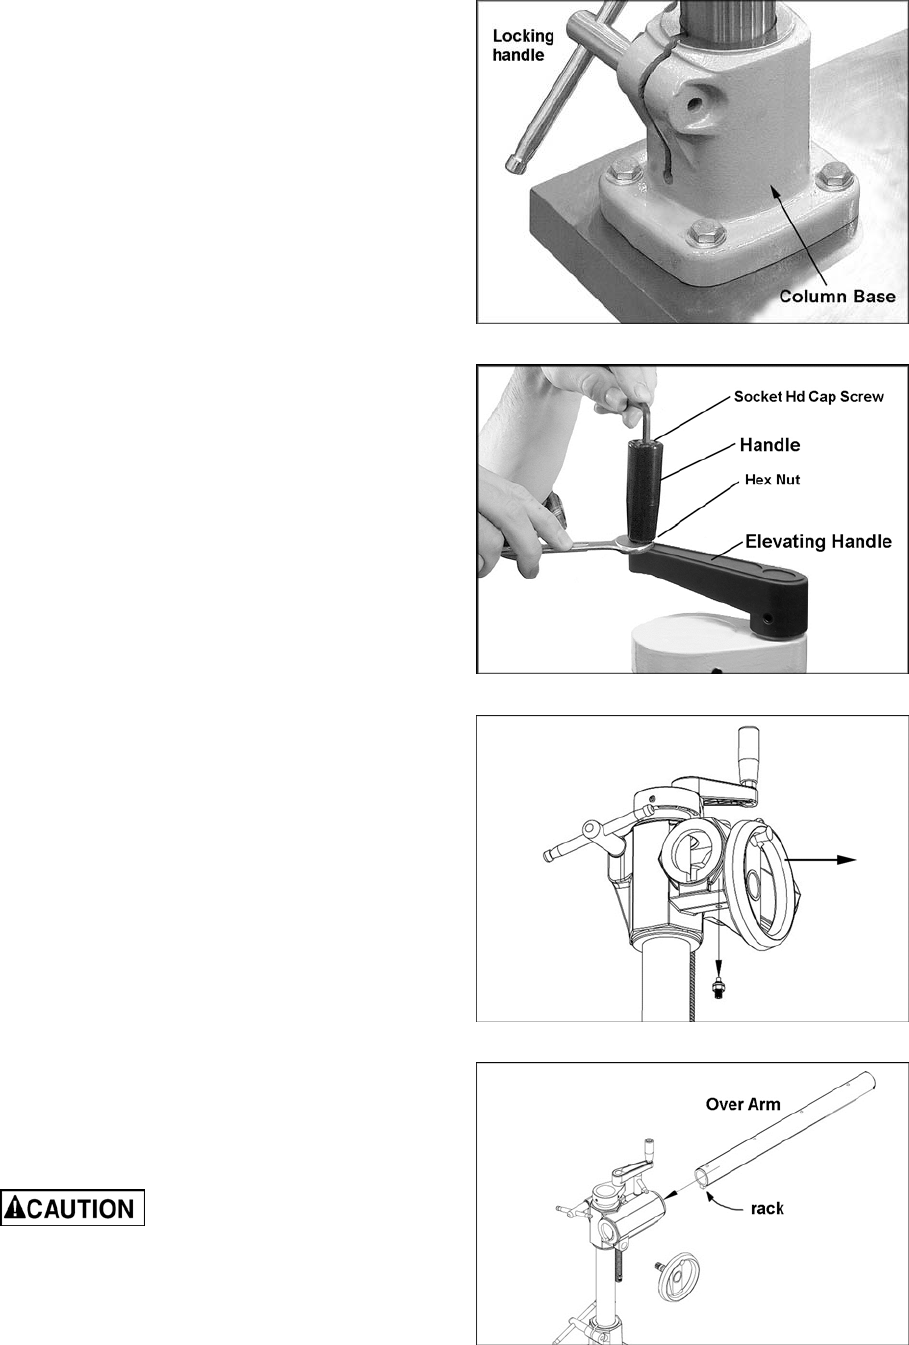
11. Remove the screw from below the bracket,
then remove the handwheel (Figure 6).
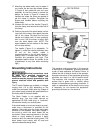
12. Slide the end of the over arm that has the
rack extending all the way to the edge, into
the bracket (Figure 7). NOTE: The rack will
slide through the slot inside the bracket.
13. Re-install handwheel, then reinstall screw
(Figure 6). Make sure the rack of the
overarm meshes properly with the pinion on
the handwheel shaft. The over arm can now
be moved simply by rotating the handwheel.
14. Place the sleeve of the over arm cone
assembly onto the over arm as shown in
Figure 8. Loosen further the two hex cap
screws if needed. Push the cone assembly
onto the over arm as far as it will go.
15. Tighten the two hex cap screws (Figure 8)
with a 14mm wrench.
The stock feeder is heavy.
The use of an assistant may be necessary.
16. Place the stock feeder on the table surface,
and lower the over arm so that the clamp is
positioned to accept the stock feeder. (see
“Basic Feeder Movements”, page 12, for
instructions on positioning the over arm.)
Figure 4
Figure 5
Figure 6
Figure 7